6
Parker Autoclave Engineers
Instrumentation Products Division
Erie, PA USA
www.autoclave.com | Cat. 02-9221ME
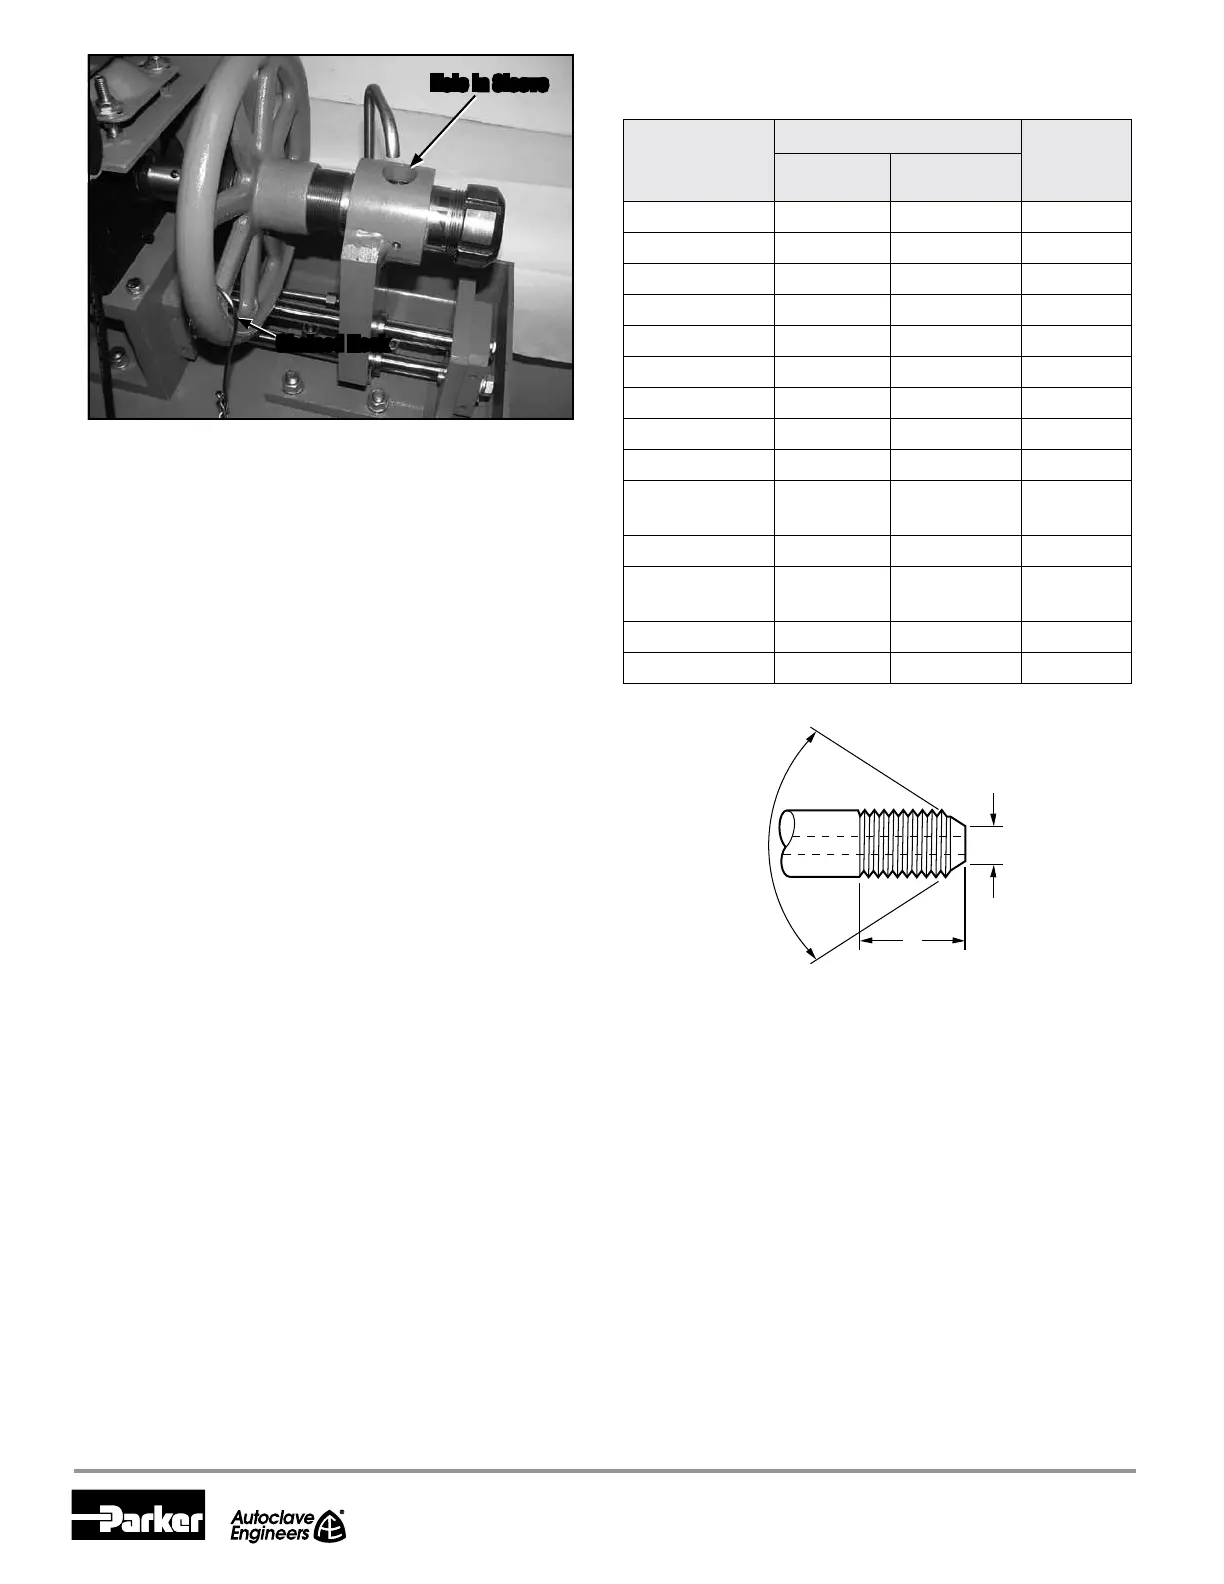
4.18 Rotate feedwheel until you see the cutting blades extend
approximately 1/4" through the hole in the sleeve see
Figure 6.
4.19 With the machine turned off and the power cord un-
plugged, insert tubing through the collet until it is ush
against the blades. Now back tubing up about 1/4" and
tighten the collet nut with the spanner wrench.
4.20 Connect the power cord and start the machine. Advance
the blades by turning the feedwheel (ccw) slowly. When
the blades start to cut (as seen through hole in sleeve),
rotate feedwheel the number of turns indicated in
Table 2. Each turn of the feedwheel advances the tube
1/16". Advance cutting blades slowly.
Note: 304 SS tubing will require a slower blade feed rate
than 316 SS. The rate of turning the feedwheel for
304 SS is approximately 1/4 that of 316 SS.
4.21 At completion of indicated number of turns, hold feed
wheel stationary for three to ve (3-5) revolutions of the
cutting blades. This squares and nishes the coned end
of the tubing.
Note: To ensure a proper sealing of a coned connection,
it is necessary that the nished cone has a square end
which is perpendicular to the center line of the tubing.
The critical nish for coned connections is on the leading
edge of the cone. The transition point where the cone
meets the square end of the tube must be free of burrs
and tool marks (Figure 7).
4.22 Reverse the feedwheel until the tubing is disengaged
from the cutting blades. Attach the chained hook to the
feedwheel and if no one is using the threading end of the
machine, turn it off.
Hole in Sleeve
Chained Hook
Figure 6
Illustration of Coning Operation
Table 2
Required Feedwheel Rotation for Coning Operation
Type of Connection
Tube Diameters
Number of
Feedwheel
Turns
OD
in (mm)
ID
in (mm)
SM250CX20 1/4 (6.4) .109 (2.8) 2.0
SM375CX20 3/8 (7.1) .209 (5.2) 2.0
SM562CX20 9/16 (14.3) .312 (7.9) 2.5
SM562CX10 9/16 (14.3) .359 (9.1) 2.0
SM750CX20 3/4 (19.1) .438 (11.1) 3.0
SM750CX10 3/4 (19.1) .516 (13.1) 2.5
SM1000CX30 1 (25.4) .438 (11.1) 6.0
SM1000CX20 1 (25.4) .562 (14.3) 4.0
SM1000CX10 1 (25.4) 688 (17.5) 3.0
M250C
100M250C
1/4 (6.4) .083 (2.1) 2.0
M312C150 5/16 (7.9) 062 (1.6) 3.0
M375C
100M375C
3/8 (7.1) .125 (3.2) 2.5
M562C 9/16 (14.3) .188 (4.8) 4.0
M562C40 9/16 (14.3) .250 (6.4) 3.5
59°
+0°
–2°
D
L
Figure 7
Tube End Dimensions (see Table 3)
4.23 Use the spanner wrench to loosen collet nut, releasing
tube from collet.
4.24 Remove tubing and inspect cone. There should be no
score marks on the tube and it should be completely
faced.
4.25 Deburr the inside of the tube. This completes the coning
operation.
 Loading...