Sets the Full Scale De ection value for the 4 – 20mA Analogue Output of the Oxygen sensor(s).
Sets the address for the generator when communicating on a network via the RS485 MODBUS port.
Address range is 1 – 32
When enabled the Oxygen alarm is over-ridden.
0 = Over-ride disabled, 1 = Override Enabled [OVR]
When enabled the bed cleaning cycles will run whenever the generator is powered up, comes out of
standby mode and economy mode.
0 = Disabled, 1 = Enabled
Sets the mode of control for the generator
1 = Local Start / Stop control, 2 = Remote Start / Stop control via the digital input, 3= Remote
communication
Outlet oxygen sensor calibration menu.
Enables the economy mode.
0 = Disabled, 1 = Enabled
Sets the purity level at which an oxygen fault is initiated.
Default Settings:
% Generators - 0.05% above the selected production purity.
ppm Generators - 5ppm above the selected production purity.
If the purity level exceeds the oxygen alarm level for a period longer
When enabled the actuation of the Stop control will generate an alarm.
0 = Disabled, 1 = Enabled
If the purity level exceeds the oxygen alarm level for a period longer than the alarm delay, the oxygen
alarm will be activated and the gas will be vented to atmosphere.
Delay Range = 0 – 600 Seconds, Default = 60 Seconds
25
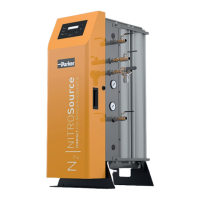
N2 Compact Nitrogen Gas Generator - User Guide. ©2020.
3.1 O2 Alarm
Over-ride = 0
3.2 O2 Calibration
= 5.00%
3.3 O2 Alarm Level
= 5.05%
3.4 O2 Alarm Delay
= 60s
3.5 Start Clean Up
Enable = 1
3.6 Economy Enable
= 1
3.7 Fault Relay
On Stop = 0
3.8 O2 Analogue FSD
= 6.00%
3.9 O2 PPM Offset
= [---]
Sets the ppm O2 cell calibrated o set value marked on the cell.
Note: is value must be entered only when the cell is changed.
3.10 Modbus Address
= 1
3.11 Remote Control
= 1
CUSTOMER SETTINGS
To prevent unauthorised access to the con gurable parameters, the customers setting menu has optional password protection. is is
disabled by default and can be enabled in menu 3.1
To gain access in to this menu, when password has been enabled:
Press and hold both the and keys for approximately 5 seconds until the menu changes to the
password prompt as shown.
e ashing cursor will be positioned over the rst digit. Using the key change the rst digit of the code and press . e cursor will
move to the next digit.
Repeat the process and enter the following password 1 2 1 _ _ . When the password has been entered correctly the Hour Meters menu will be
displayed. Use the key to navigate to page 3 “Customer Settings” menu and press .