EasyManua.ls Logo

Parkside PPSK 40 A1 - User Manual

Parkside PPSK 40 A1
101 pages
Print Icon
To Next Page IconTo Next Page
Loading...
BG
RS
IAN 360432_2010
PLASMA CUTTER WITH
INTEGRATED COMPRESSOR
ПЛАЗМЕНА РЕЗАЧКА
С КОМПРЕСОР
PLAZMA SEKAČ SA
KOMPRESOROM
PLASMASCHNEIDER
MIT KOMPRESSOR
Operation and Safety Notes
Translation of the original instructions
Указания за монтаж, работа и безопасност
Превод на оригиналното ръководство за
експлоатация
Uputstvo za upotrebu i bezbednosne instrukcije
Prevod originalnog uputstva za upotrebu
Bedienungs- und Sicherheitshinweise
Originalbetriebsanleitung
GB
BG
RS
DE
CY
AT CH
PLASMA CUTTER WITH INTEGRATED COMPRESSOR
PPSK 40 A1

Table of Contents

Questions and Answers

  • C
    Corey BlackAug 19, 2025
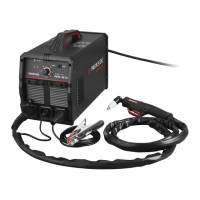
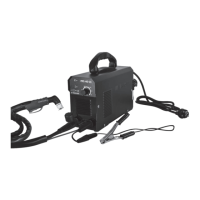
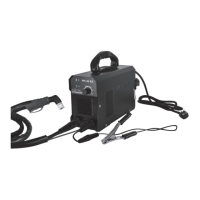
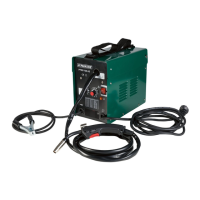
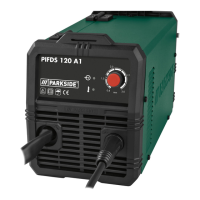
    What to do if the warning lamp switches on in Parkside Welding System?
    • P
      Paula WalterAug 20, 2025
      If the warning lamp activates on your Parkside Welding System, it may be due to overheating protection being activated. Allow the device to cool down. Alternatively, the input voltage might be too high. Ensure the input voltage matches the specifications on the type plate.
  • G
    gillespiejoshuaAug 21, 2025
    What to do if the arc stops during cutting with Parkside Welding System?
    • E
      Erin AllenAug 22, 2025
      If the arc stops during cutting with your Parkside Welding System, it could be due to several reasons: * The cutting speed might be too low. Increase the cutting speed until the issue resolves. * The plasma burner is too high or far from the material. Lower the plasma burner to the recommended height. * The plasma burner components are worn. Check and replace any worn parts. * The workpiece is not connected to the grounding cable. Check the connections.
  • C
    Caleb DiazAug 23, 2025
    What to do if consumables wear quickly in Parkside Welding System?
    • M
      Michelle SilvaAug 25, 2025
      If consumables are wearing quickly in your Parkside Welding System, consider the following: * The performance might have been overstretched. If the material is too thick, increase the angle to avoid material being blown back into the tip. * The arc control time might have been exceeded. Avoid controlling the arc for more than 5 seconds. * There might be incorrect plasma burner assembly. You can start with contact between the burner sleeve and metal or with a 3.2 mm distance to the metal. * There might be insufficient air supply or low pressure. Check the air filter and increase the air pressure. * The air compressor might be faulty. Check the performance of the external air compressor and ensure the pressure is 4–4.5 bar.
  • B
    Brenda WilliamsAug 26, 2025
    What to do if there is slag formation on interfaces when using Parkside PPSK 40 A1 Welding System?
    • R
      Robert HoganAug 26, 2025
      If you notice slag formation on interfaces while using the Parkside Welding System, this may be because the tool or material is generating too much heat. Allow the material to cool down before continuing. It could also be due to the cutting speed being too low, or the current too high. Increase the speed and/or reduce the current until the slag is minimized. Another cause may be worn plasma burner components. Check and replace any worn parts.
  • K
    Kristin HurstAug 27, 2025
    Why is there insufficient penetration with my Parkside PPSK 40 A1?
    • D
      davidperkinsAug 28, 2025
      Insufficient penetration with your Parkside Welding System could be due to several factors. The cutting speed might be too fast, so try slowing down the working speed. Ensure the burner sleeve is straight; if not, adjust the inclination. If the metal is too thick, multiple cycles may be necessary. Lastly, check and replace any worn plasma burner components.
  • R
    Robin GutierrezAug 30, 2025
    What to do if the indicator lamp does not light up on Parkside PPSK 40 A1?
    • B
      batesamandaAug 30, 2025
      If the indicator lamp on your Parkside Welding System does not light up, first check whether the device is properly connected to the socket. Also, make sure the ON/OFF switch is set to the ON position.
  • K
    Kevin BurkeAug 31, 2025
    What to do if sparks fly upwards instead of down through the material with Parkside PPSK 40 A1?
    • C
      cherylortegaSep 1, 2025
      If sparks fly upwards instead of down through the material when using the Parkside Welding System, it could be because the burner sleeve does not penetrate the material. Try increasing the current. Alternatively, the burner sleeve may be too far away from the material; reduce the distance. Ensure the material is properly grounded by checking the connection. Also, the lifting speed might be too quick; reduce the speed.
  • J
    Janet MiddletonSep 2, 2025
    What to do if the plasma burner 8 is not ready for operation in Parkside PPSK 40 A1 Welding System?
    • A
      Alexis MccarthySep 3, 2025
      If the plasma burner 8 is not ready for operation on your Parkside Welding System, make sure the current switch is turned on. Also, check the air supply to ensure there are no restrictions in air transmission. Finally, verify that the workpiece is connected to the ground terminal.
  • M
    Martin LoweSep 4, 2025
    What to do if there is no output current in Parkside PPSK 40 A1?
    • E
      Emily FryeSep 4, 2025
      If there is no output current from your Parkside Welding System, the machine may be faulty and require repair. Also, check if the overvoltage protection has been activated, and allow the device to cool down if necessary.
  • A
    Amber CisnerosSep 6, 2025
    What to do if initial cut is not completely drilled through with Parkside PPSK 40 A1 Welding System?
    • L
      Lisa EstradaSep 6, 2025
      If your Parkside Welding System makes an initial cut but doesn't completely drill through, check all connections for potential problems.

Summary

Pictogram Reference Guide

Introduction and Usage

Intended Use

Specifies the authorized applications and purpose of the plasma cutter.

Package Contents

Lists all items included in the product packaging.

Parts Description

Details and identifies all components of the plasma cutter.

Technical Specifications

Safety Instructions

Electrical Safety and Fire Prevention

Covers risks from electric shock, sparks, fire, and necessary precautions.

Health and Environmental Hazards

Addresses dangers from fumes, arc beams, and electromagnetic fields.

Operational Environment Safety

Guidelines for safe working environments and operational practices.

Specific Cutting Safety Measures

Precautions for tight spaces, voltage, and device handling.

Radiation Protection and EMC Compliance

Protection against rays and EMC classification standards.

Before Use Setup

Installation Environment

Specifies requirements for a safe and effective installation environment.

Compressed Air Supply

Guides on choosing and connecting the compressed air source.

Connecting Torch and Ground Cable

Instructions for connecting the cutting torch and ground cable.

Roller Guide Fitting

Details on how to attach the optional roller guide for cutting.

Device Operation

General Operation

Step-by-step guide for powering on and initiating cutting.

Plasma Cutting Techniques

Explains drag cutting, distance cutting, and perforation methods.

Troubleshooting

Indicator and Ventilator Faults

Addresses issues with indicator lamps and the ventilator.

Output and Arc Problems

Solutions for no output, decreasing output, and arc interruptions.

Penetration and Airflow Issues

Troubleshooting insufficient penetration and air regulation.

Ignition and Burner Readiness

Resolving problems with HF-arc creation and burner readiness.

Consumables and Slag Formation

Addresses rapid consumable wear and slag formation.

Maintenance and Care

Burner Component Maintenance

Guidelines for maintaining and replacing burner components.

General Maintenance and Storage

Procedures for cleaning, upkeep, and proper storage of the device.

Disposal and Compliance

Recycling and Disposal

Instructions on environmentally responsible disposal of the device.

EU Declaration of Conformity

Statement confirming compliance with EU safety directives.

Warranty and Service

Warranty Terms and Conditions

Details on warranty period, conditions, and extent of coverage.

Processing Warranty Claims

Steps to follow for submitting and processing warranty claims.

Contacting Service and Support

Information on how to contact customer service and order parts.

Parkside PPSK 40 A1 Specifications

General IconGeneral
Input voltage230 V
Frequency50 Hz
Welding current40 A
Protection classIP21S
Electrode diameter1.6 / 2.0 / 2.5 mm
Welding current range10-40 A
Duty cycle40% at 40 A

Related product manuals