ENGLISH - 5
G. Handle assembly
H. Starting and stopping the engine
While tightening, the blade assembly can be
held fast by inserting the wrench or the screw-
driver supplied into the cap and gearcase holes.
To do this, rotate the cap intil the two holes
coincide.
4) Assemble nylon string head as illustrated:
a) Flange guard - b) Upper cap - c) Guard d)
Nylon string head
Tighten counterclockwise.
5) While tightening, the head assembly can be
held fast by inserting the wrench or the screw-
driver supplied into the holes as already shown
for blade assembly.
WARNING: Do not use the guard for the nylon
string head (18) when using a metal blade.
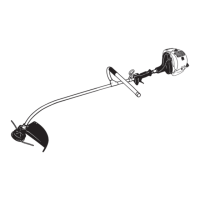
DOUBLE HANDLE
Adjust and secure double hand clamp by tighten-
ing the screws.
To adjust the idle speed, however, proceed as fol-
lows:
With engine running and warm, slowly turn screw
‘T’ clockwise until the engine runs smoothly with
a consistent noise level but without making the
cutting head rotate.
If the cutting attachment does move or the engine
runs too fast, slowly turn screw ‘T’ in an anticlock-
wise direction until the correct speed is obtained.
Precise numerical engine speed settings are men-
tioned in the technical detail chart in the front of
the owner’s manual.
WARNING: First read sections: SAFETY RULES,
SAFETY USAGE and SYMBOLS.
STARTING A COLD ENGINE
1) Position the on/off switch to the I (ON)
position, away from the «STOP» position.
2)
Rotate the choke lever in the direction illustrated
by the arrows. This engages the fast idle system.
3) Squeeze the primer bulb (C) several times
until you see fuel begin to return back through
the tube (D) towards the fuel tank. Push the
decompression valve (B) down if your models
is fitted with one. Pull the starter handle until
the engine starts.
4) Hold the machine safely and allow the engine
to run for a few seconds. Grip the control han-
dle firmly, pushing down on the safety trigger
(S) and then squeezing the accelerator trigger
(A). This action automatically releases the
spring loaded choke lever (E) disengaging the
fast idle system.
WARNING: The fast idle system does cause the
cutting attachment to rotate when engaged.
STARTING A WARM ENGINE
Position the on/off switch to the I (ON) posi-
tion.
Squeeze the primer bulb (C) several times until
you see fuel begin to return back through tube
(D) to the fuel tank. Pull the starter handle until
the engine runs.
HOT ENGINE STARTING WITH
1) STOP switch on START position I. Trigger on
idle position (released).
Choke towards (open position ).
5) Depress the safety lever (S), squeeze the
accelerator trigger (A) and push the throttle
advance forwards (B). Now release the
accelerator trigger (A) and then the throttle
advance (B).
3) Press the primer bulb (C) several times until
you see fuel going back to carburetor through
pipe (D). Pull starter rope.
WARNING: when the throttle (B) advance is
engaged, the head or blade rotates.
5) ENGINE STOPPING
Press the stop switch moving it to STOP posi-
tion 0.
WARNING: when the engine is switched off
rotating parts, blade or nylon string head, will
keep on rotating for a few seconds. Hold the
machine until all parts come to a standstill.
N.B. In an emergency the above mentioned
delay in stopping may be shortened by
touching blade parallel on the ground.
I. Carburettor adjustment
L. Regular maintenance
From time to time ensure all screws are tight.
Replace damaged, worn, cracked or warped
blades. Always make sure nylon string head or
blade have been assembled correctly (see sec-
tions NYLON STRING HEAD and BLADE
ASSEMBLY) and blade fastener is tightened.