Wireless Smart Gate Next - Special Features of the Wireless Smart Gate
24
013-16123A
Next - Special Features of the Wireless Smart Gate
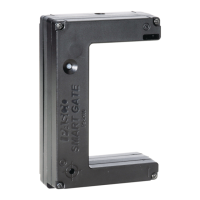
• In the “Hardware Setup” panel, the Wireless Smart Gate picture shows the location of Port 3, The Auxiliary
Port and Port 4, The Laser Detector Port.
Port 3, Auxiliary Port Setup
1. Click the image of Port 3 to open the menu of choices that can be connected to Port 3, the Auxiliary Port.
• The choices from the Port 3, Auxiliary Port menu are as follows:
• The choices include timing devices (e.g., “Photogate”, “Time of Flight Accessory”), pre-configured timers (e.g.,
“Picket Fence”, “One Photogate (Triple Flag)”), and sensors connected via a TRS phono plug (e.g., “Free Fall
Adapter”, “Geiger Counter”).
Port 3, Auxiliary Port - Example Setup for Photogate
1. Connect a Photogate (such as ME-9204B Accessory Photogate or ME-9498A Photogate Head) to Port 3, the
Auxiliary Port.
2. Next, click the image of Port 3 to open the menu of choices. Select Photogate from the menu.
Photogate One Photogate (Single Flag) General Counter
Time of Flight Accessory One Photogate (Double Flag) Drop Counter
Photogate with Pulley One Photogate (Triple Flag) Flow Rate Sensor
Picket Fence Free Fall Adapter 4 to 1 Adapter
Pendulum Timer Geiger Counter
Click the Port 3
image to show the
menu
Scroll down
to see more
choices
Port 4, the Laser
Detector Port
Optional: Use your
keyboard to enter the
name of a choice.