SYSTEM SET-UP
1. Press the on-screen Up arrow to access the ADMIN menu.
2. Press 3 for SETUP.
3. Press 3 for SYSTEM SETUP.
4. Enter the admin password and press the green key.
5. The TERMINAL DATE is set by the host; press the green key to
confirm.
6. The TERMINAL TIME is set by the host; press the green key to
confirm
7. Select the ECR TYPE: press 1 for STANDARD or 2 for CTP
GATEWAY.
8. If you select 1 – STANDARD:
• The PORT FOR ECR is set by the host; press the green key to
confirm.
• Select the ETHERNET SETUP: press 1 for DYNAMIC or 2 for
STATIC; go to step 10.
9. If you select 2 – CTP GATEWAY, select the ETHERNET SETUP:
press 1 for DYNAMIC or 2 for STATIC.
10. If you select 1 – DYNAMIC, the terminal obtains the configuration
information from the host; go to step 12.
11. If you select 2 – STATIC, configure the following connection
parameters:
• TERM IP ADRESS
• MASK IP
• GATEWAY ADDRESS
• PRIMARY ADDRESS
12. When the connection parameters are set, select a TEST
CONNECTION option: select 1 (Yes) to test the connection or 2
(No) to return to the SETUP menu.
13. Press the red X key two times to return to the main screen.
PAYFACTO KEY EXCHANGE
1. Press the on-screen Up arrow to access the ADMIN menu.
2. Press 4 for KEY EXCHANGE.
The terminal connects to the host to update the security keys.
3. Press the green key to continue.
TERMINAL FUNCTIONS/OPTIONS SET-UP
1. Press the on-screen Up arrow to access the ADMIN menu.
2. Press 3 for SETUP.
3. Press 1 for OPTIONS.
4. Enter the admin password and press the green key.
5. Set the terminal’s operation using the on-screen options for the
following functions:
• MERCHANT LANG: Terminal language
• APPLICATION MODE: Sales environment
• TERMINAL TYPE: The accepted card type(s)
• TIP OPTION: Whether to enable tipping or not; selecting Yes
displays additional related settings
• CASHBACK OPTION: Whether to enable cashback or not;
selecting Yes displays additional related settings
• ENTER LAST 4 DIGITS: Whether to require the entry or the card’s
last 4 digits as fraud prevention
• INVOICE NUMBER: Whether the terminal prints an invoice
number on the receipt
• BUZZER: Enables or mutes terminal sounds
• OKS BEFORE PRINT: Whether the operator presses OK before
printing a receipt
• OKS ON SETTLEMENT: WHETHER THE OPERATOR PRESSES OK
BEFORE PERFORMING A SETTLEMENT
• COMPL W/O PAUTH: Selects if a transaction can be completed
without a preauthorization
• SETT HST TOTALS: Whether the terminal’s settlement history
totals are retained
• PAY TYPE QUES: Whether the terminal asks for the payment
type
• OKS CONFIRM AMOUNT: Whether the operator presses OK to
confirm an amount
BATCH CLOSE SETTLEMENT
NOTE: This function can also be completed in ECR mode.
IMPORTANT: Complete any open pre-authorizations
before closing a batch.
1. Press the on-screen Up arrow to access the ADMIN menu.
2. Press 1 for SETTLEMENT.
3. Enter the admin password and press the green key.
4. Press the green key to confirm the SALES AND TRANSACTION
COUNT.
5. Press the green key to confirm REFUND details.
The settlement completes and closes the batch.
ENABLING CONTACTLESS TRANSACTIONS
1. Press the on-screen Up arrow to access the ADMIN menu.
2. Press 3 for SETUP.
3. Press 4 for CONFIG NFC.
4. Enter the admin password and press the green key.
5. To enable contactless transactions, press 1 – YES for ENABLE
CLESS.
6. For each contactless technology, select 1 – YES to accept or 2 –
NO to refuse:
• ENABLE PAYWAVE (Visa)
• ENABLE PAYPASS (MasterCard)
• ENABLE FLASH (Interac)
• ENABLE DPAS
• ENABLE XPRESSPAY
• ENABLE JSPEEDY
7. Press the red X key two times to return to the main screen.
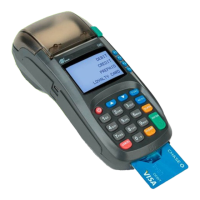
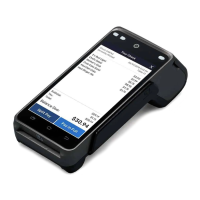
S300 Integrated Mode
Quick Reference Guide

 Loading...