Cal. 6 : 2
nd
calibration of formier gases.
The “Formier 10%” LED is lit. Select a formier gas that corresponds to the lowest ppm
value used, and let the system flush through until a steady readout is achieved (at least
3 min.). Adjust the number of LEDs that should be lit using the “alarm up” or the
“alarm down” button. Save the calibration by pressing both “alarm up” and “alarm
down” at the same time.
When saving a calibration you leave the calibration menu.
To leave the calibration menu without saving a calibration, turn off the SGI-3. Formier
gases with 5% and 2% hydrogen should not be calibrated, as they are calculated on the
basis of the calibration using 10% hydrogen.
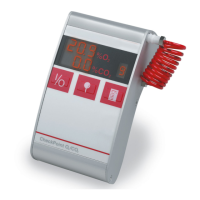
6.2. Calibration procedure for OXI-3
Calibration
Warm up OXI-3 for at least 4 hours.
Normally, 6 calibrations must be carried out, 3 of which with gases, typically: 20.9 % O
2
(atmospheric air), 0.1% (1000ppm) O
2
, and 25ppm O
2
.
Supply the calibration gas via an overflow device with a flow rate of at least 0.5 l/min, and
wait until the readings are quite steady.
Carry out a total of 6 calibrations.
1. Activate the calibration menu by pressing the “RANGE” button and the two alarm
buttons ( ) for 3 seconds.
2. The calibration menu now allows you to select the required calibration by pressing the
“RANGE” button.
Cal. 1 : Offset calibration of the current output.
The “Alarm” LED flashes, and the first red LED is lit. Connect an ammeter to the DIN
connector, pin 1 (+) and pin 2 (-). Set the current output at 4mA by means of the “alarm
up” or the “alarm down” button. This setting is independent from the gas input. Save
the calibration by pressing both “alarm up” and “alarm down” at the same time.
Cal. 2 : Gain calibration of the current output.
The “Alarm” LED is constantly lit, and all 48 red LEDs are lit. Connect an ammeter to
the DIN connector, pin 1 (+) and pin 2 (-). Set the current output at 20mA by means of
the “alarm up” or the “alarm down” button. This setting is independent from the gas
input. Save the calibration by pressing both “alarm up” and “alarm down” at the same
time.
Cal. 3 : 1
st
calibration of the percentage range.
The “%” LED flashes. Select an oxygen concentration that corresponds to the highest
percentage value used, and let the system flush through until a steady readout is
achieved (at least 1 min.). Adjust the number of LEDs that should be lit using the
“alarm up” or the “alarm down” button. Save the calibration by pressing both “alarm
up” and “alarm down” at the same time.
Cal. 4 : 2
nd
calibration of the percentage range.
The “%” LED is constantly lit. Select an oxygen concentration that corresponds to the
lowest percentage value used, and let the system flush through until a steady readout is
achieved (at least 1 min.). Adjust the number of LEDs that should be lit using the
“alarm up” or the “alarm down” button. Save the calibration by pressing both “alarm
up” and “alarm down” at the same time.
Cal. 5 : 1
st
calibration of the ppm range.
The “
ppm” LED flashes. Select an oxygen concentration that corresponds to the
SGI-3/OXI-3/OXI-3.1 User manual PBI-Dansensor A/S
PBI-210247-H UK 07/11/2005 13