highest ppm value used, and let the system flush through until a steady readout is
achieved (at least 2 min.). Adjust the number of LEDs that should be lit using the
“alarm up” or the “alarm down” button. Save the calibration by pressing both “alarm
up” and “alarm down” at the same time.
Cal. 6 : 2
nd
calibration of the ppm range.
The “ppm” LED is lit. Select an oxygen concentration that corresponds to the lowest
ppm value used, and let the system flush through until a steady readout is achieved (at
least 3 min.). Adjust the number of LEDs that should be lit using the “alarm up” or the
“alarm down” button. Save the calibration by pressing both “alarm up” and “alarm
down” at the same time.
When saving a calibration you leave the calibration menu.
To leave the calibration menu without saving a calibration, turn off the OXI-3
6.3. Calibration procedure for OXI-3.1
Calibration of voltage output
Connect the voltmeter to the DIN connector, pin 1 (+) and pin 2 (-).
1. Supply atmospheric air.
2. Press and hold and for 5 seconds.
3. The “Ready” LED goes out.
4. Press or to set the voltage on the voltmeter to 1mV.
5. Press and at the same time. The calibration is saved, and the “Ready” LED is
constantly lit again.
Calibration of sensor
Warm up the OXI-3.1 for at least 4 hours.
The OXI-3.1 must be calibrated using 3 gases, typically:
1000ppm O
2
, 100ppm O
2
and 25ppm O
2
for calibration in the ppm
range. Calibration in the % range normally requires 20.9% O
2
(atmospheric air), 1% O
2
and 0.1% O
2
(=1000ppm O
2
)
Connect the voltmeter to the DIN connector, pin 1 (+) and pin 2
(-).
1. To calibrate in the “%” range, supply 24V DC to the DIN
connector, pin 4 (+) and pin 7 (-).
2. Supply calibration gas at a flow rate of 200ml/min to the gas
inlet. Flush with the gas for at least 10 minutes until the
voltmeter readout is steady.
3. Press and hold and until “
Ready” flashes (1000ppm
duty cycle 25%, 100ppm duty cycle 50%, and 25ppm duty
cycle 75%)
4. Press / hold or to set the correct reading on the voltage
output in accordance with the calibration gas (5mV/ppm).
5. Press and at the same time. The calibration is saved, and
the “
Ready” LED stops flashing.
6. Repeat the procedure for each of the other gases.
PBI-Dansensor A/S SGI-3/OXI-3/OXI-3.1 User manual
14 PBI-210247-H UK 07/11/2005
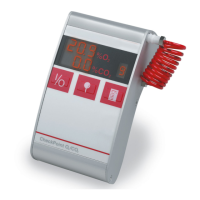
Calibration
buttons