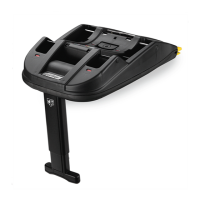
10
with the child car seat against the vehicle seat
until they can go no further.
•
IMPORTANT: It is possible to check that the
base is correctly positioned by looking at the
signals on the handle. OK (green) indicates that
the position is correct, NO (red) indicates that
the procedure has been carried out incorrectly
and must be repeated until the handle only
shows the term “OK”.
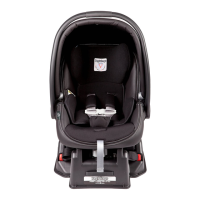
9• To release the child car seat from the base:
raise the handle to its transport position, push
the lever on the backrest upwards and at the
same time lift the seat.
10• To release the base from the vehicle seat:
release the Isofix connectors from the fixing
points in the car by lifting the handle on the
base (Arrow A) and pulling the base in the
normal direction of travel (Arrow B). Pull the
handle (Arrow C) and push the connectors back
inside the base (Arrow D). Rotate the support
leg and place it in its housing (Arrow E).
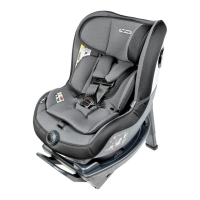
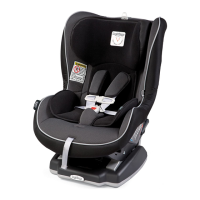
Connecting Viaggio1 Duo-Fix
and all its models
IMPORTANT: the car seat must be
attached without the child in it.
• Before connecting the car seat on the Isofix
base, ensure that the child car seat’s Isofix
connectors are fully extended (Arrow A).
• If you have any difficulty fitting car seat in your
car, lift up or remove the vehicle’s headrests.
11• Remove the plastic casing attached to the
child car seat with the special release switches
(Arrows B and C).
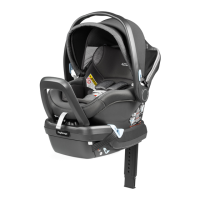
12• Position the child car seat on the Isofix Base
0+1 K and insert the rear connectors of the
child car seat in the fixing points of the base
nearest to the vehicle seat (Arrow A).
• Press the front part of the child car seat until it
clicks into place (Arrow B).
IMPORTANT: The two signals behind the
base go from red to green to indicate that the
child car seat is properly attached to the base.
13• Pull the handle on the base (indicated by
Arrow A) and push the base with the child car
seat against the vehicle seat until they can go
no further (indicated by Arrow B).
IMPORTANT: It is possible to check that the
base is correctly positioned by looking at the
signals on the handle. OK (green) indicates that
the position is correct, NO (red) indicates that
the procedure has been carried out incorrectly
and must be repeated until the handle only
shows the term “OK”.
IMPORTANT: Once the procedure is
complete, move the base to check that both
Isofix points are actually attached.
Serial numbers
14• On the underside of the Isofix Base 0+1 K,
near the isofix connectors, the following
information is provided: product name, date of
manufacture and serial number of the product
itself (Fig. a).
The approval label is located on the Isofix Base
0+1 K behind the compartment holding the
instruction sheet (Fig. b).
This information is required for any complaints.
Cleaning and maintenance
• This product requires a small amount of
maintenance. Cleaning and maintenance must
only be carried out by adults.
• Clean the plastic parts periodically with a
damp cloth. Do not use solvents or other
similar products.
• Protect the product from atmospheric agents:
humidity, rain or snow. Extended exposure to
sunshine can cause colour changes in many
materials.
• Store the product in a dry environment.
How to read the approval label
This paragraph explains how to read the
approval label (the orange label located in the
instruction sheet compartment).
• The terms SEMI-UNIVERSAL class E and class
A indicate the compatibility of the child car
seat with vehicles fitted with Isofix attachment
systems.
• The top of the label displays the trademark of
the manufacturing company and the name of
the product.
• The letter E in a circle indicates the European
approval mark and the number indicates the
country that issued the approval (1: Germany,
2: France, 3: Italy, 4: The Netherlands, 11: Great
Britain, and 24: Ireland).
 Loading...