PelPro Pellet Stove • 8104-171B • 10/21 PelPro Pellet Stove • 8104-171B • 10/21pelprostoves.com pelprostoves.com18
19
Using Your Stove
Using Your Stove
Using Your Stove
If your Stove does not ignite on the initial burn, the LED light will blink
red 4 times indicating a missed ignition.
1. Turn your Stove to o, remove and clean the re pot
2. Conrm re pot is properly positioned
3. Prime your Stove per previous instructions
O
N
A
U
T
O
A
L
A
R
M
O
N
A
U
T
O
A
L
A
R
M
A
U
O
O
N
A
L
A
R
M
A
U
T
O
Is this your rst start-up after purchase?
If you just bought this Stove, once a re has been established in your Stove, leave the Stove burning on
HI for 30 minutes to allow paint to cure.
After 30 minutes, turn the dial control to OFF and allow your Stove to cool completely. Once cooled,
clean the re pot. Your Stove is now ready to resume normal use.
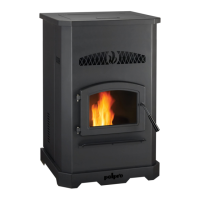
What Do the Blinking Lights Mean?
Green & Amber - Normal Operation
• Green, Steady On - Feed system is priming
• Green, 1 Blink - Stove is o and ready
• Green, Continuous Blinking - Stove is in the start up/ignition sequence
• Green, Varies Blinks - Varies depending on burn rate
• Amber, Steady On - Stove is set and running at either the minimum or maximum power
levels
• Amber, Continuous Blinking - Stove is in the shutdown sequence. *Early models may have
a green continuous blinking light during shutdown sequence.
Red - Operational Issue - Refer to troubleshooting
• Red, 1 Blink - Empty hopper, refer to troubleshooting
• Red, 2 Blinks - Exhaust probe alarm, check connections or refer to troubleshooting
• Red, 3 Blinks - Ambient probe alarm, check connections or refer to troubleshooting
• Red, 4 Blinks - Missed ignition, refer to troubleshooting
• Red, 8 Blinks - Exhaust gas over temperature, refer to troubleshooting
Using Your Stove
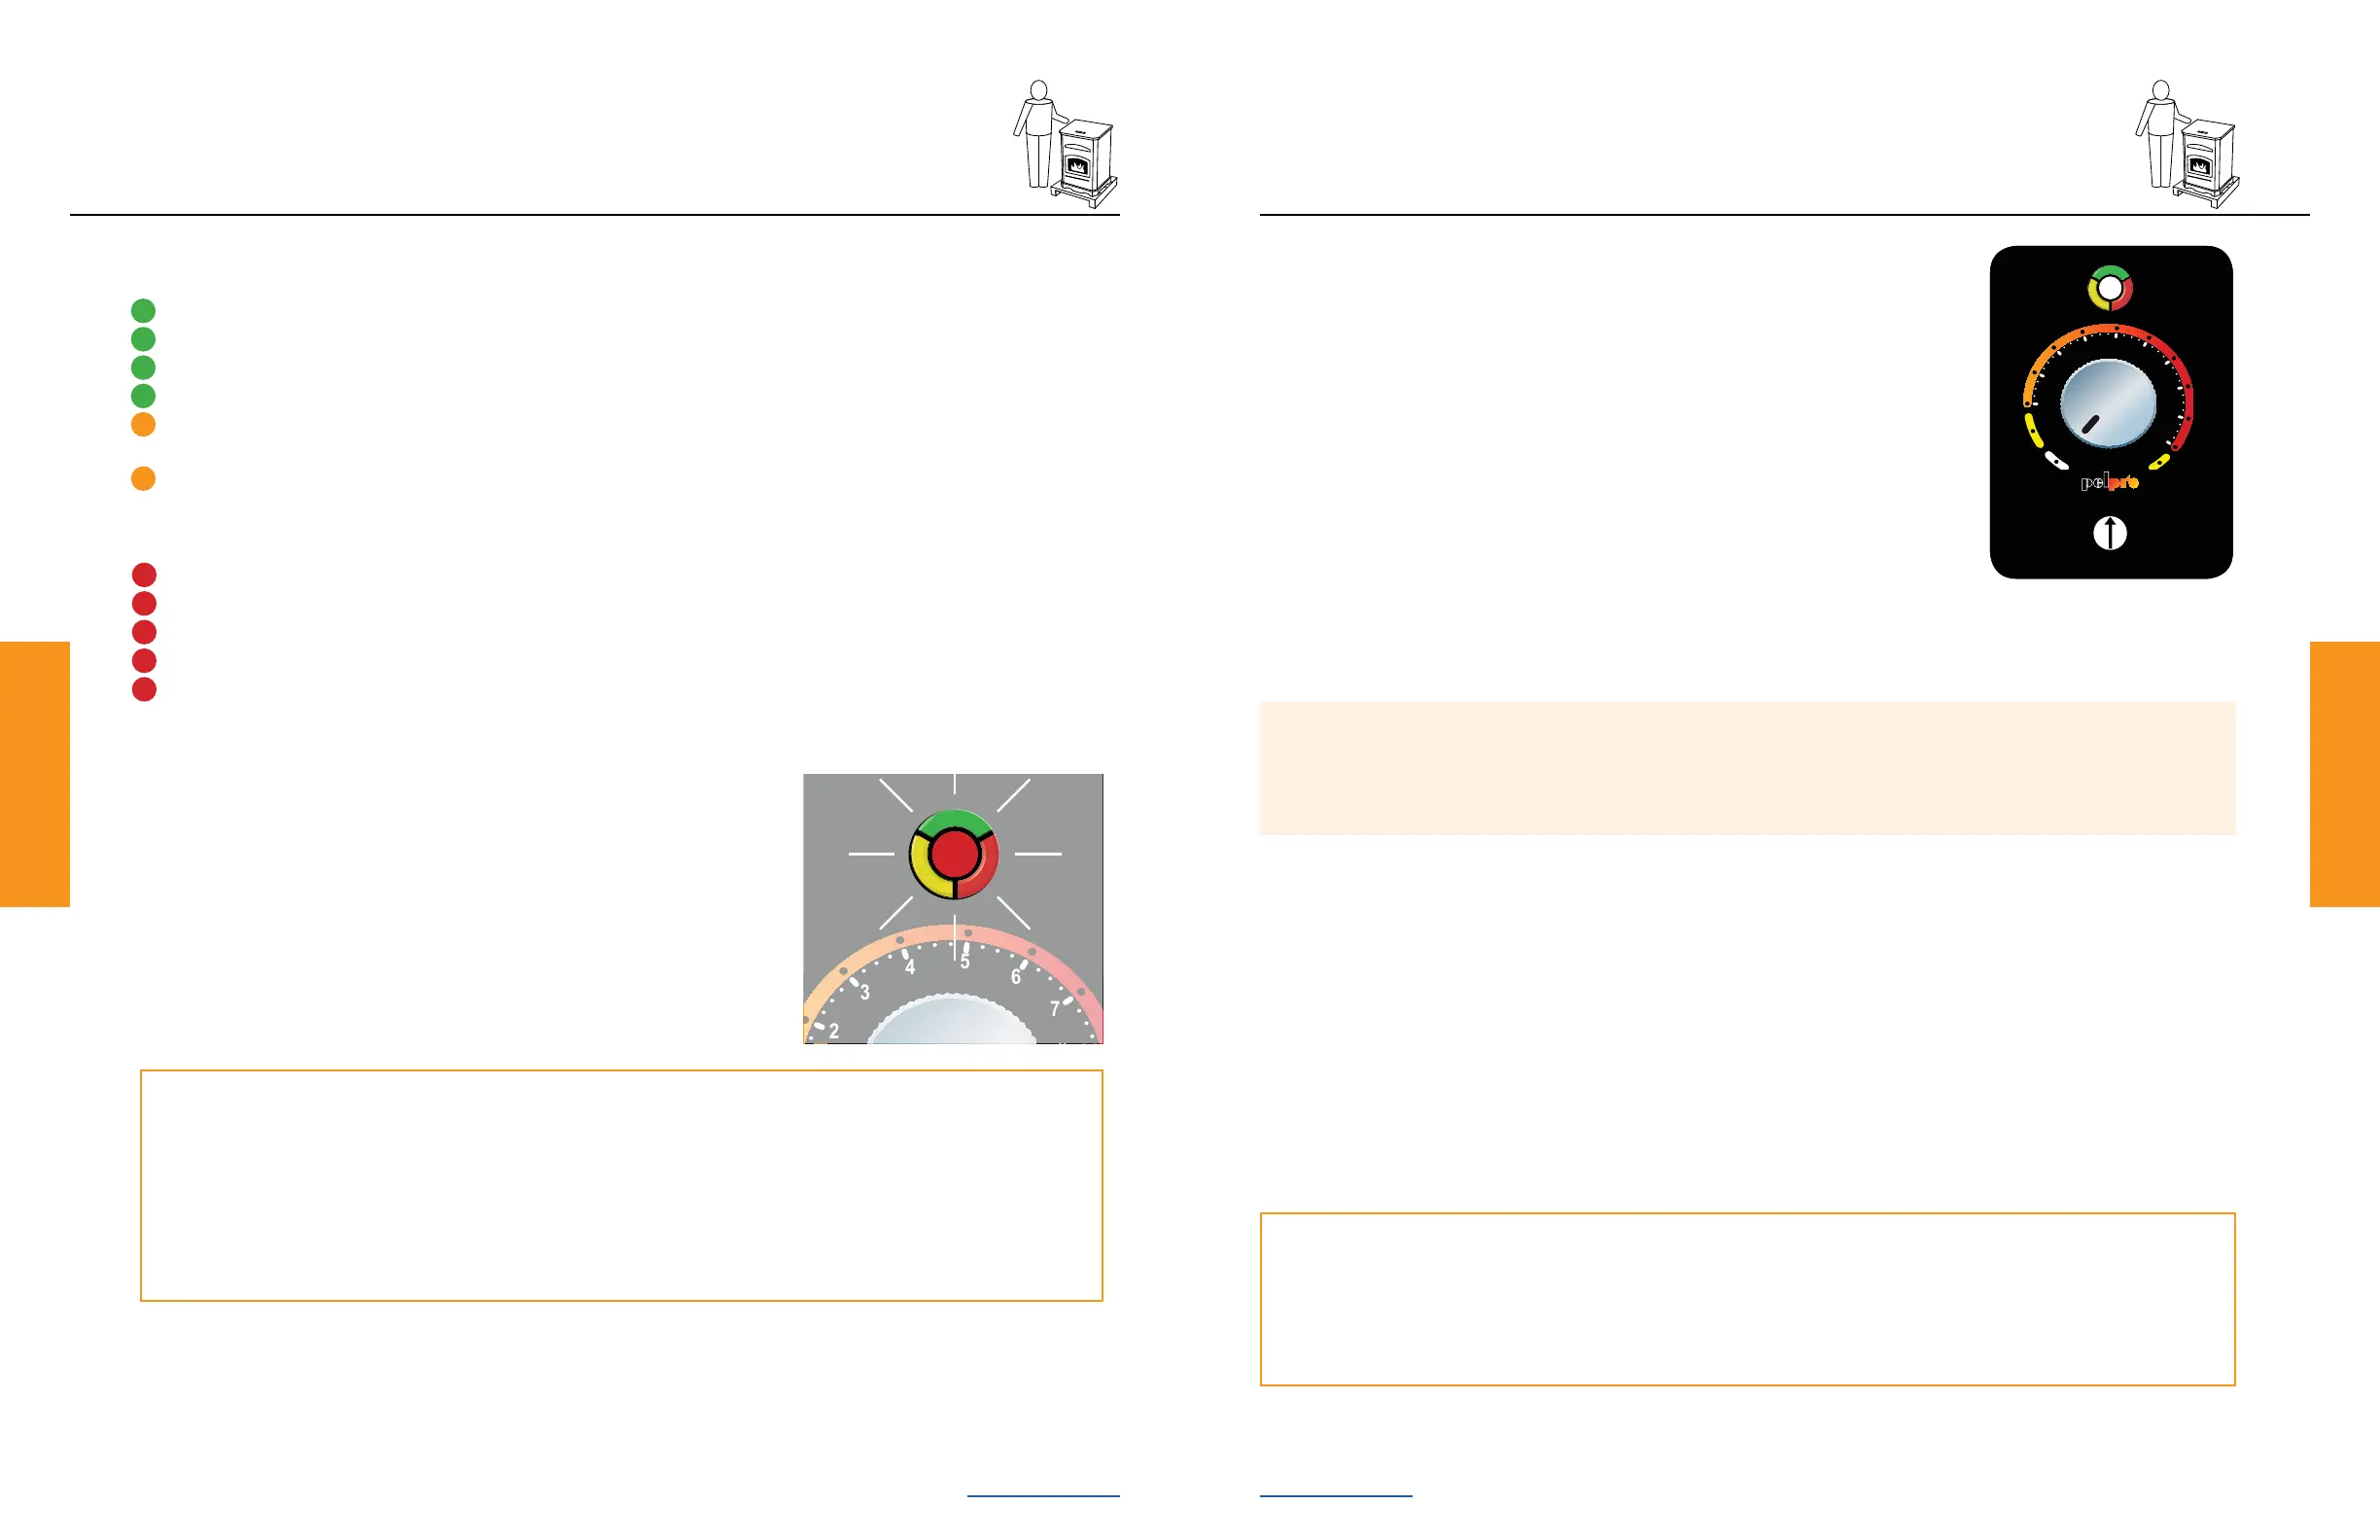
Comfort Settings
Control your comfort with a single dial:
• OFF setting - Used to turn your Stove o
• LO setting – Your Stove will continue to run on low regardless of room
temperature. LED light will be steady amber
• 1 through 10 settings – Set to your desired comfort level. Once the desired
comfort level is achieved the Stove will automatically shut down. When the
temperature in the room drops below the desired comfort level, your Stove will
automatically restart.
0
-
1
-
2
-
3
-
4
+
1
+
2
+
3
+
4
O
N
A
U
T
O
A
L
A
R
M
0
-
1
-
2
-
3
-
4
+
1
+
2
+
3
+
4
O
N
A
U
T
O
A
L
A
R
M
Pro Tip
If the dial control is turned to the o position and then back on, even if by mistake, your Stove will go
through the shutdown process (approximately 15 minutes) and restart.
Thermostat
Your PelPro Stove comes with a built-in thermostat system that provides easy temperature
adjustments. The Stove is not designed to use a remote control or external thermostat.
Trim
Adjustment
• HI setting - Your Stove will continue to run on high regardless of room temperature. LED light will be steady amber.
Trim Adjustment
Trim adjustment is the small dial located below the main dial control. Rotating this dial will adjust the air/fuel ratio and
below are examples of when to use it:
• If the re is too large, lazy or producing black soot, rotate the dial counterclockwise one level at a time and allow 15
minutes for stabilization before making another adjustment
• If your re is too small and sometimes goes out when there are pellets in the hopper, rotate the dial clockwise one
level at a time and allow 15 minutes for stabilization before making another adjustment.