PelPro Pellet Stove • 8104-171B • 10/21 PelPro Pellet Stove • 8104-171B • 10/21pelprostoves.com pelprostoves.com8
9
Installing Your Stove
Installing Your Stove
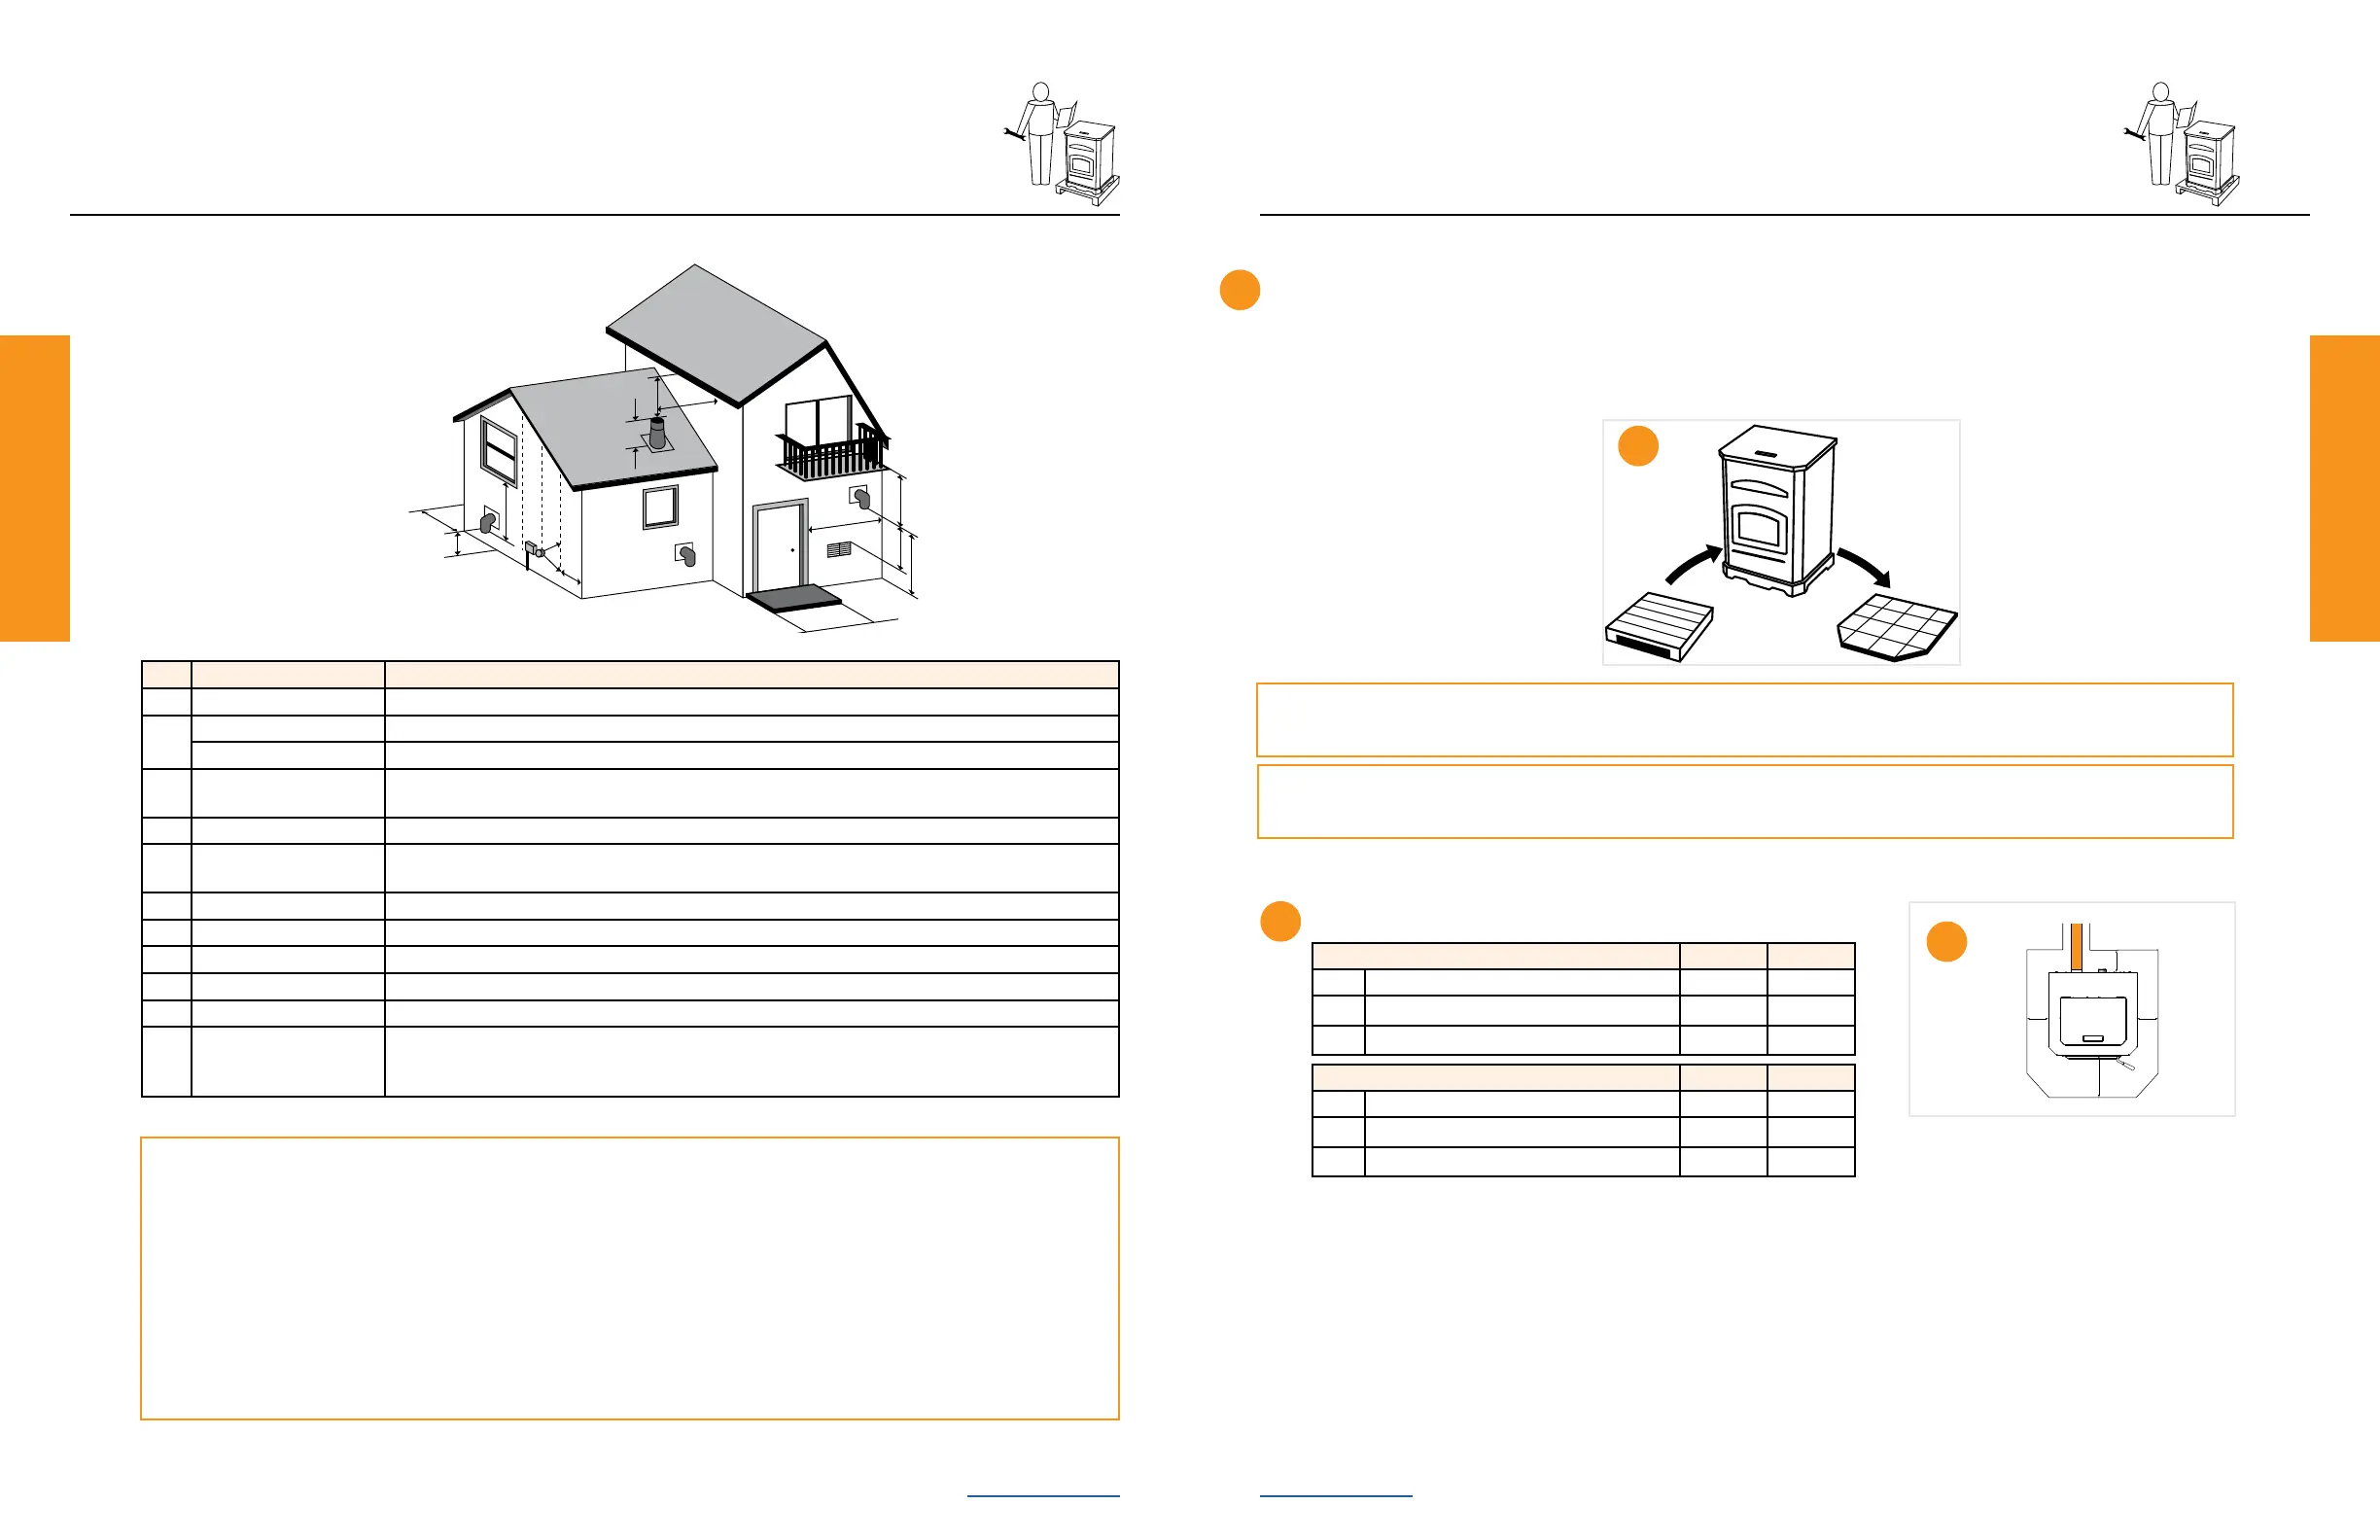
Vent Termination Clearances
Installing Your Stove
A
D.
B
L
C
K
J
B
I
H
G
F
Clearances
A 12” Clearance above grade, veranda porch, deck or balcony (Including vegetation and mulch)
B
12” Clearance beside or below any windows or doors that open
12”* Clearance above any window or door that opens
C 18”
Vertical clearance to ventilated sot located above the terminal within a horizontal distance of 2 feet
from the center line of the terminal
D 12” Clearance to an outside corner wall
F
12”,
48” no outside air kit
Clearance to a non-mechanical air supply inlet to the building or a combustion air inlet to any other
Stove
G 36” Clearance to a mechanical air supply inlet
H 84”** Clearance above a paved sidewalk or paved driveway located on public property
I 12”** Clearance under a veranda, porch, deck or balcony
J 12” Clearance above the roof
K 24” Clearance from an adjacent wall including neighboring buildings
L
36” within a height of 15
feet above the meter /
regulator assembly
Clearance to each side of center line extended above natural gas or propane meter / regulator assembly
or mechanical vent
NOTICE:
Do NOT terminate vent:
• In any location that will allow ue gases or soot from
entering or staining the building
• In any location which could create a nuisance or hazard
• In any enclosed or semi-enclosed area such as a
carport, garage, attic, crawl space, under a sun deck or
porch or narrow walkway
• Closely fenced area, or any location that can build up
a concentration of fumes such as a stairwell, covered
breezeway, etc.
NOTICE:
Do NOT terminate below an air inlet.
• It is recommended that at least 60” (1.52m) of vertical
pipe be installed when Stove is vented directly through
a wall—this will create a natural draft, which will help
prevent the possibility of smoke or odor venting into the
home during a power outage
• It will also keep exhaust from causing a nuisance
or hazard by exposing people or shrubs to high
temperatures
• The safest and preferred venting method is to extend
the vent vertically through the roof or above the roof
*Recommended to prevent condensation on windows and thermal breakage. **This is a recommended distance. For additional requirements check local codes.
Placing Your Stove
It is necessary to install EMBER PROTECTION; a Type 1 oor protector for this Stove.
The Floor protector must be non-combustible material, extending beneath Stove
with a minimum
of 6
inches (152mm) in front of glass and 6 inches (152mm) to both sides of the fuel loading
door. Open the door and measure 6 inches (152mm) from the side edge of the opening in the
face of the Stove.
Installing Your Stove
1
1
2
Notice: Be careful to protect the bottom of the Stove and oor surfaces when moving the Stove. Bottom
edges of Stove are sharp and can scratch surfaces.
Notice: Clearances may only be reduced by means approved by the regulatory authority having jurisdiction.
USA Hearth Pad Requirements Inches mm
A Sides 2 51
B Back 2 51
C Front 6 152
Non-combustible oor protection extending beneath the ue pipe is required with horizontal venting or under the top vent
adapter with vertical installation.
*Non-combustible oor protection must extend 2 inches (51mm) beneath the ue pipe when installed horizontal venting or
under the top vent adapter with vertical installation. CANADA REQUIRED, USA RECOMMENDED.
Canada Hearth Pad Requirements Inches mm
A Sides 6 152
B Back 2 51
C Front 6 152
Hearth pad minimum requirements:
2
B*
A
C
A