PelPro Pellet Stove • 8104-171B • 10/21 PelPro Pellet Stove • 8104-171B • 10/21pelprostoves.com pelprostoves.com10
11
Installing Your Stove
Installing Your Stove
Installing Your Stove
Conrm required clearances to combustibles:
Alcove:
3
4
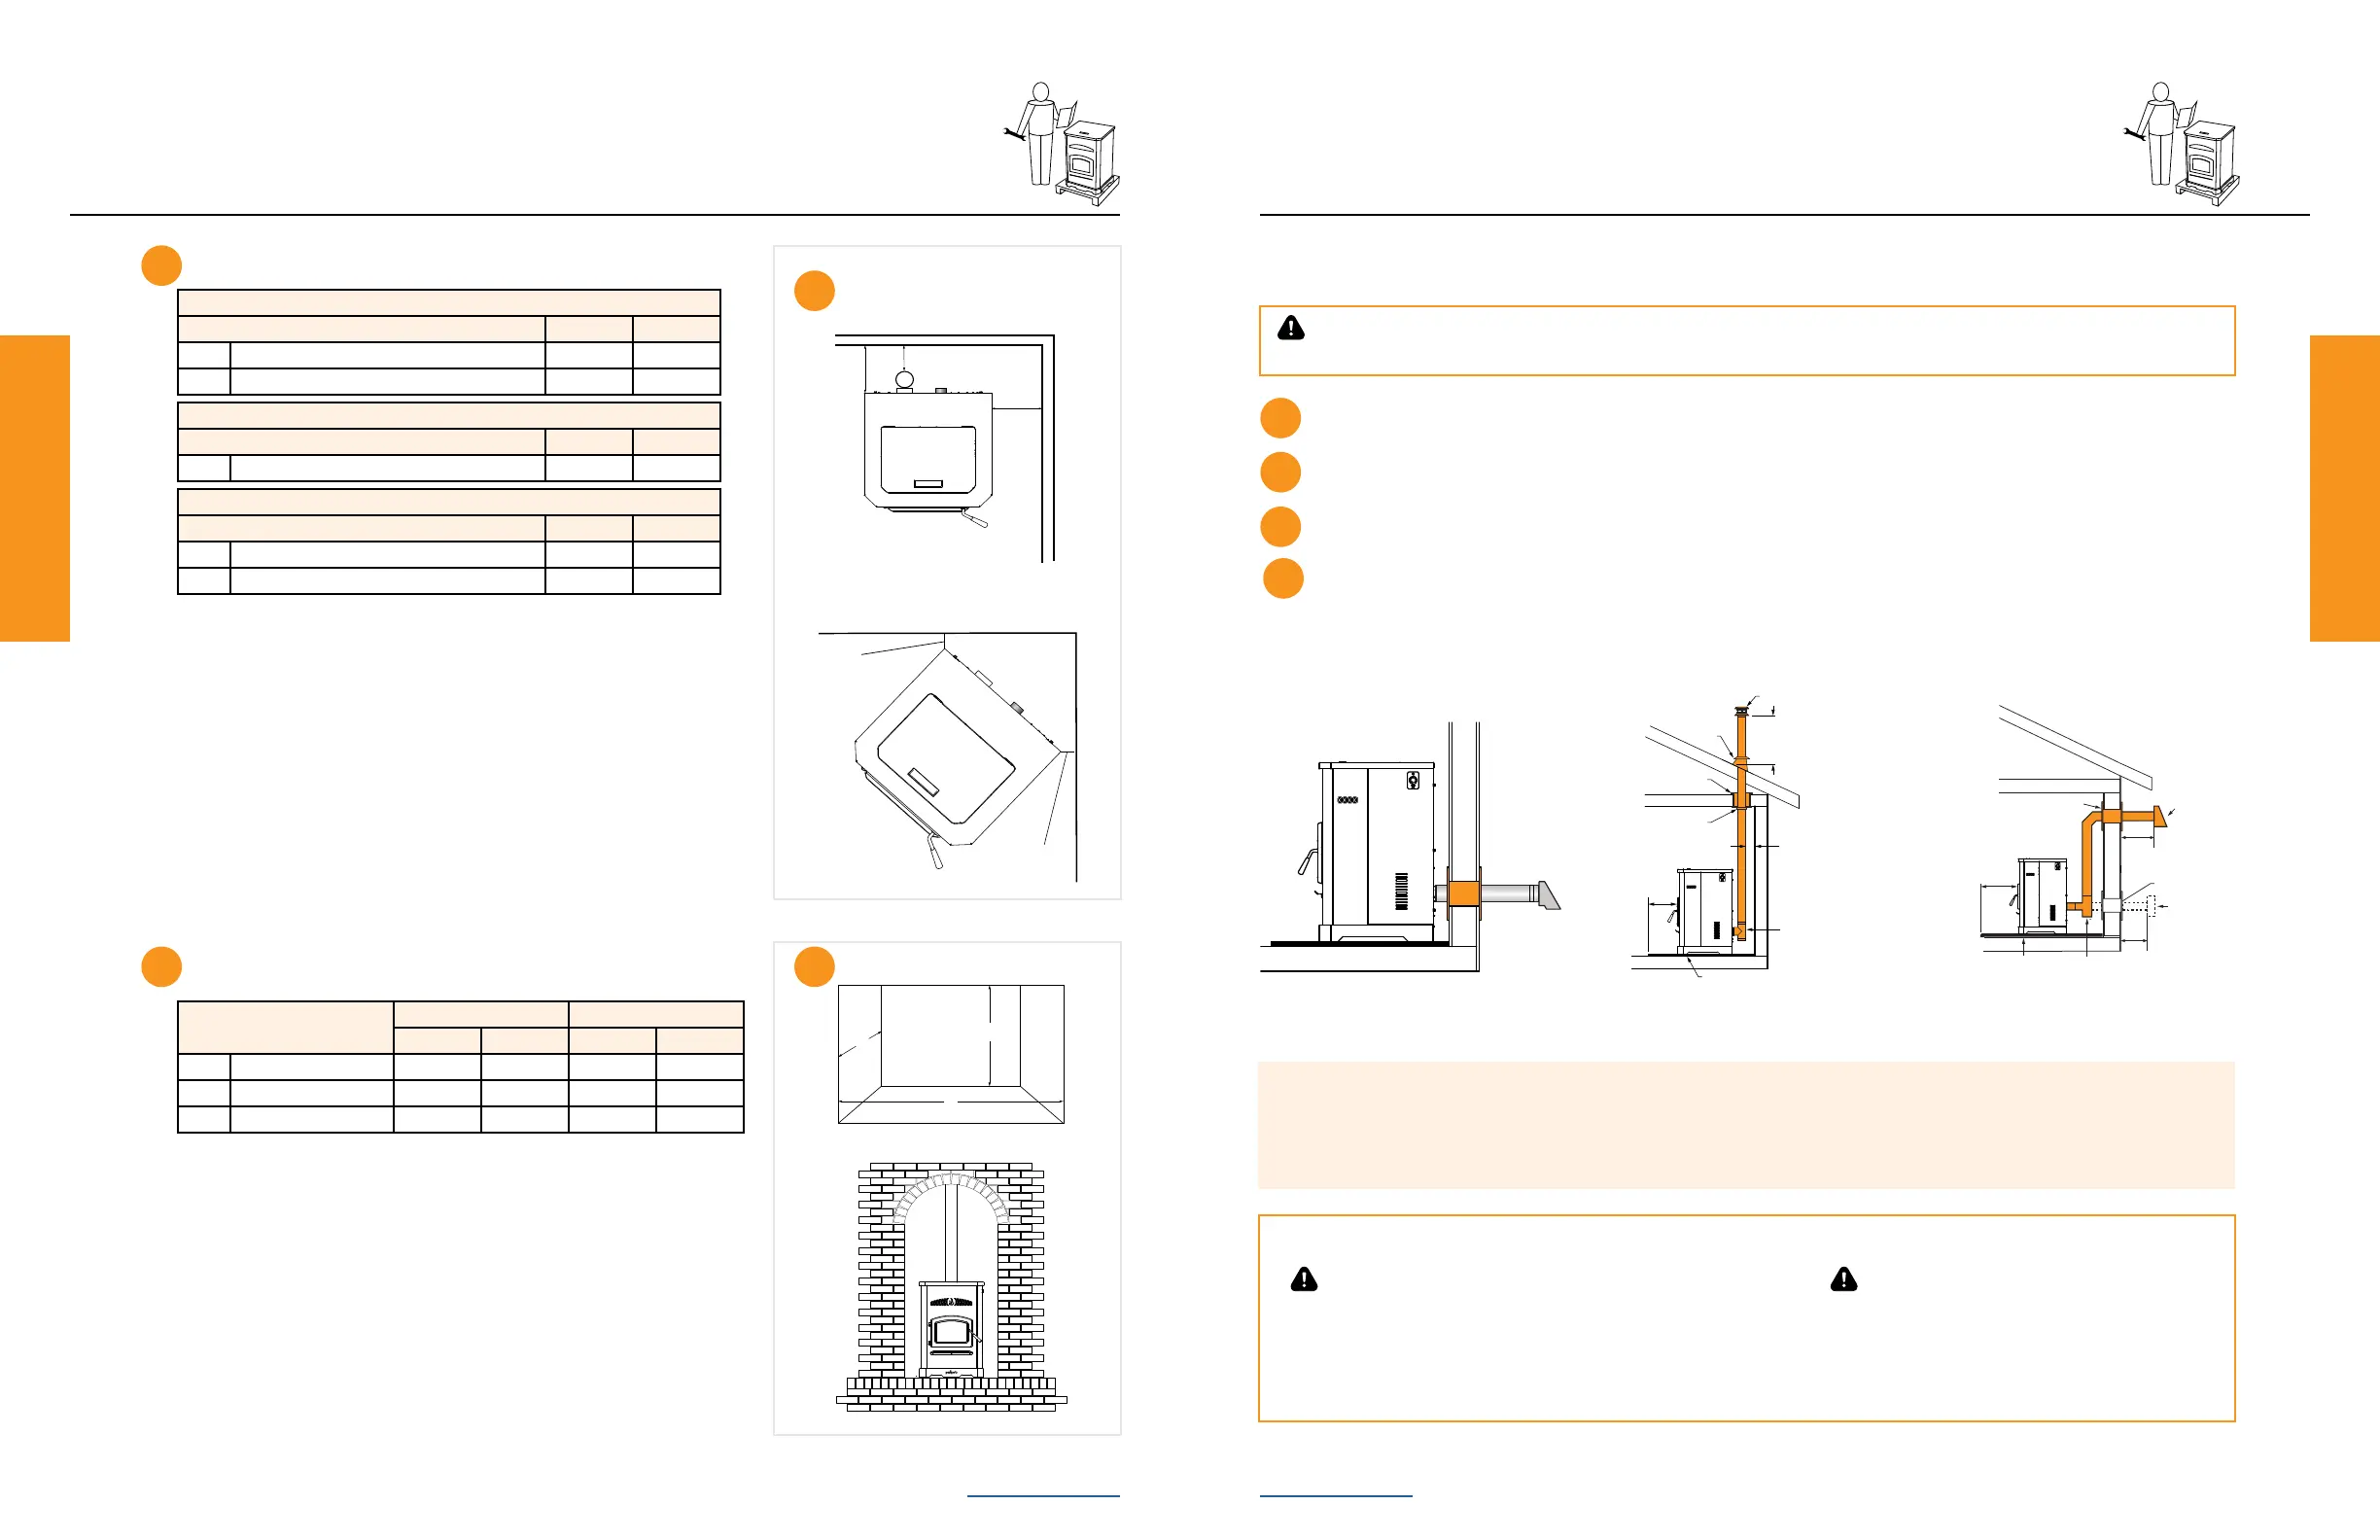
Vertical Installations (Interior Flue)
Straight back against wall Inches mm
D Back wall to pellet pipe 3 76
E Side wall to Stove 9 229
Horizontal Installations
Straight back against wall Inches mm
G Back wall to Stove 3 76
E Side wall to Stove 9 229
Minimum* Maximum
Inches mm Inches mm
H Height 52 1321 n/a n/a
I Width 42-1/2 1080 n/a n/a
J Depth** n/a n/a 25-3/4 654
Corner Installation
Straight back against wall Inches mm
F Walls to Stove 3 76
3
4
J
H
I
*All minimums listed are to a combustible surface.
**Front of stove must be ush or extend past the alcove front.
Installing Your Stove
Vertical - Interior, Preferred
Installation
Exterior - Optional
Installations
Install venting. (For additional installation options visit pelprostoves.com)
3
Install wall thimble (sold separately) per manufacturer requirements.
2
Venting Your Stove
CAUTION!
Take appropriate precautions to locate utilities within the wall and avoid contact.
Use silicone to create an eective vapor barrier at the location where the chimney or other
component penetrates to the exterior of the structure.
4
Mark and cut wall for venting penetration on exterior wall (if needed).
1
Pro Tips
• See venting manufacturer’s required clearances to combustibles
• For horizontal installations, the minimum clearance from exterior to termination cap is 6”—you
may want to increase to 18” clearance to minimize soot blow back on home exterior.
WARNING!
Do not terminate venting in any enclosed or semi-enclosed area
such as: a carport, garage, attic, crawl space, under a sun deck
or porch, narrow walkway or closely fenced area, or any location
that can build up a concentration of fumes such as a stairwell,
covered breezeway, etc.
CAUTION!
Ensure that your Stove venting terminates above
your Stove. The following may occur:
• Your Stove will not draft properly
• Smoke may seep in your house
• Excessive sooting
Install vent at clearances specied by the manufacturer
NOTE: In Canada when using a factory-built chimney it must be safety listed, Type UL103 HT (2100
o
F) CLASS “A” or
conforming to CAN/ULC-S629M, STANDARD FOR 650
o
C FACTORY-BUILT CHIMNEYS.
Exterior Wall
Firestop
Rain Cap
Flashing
Ceiling Support
Non-combustible Hearth Pad
3” min. or follow pipe
manufacture listed
clearance
Clean-out Tee
6 in
[152mm]
Min
12 in [305 mm]
Minimum
above roof
penitration
Non-combustible
Hearth Pad
Wall Thimble
Horizontal
Termination Cap
Termination
Cap
6 in. (152 mm)
Minimum
6 in.
(152 mm)
Minimum
Clean Out T
Wall Thimble
6 in.
(152 mm)
Minimum