PelPro Pellet Stove • 8104-171B • 10/21 PelPro Pellet Stove • 8104-171B • 10/21pelprostoves.com pelprostoves.com12
13
Installing Your Stove
Installing Your Stove
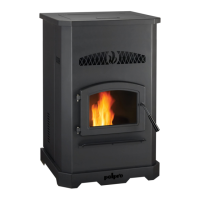
• 45° elbow is equivalent to 1 foot of straight pipe
• 90° elbow is equivalent to 3 feet of straight pipe
Installing Your Stove
Notice:
These are guidelines for successful venting of
your pellet Stove. The more vertical rise you can
obtain in your system, the better it will perform.
Horizontal vent runs can accumulate ash and
will need to be cleaned more often. Try to keep
them as short as possible.
Venting Your Stove
The maximum horizontal venting allowed with no vertical venting
attached is 48 inches including one 90° elbow or two 45° elbows.
Addition of any horizontal venting beyond 48 inches requires a
minimum 60 inches of additional vertical vent. Horizontal sections
of vent pipe should have a 1/4 inch rise per foot. We recommend
using the shortest venting and fewest elbows possible when venting
horizontal.
We recommend the use of 4 inch vent with any installation requiring
more than two 90° elbows, or more than 15 feet of venting.
WARNING!
Fire Risk.
• Only LISTED venting
components may be
used
• NO OTHER vent components may be used.
Substitute or damaged vent components
may impair safe operation.
Minimum Vertical Vent for One Elbow
Horizontal Run (Ft)
Minimum Vertical Rise
(Ft)
20
20
15
15
10
10
5
5
0
0
Minimum Vertical Vent for Two Elbows
Length of Horizontal Sections (Ft)
Minimum Vertical Rise
(Ft)
20
20
15
15
10
10
5
5
0
0
Minimum Vertical Vent for Three Elbows
Length of Horizontal Sections (Ft)
Minimum Vertical Rise
(Ft)
20
25
8 10 12
15
6
10
4
5
2
0
0
ONE 90° ELBOW
Total
Horizontal
Minimum
Vertical
Vent
Diameter
4 0 3
5 5 3
6 6 3
7 7 3
8 8 4
9 9 4
10 10 4
11 11 4
12 12 4
13 13 4
14 14 4
15 15 4
16 13 4
17 17 4
18 18 4
19 19 4
TWO 90° ELBOWS
Total
Horizontal
Minimum
Vertical
Vent
Diameter
2 5 3
3 6 3
4 7 3
5 8 3
6 9 3
7 10 4
8 11 4
9 12 4
10 13 4
11 14 4
12 15 4
13 16 4
14 17 4
15 18 4
THREE 90° ELBOWS
Total
Horizontal
Minimum
Vertical
Vent
Diameter
2 11 4
3 12 4
4 13 4
5 14 4
6 15 4
7 16 4
8 17 4
9 18 4
10 19 4
11 20 4
Installing Your Stove
Pro Tip
Installing a clean-out “T” (sold separately) to the rear
of your Stove, when venting vertically can save time during cleaning.
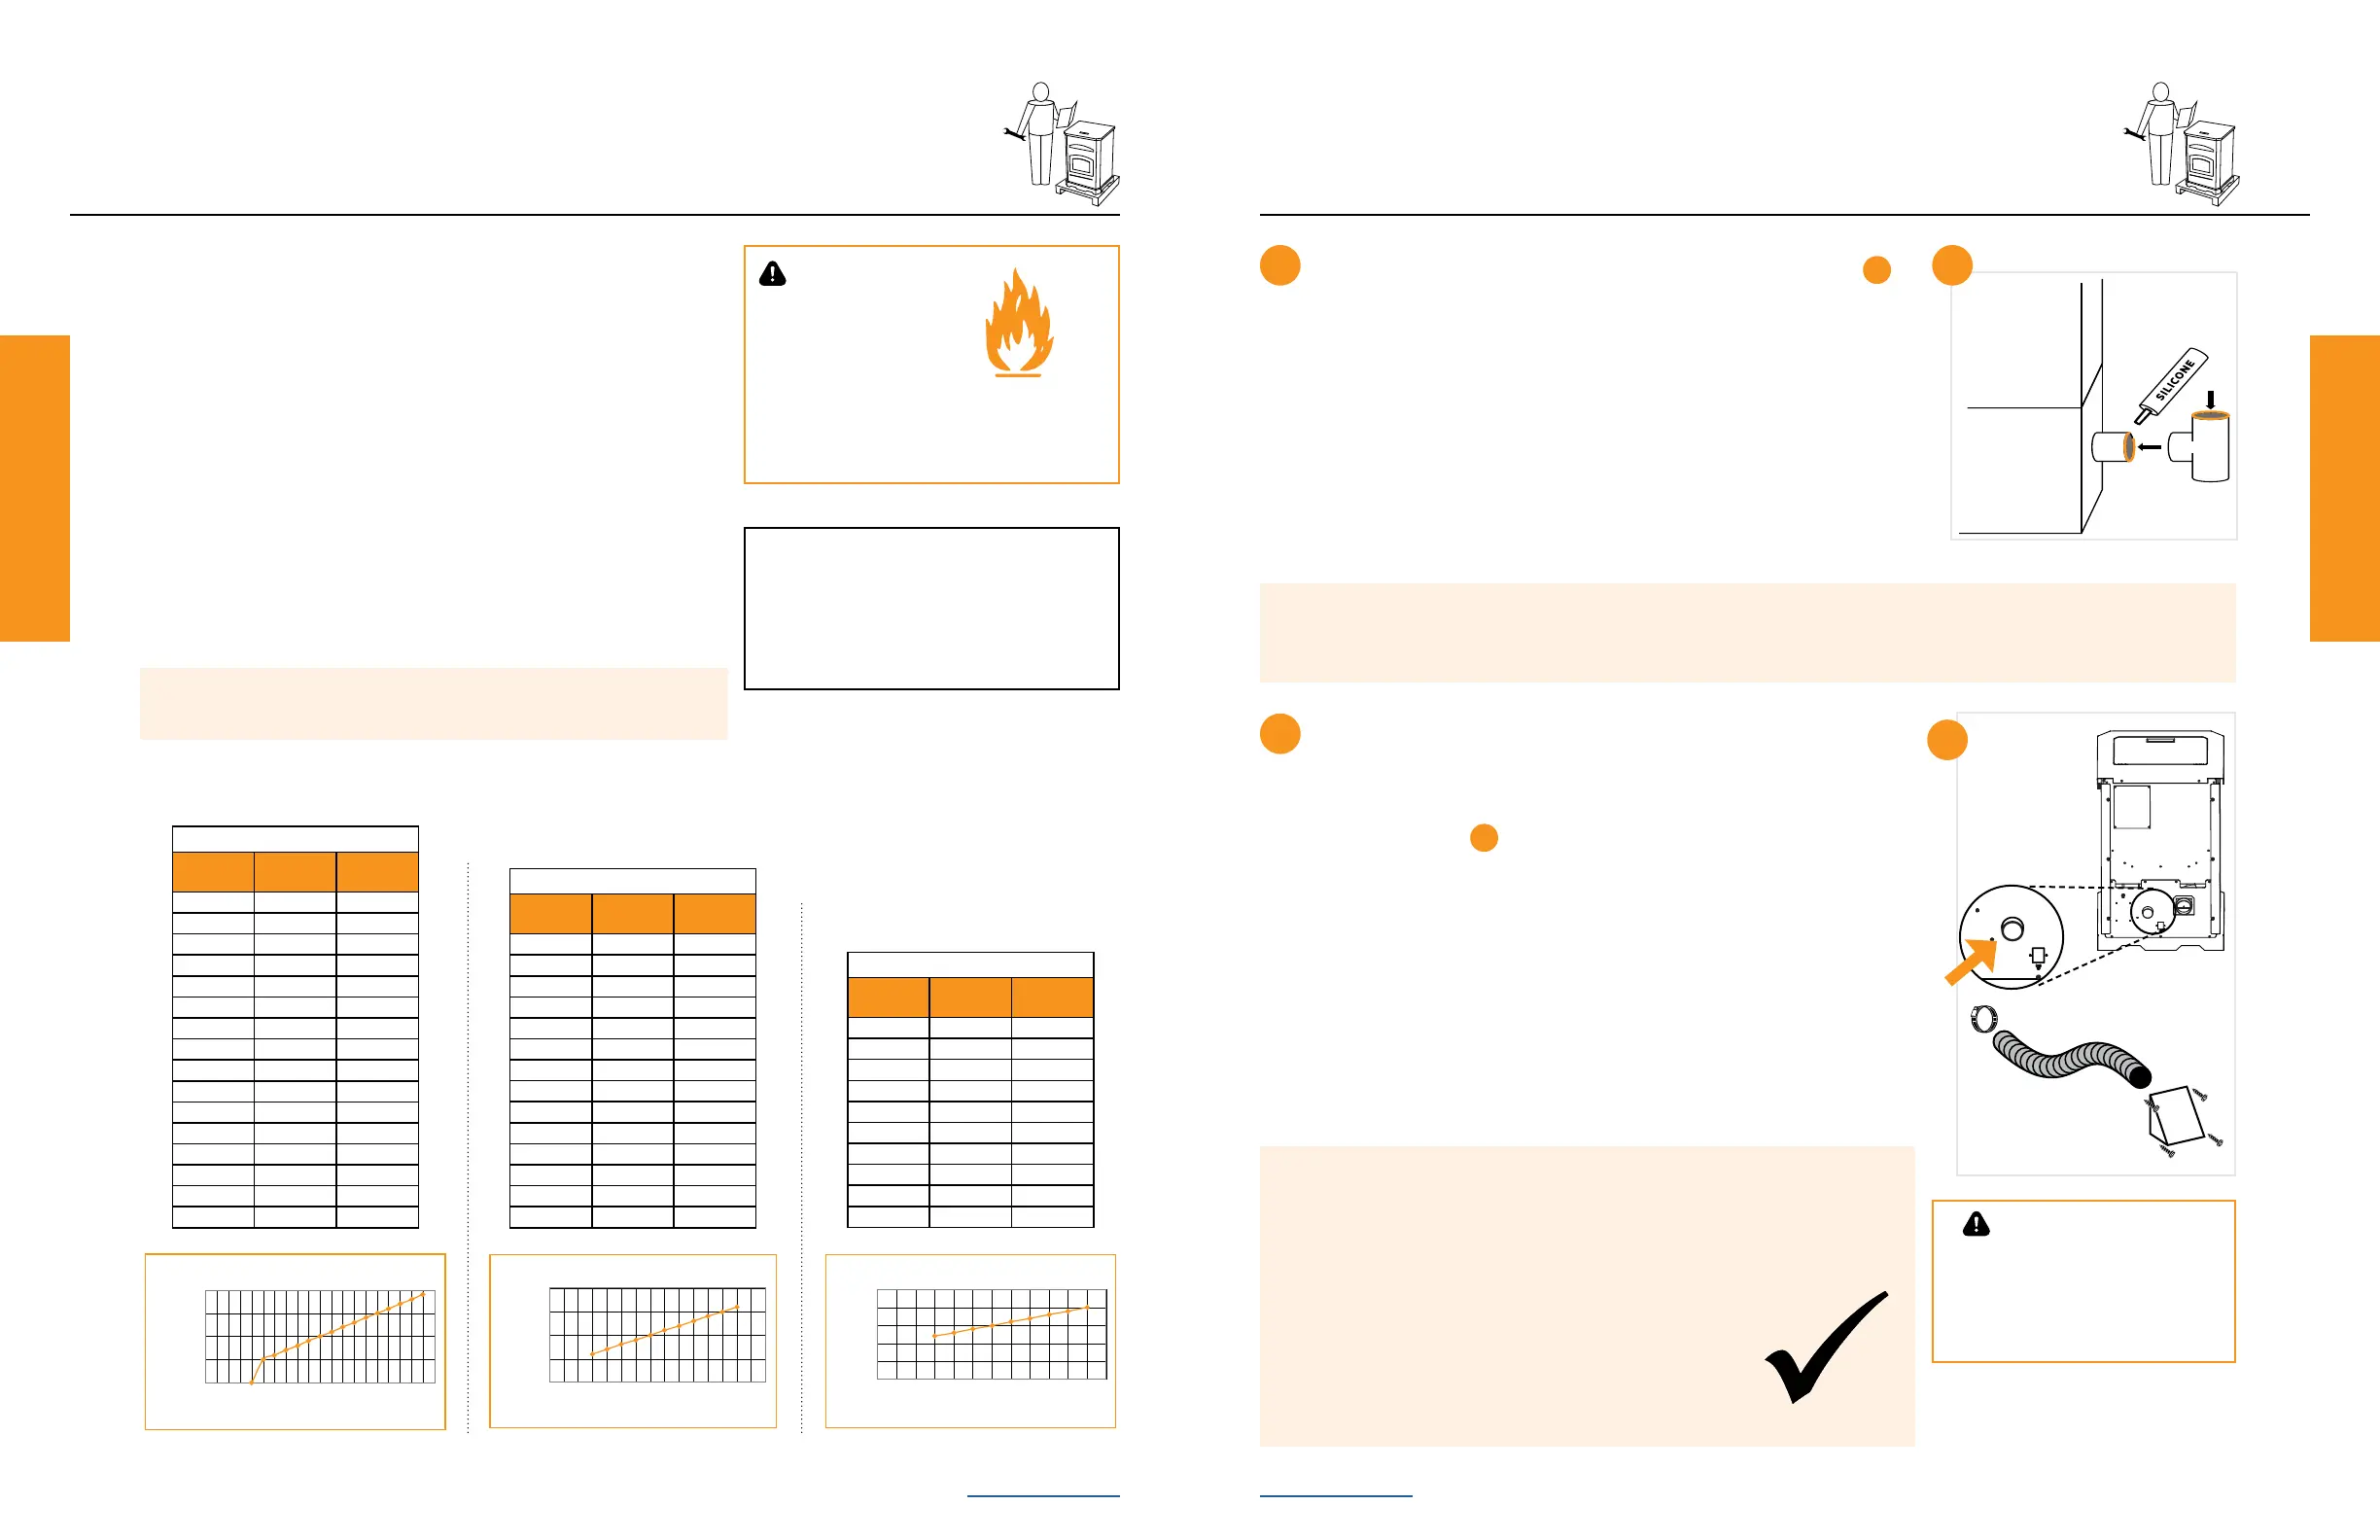
Install outside air kit (included)
For optimal performance, PelPro recommends the outside air kit for
all installations. Outside air kit is required for all mobile/manufactured
home installations.
Install through wall
B
• Maintain clearances from exhaust
- Attach ex pipe to outside air connection
on Stove
- Use hose clamp
- Route tube outside the structure
- Attach cap
- Secure to outside wall with appropriate fasteners
6
B
CAUTION!
Never draw outside
combustion air from:
• Wall, oor or ceiling cavity
• Enclosed space such as an
attic, garage or crawl space.
• Install pellet venting through wall and connect vent/pipe to Stove
A
• Some venting manufacturers oer pellet Stove adapters for their
venting for easier installation
• Seal all pipe joints using high-temp silicone (500°+)
• Secure exhaust venting system to the Stove with at least 3 screws or
rivets per the pipe manufacturer’s instructions. Also secure all connector
pipe joints with at least 3 screws through each joint.
• Install termination cap
• Conrm all required Stove clearances to combustibles
A5
Take a Break
Inspect your work:
_____ Conrm clearances to combustibles are maintained
_____ Pipe joints are secure and properly sealed
_____ Outside air kit installed properly
_____ Conrm termination clearances