PT395 Series Detector
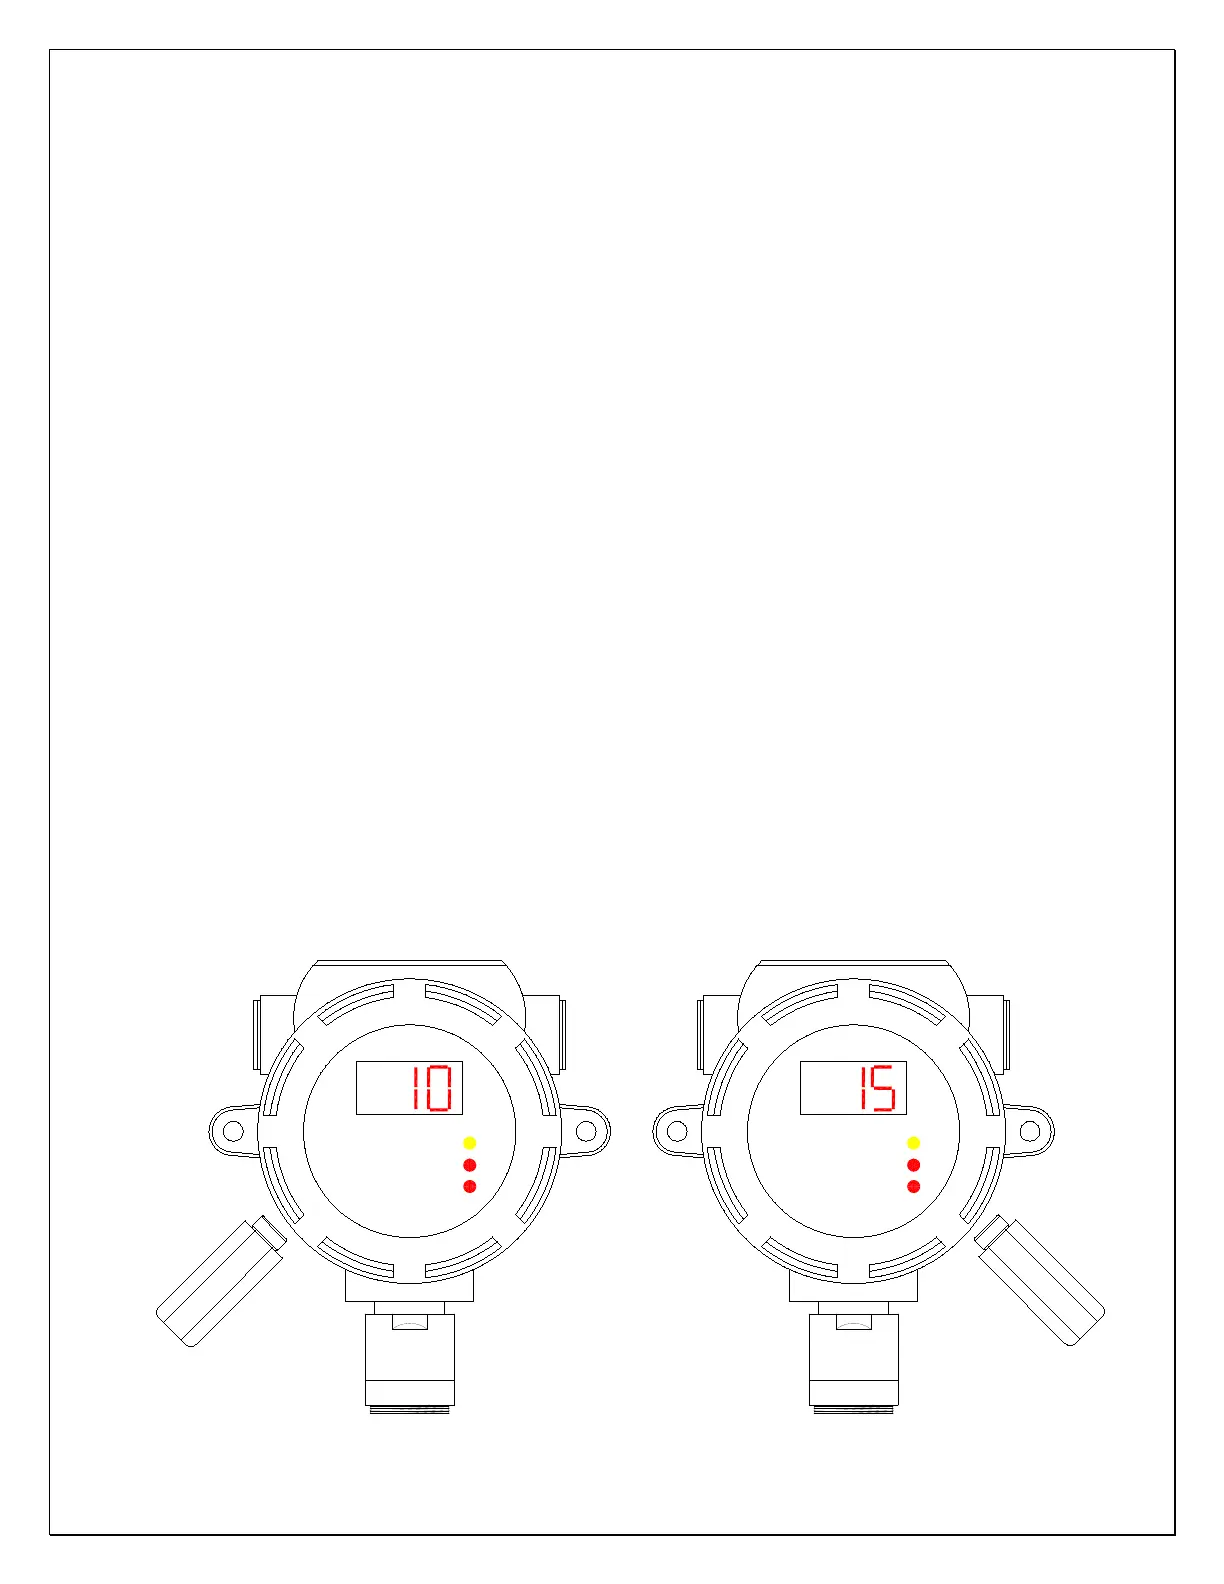
1. Place and hold the magnetic tool at its position on the cover of the junction
box until the yellow alarm LED indicator starts flashing and the current low
alarm level is displayed.
2. To change the current alarm level, continue to hold the magnet. The alarm
level is incremented by 1 at a time. Continue to hold the magnet at its place
until the desired alarm level is reached and then move the magnet away.
Alarm level displayed rolls back to zero after the full scale range of the
transmitter. For example, for H
2
S detector with range of 100 ppm, the alarm
level will restart from 0 after 100. If the Alarm level displayed is higher than
the desired value then use the 8 o’clock magnet position to decrement the
value. Thus 8 o’clock magnet position decrements the alarm level displayed
while 4 o’clock position increments the value displayed. See Figure 9.
3. Wait for 10 seconds. The unit will display latching or non-latching Low alarm
relay type. ( “nL”
non-latching, “L” latching). Hold the magnet to 4
o’clock position and display will toggle between “nL” and “L”. Select the
desired latching or non-latching alarm and move the magnet away.
4. The low alarm is now configured. After 10 seconds the low alarm LED will go
off and High alarm LED will start flashing displaying the current High alarm
level. Repeat steps 2 to 4 to configure High alarm.
Magnetic Wand
Low
High
Fault
Magnetic Wand
Low
High
Fault
Magnet Position to
Decrement Alarm Level
Magnet Position to
Increment Alarm Level
Figure 9. Using Magnet to adjust Alarm Levels
 Loading...