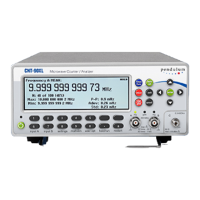
To set up the counter to display any deviation
from 1 MHz, press the MATH/LIM key and
select Math. The display will show that Math
is still Off. Press the soft key below the Math
Off indicator to enter the Formula Select
menu. Use the cursor keys to mark the for
-
mula K
*
X/M + L and confirm by pressing the
EXIT/OK key.
Now enter the numerical values for the con
-
stants K, L and M. The default values are:
K=1, L=0 and M=1. In this case only L has to
bealteredto-1
*
10
6
in order to get the job
done.
Open the value input menu for L by pressing
the soft key below the menu heading marked
L on the display. Press 1 followed by ±, EE
(short for Enter Exponent) and 6. Confirm and
exit by pressing EXIT/OK.PressEXIT/OK
repeatedly until the display is showing the
measurement result, now modified to reflect
any deviation from 1 MHz.
Change the generator frequency upward and
downward just a little, and watch the counter's
display.
High-Speed
Measurements
The benefits of high speed measurements for
benchtop use become obvious when you use
statistics. For instance, the '9X' can make
1000 7-digit measurements and present the
standard deviation (jitter) in less than one sec
-
ond.
Recall the default setting and press
AUTOSET twice within two seconds before
tweaking the controls to reach the optimum
measurement speed for your application. See
the following two paragraphs.
Under the INPUT Menus:
Auto trigger level settings in this model is so
fast that you will normally not notice any dif
-
ference in speed if auto is on or off. However,
if you use statistics to make hundreds or thou
-
sands of measurements, the fractions of a sec
-
ond it takes to calculate trigger levels before
each measurement add up to a considerable
time over the total sequence.
The measuring speed can be increased sub
-
stantially if you set the trigger levels manually
once, before a lengthy measurement sequence
starts.
Press INPUT A and choose MAN for the
MAN/AUTO setting. Now press Trig to open
the trigger level value input menu. Enter a
level of +0.5 V. Confirm the selection by
pressing EXIT/OK twice.
Under the SETTINGS Menu:
By making the measuring time for each
sample as short as possible you can also in-
crease the overall measuring speed. Remem-
ber, however, that there is always a tradeoff
between measuring time and resolution.
Press SETTINGS and then MeasTime.Use
the DOWN arrow key to set the measuring
time to the minimum value. Confirm by press
-
ing EXIT/OK twice.
Now the counter is taking measurements at a
very high speed.
Toggle the STAT/PLOT key to see the statis
-
tical measures and the graphical presentation
of the result.
The measuring speed can be increased even
more, if you take advantage of the features
that are available over the GPIB. These in
-
clude commands for turning off the display
update, etc. In this way you can reach speeds
High-Speed Measurements 4-3
Exercises

 Loading...