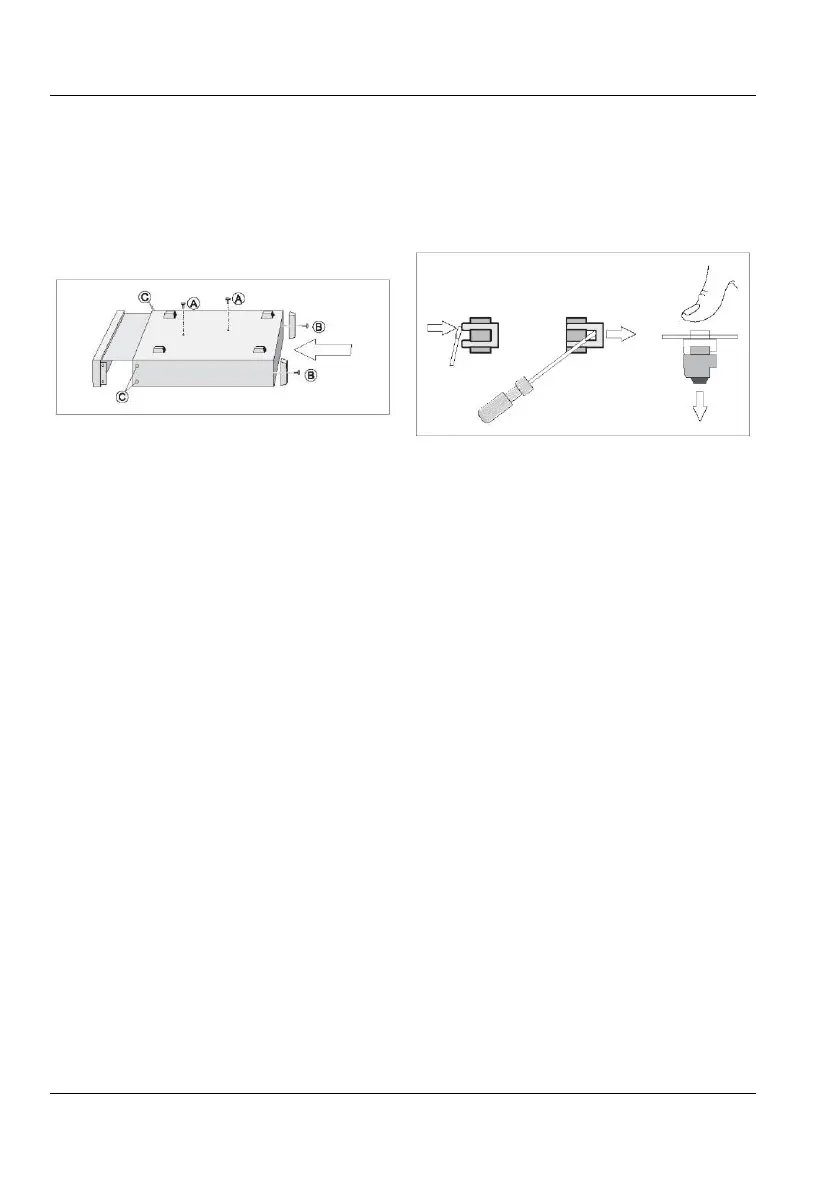
■ Assembling the Rackmount Kit
— Make sure the power cord is
disconnected from the instrument.
— Turn the instrument upside down.
Remove the screws and push the counter
out of the cover.
Undo the two screws (A) and remove
Remove the rear feet by undoing the
two screws (B).
Remove the four decorative plugs (C)
that cover the screw holes on the right
and left side of the front panel.
Grip the front panel and gently push at the
rear.
Pull the instrument out of the cover.
Remove the four feet from the cover.
Use a screwdriver as shown in the following
illustration or a pair of pliers to remove the
springs holding each foot, then push out the
feet.
Removing feet from the cover.
Push the instrument back into the cover.
Mount the two rear feet with the screws
(B) to the rear panel.
Put the two screws (A) back.
Fasten the brackets at the left and right
side with the screws included as illustrated
in Fig 1-6
Fasten the instrument in the rack via
screws in the four rack-mounting holes
The long bracket has an opening so that cables
for Input A, B, and C can be routed inside the
rack.
■ Reversing the Rackmount Kit
The instrument may also be mounted to the
right in the rack. To do so, swap the position
of the two brackets.
USER MANUAL ● CNT 9x Series ● Rev.22 February 2020



 To Next Page