MASTERTEMP 125 Pool and Spa Heater Installation and User’s Guide P/N 475114 Rev. F 8/2020
10 |
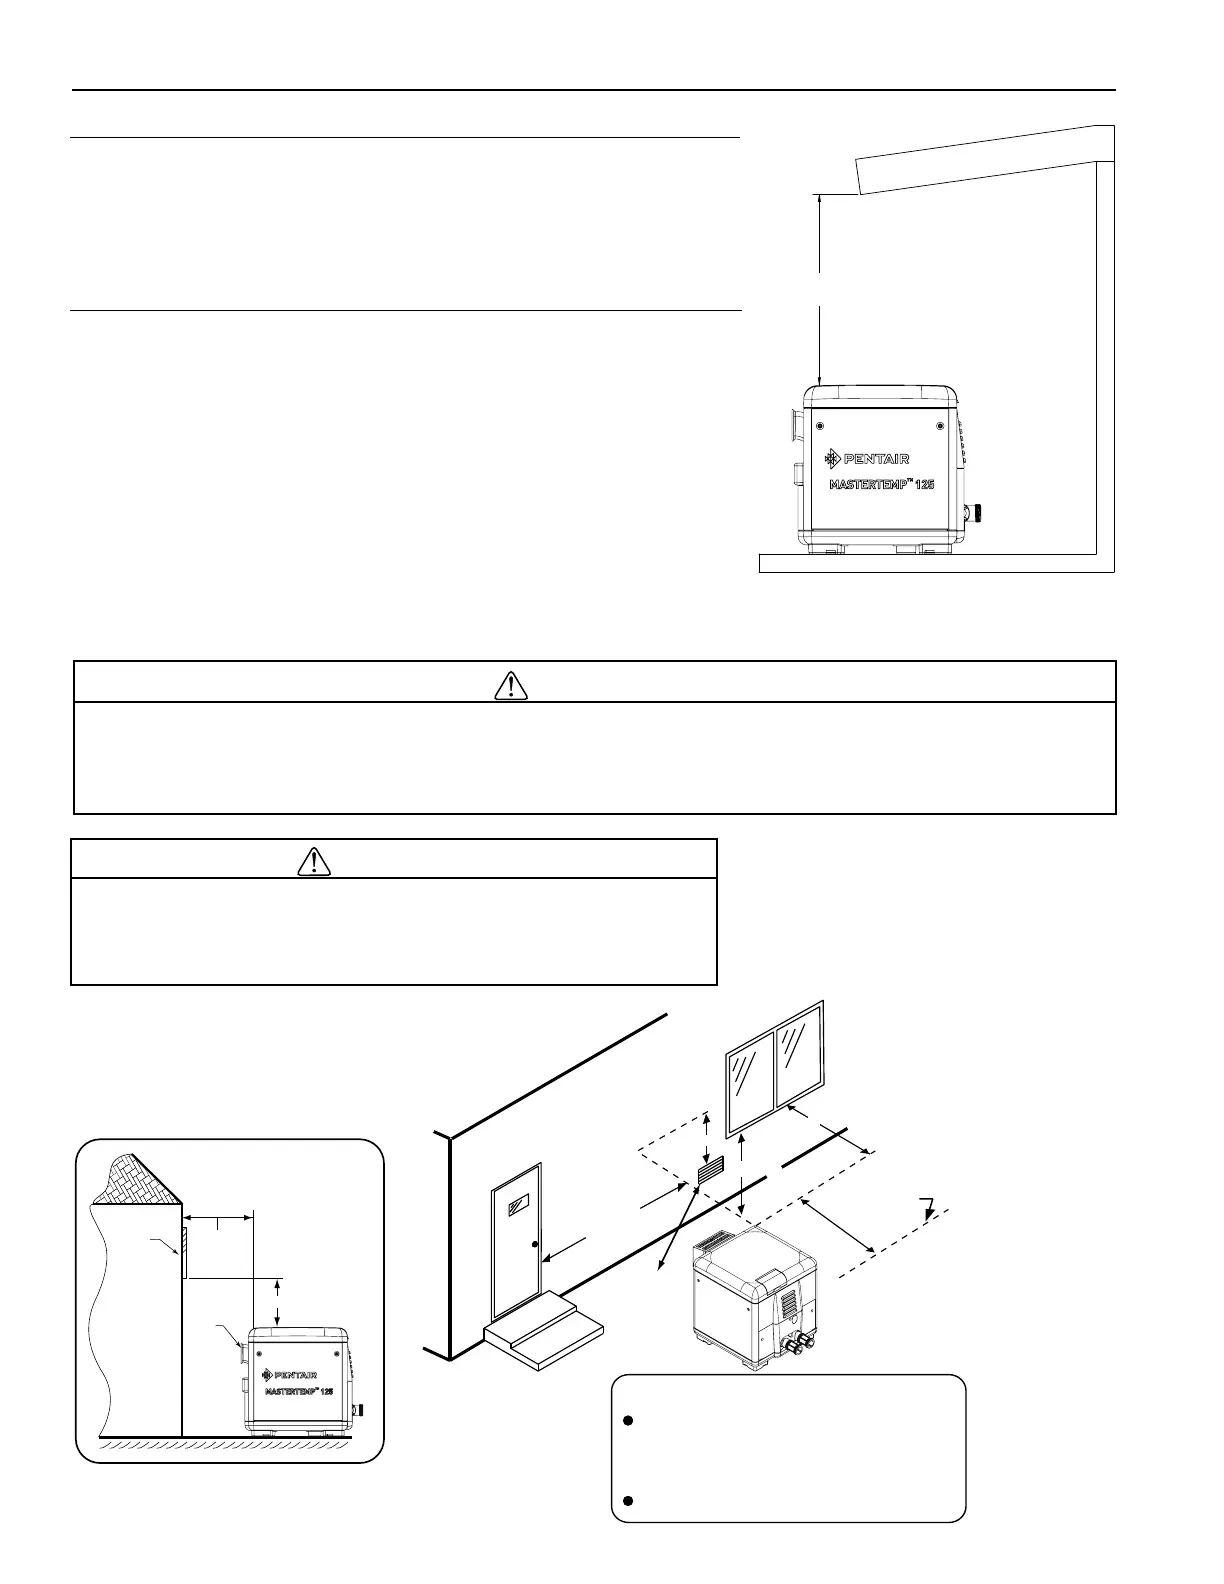
Figure 13.
HEATER CLEARANCES – OUTDOOR
IMPORTANT!
• In an outdoor installation it is important to ensure water is diverted
from overhanging eves with a proper gutter/drainage system. The
heater must be set on a level foundation for proper drainage.
• This unit shall not be operated outdoors at temperatures
below -29° C (-20
°
F).
If the heater is located under a roof overhang, there must be at least three
1 meter (3 feet) of clearance between the bottom of the overhang and the
top of the heater exhaust vent, see Figure 13. If the heater is under a roof
overhang, the space around the heater must be open on three sides. DO NOT,
under any circumstances, install the heater under ANY deck.
For minimum exhaust vent clearances for all building openings, including
but not limited to vented eaves, doors, windows, gravity air inlet, see
Figure 14. Orient the heater for convenient access to the water connections
and the gas and electrical connections.
Note: Check local building codes for installing the heater from any
property.
WARNING
Risk of fire and explosion. Do not spray aerosols in the vicinity of the heater while it is in operation. Chemicals should
not be stored near the heater installation. Combustion air can be contaminated by corrosive chemical fumes which
can damage the heater and will void the warranty.
CAUTION
If installing the heater next to or near an air conditioning unit or
a heat pump, allow a minimum of 92 cm (36 in.) between the air
conditioning unit and the heater.
VENTING GUIDELINES
OUTDOOR INSTALLATION
Vent Termination:
Must be installed at least 1500 mm away from
the building wall openings, and at the following
distances away from any door, window, or
gravity air inlet.
The heater must also have no obstructions above it.
Check local building codes
for setback requirements.
Force
Air Inlet
Property Line
1500 mm
1500 mm
1500 mm
1500 mm
SIDE VIEW
Building
Window
Exhaust Grill
(Vent)
1500 mm
1500 mm
Figure 14.
Section 1. Installation