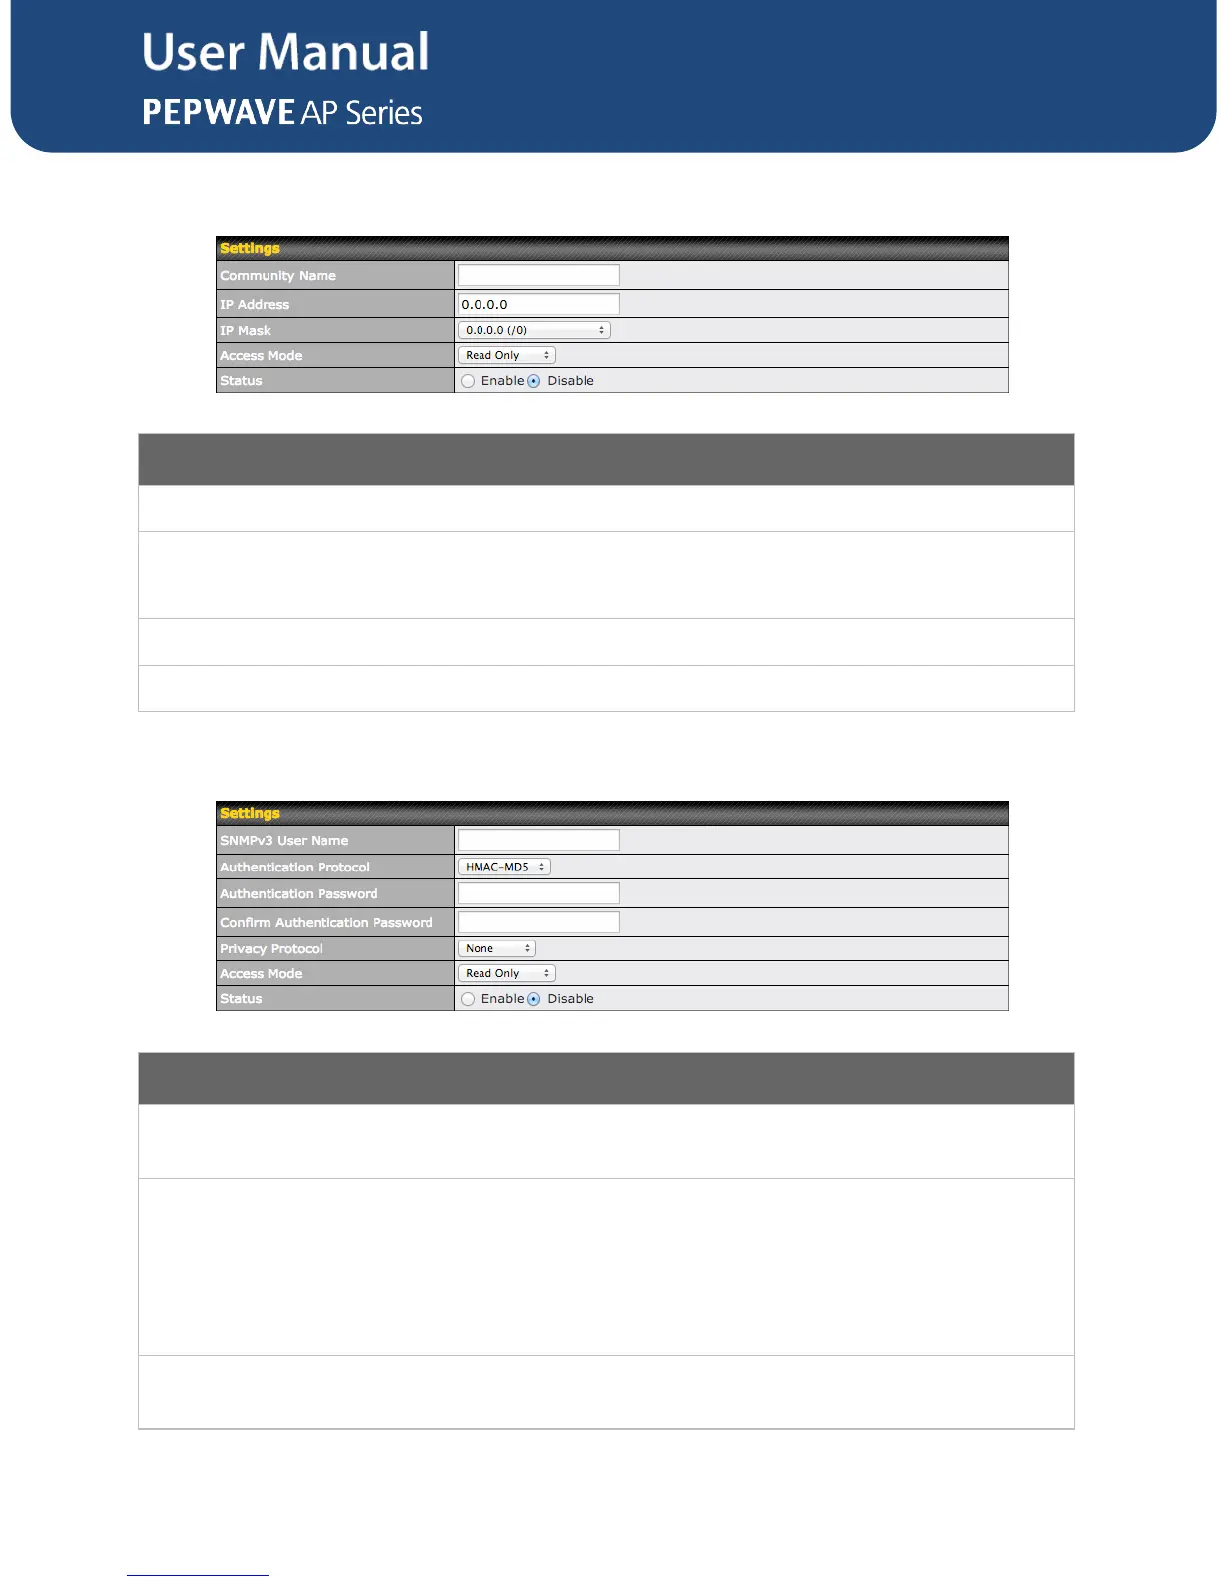
To add a community for either SNMPv1 or SNMPv2c, click the Add SNMP Community
button in the Community Name table, which displays the following screen:
Enter a name for the SNMP community.
These settings specify a subnet from which access to the SNMP server is allowed.
Enter the subnet address here (e.g., 192.168.1.0) and select the appropriate subnet
mask.
Select Read Only or Read and Write as the SNMP community access mode.
Use these controls to enable or disable SNMP community access.
To define a user name for SNMPv3, click Add SNMP User in the SNMPv3 User Name
table, which displays the following screen:
Enter a user name to be used in SNMPv3.
Select one of the following valid authentication protocols:
NONE
HMAC-MD5
HMAC-SHA
When HMAC-MD5 or HMAC-SHA is selected, an entry field will appear for the
password.
Enter a password to use with the selected authentication protocol.