VARIABLE SPEED CONTROL WHEEL – cont’d
TRIGGER SWITCH
The trigger switch turns the jigsaw ON and
OFF.
1.
To turn the jigsaw ON, squeeze the
trigger switch (1) (Fig. 10).
2.
To turn the jigsaw OFF, release the
trigger switch.
LOCK-ON BUTTON
Your jigsaw is equipped with a lock-on
feature, which is convenient when continuous
cutting for extended periods of time is
required (Fig. 11). To lock the switch ON,
depress the trigger switch (1), push in and
hold the lock-on button (2) located at the left
side of the handle, then release the trigger.
Release the lock-on button and your jigsaw
will continue running. To turn the jigsaw OFF,
depress and release the trigger switch to
release lock.
INSTALLING THE VACUUM ADAPTOR
To reduce the amount of loose sawdust
produced while cutting, a workshop vacuum
can be attached to the jigsaw by using the
vacuum adapter supplied with the jigsaw.
To install the vacuum adapter (1), insert the
adapter into the vacuum port (2) in the rear of
the jigsaw housing (Fig. 12).
NOTES:
a) The vacuum adapter is slightly tapered. If
the adapter is too large to be inserted into the
vacuum port, insert the opposite end of the
adaptor into the vacuum port.
a) Twist the adapter slightly as it is pressed
into the vacuum port to ensure it is fully
inserted.
VACUUM PORT SWITCH
During normal use without the vacuum
adaptor installed, the vacuum port switch (1)
must be slid toward the front of the tool
(Fig. 13). This will allow the internal motor fan
to continuously blow the sawdust away from
the cutting mark. When the vacuum adaptor
is installed, the vacuum port switch must be
slid toward the rear of the tool. This positions
the internal baffle to divert the sawdust
through the vacuum port so it can be
evacuated by the workshop vacuum.
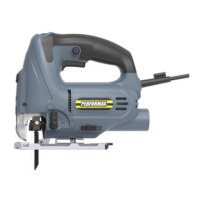
Fig. 9

 Loading...