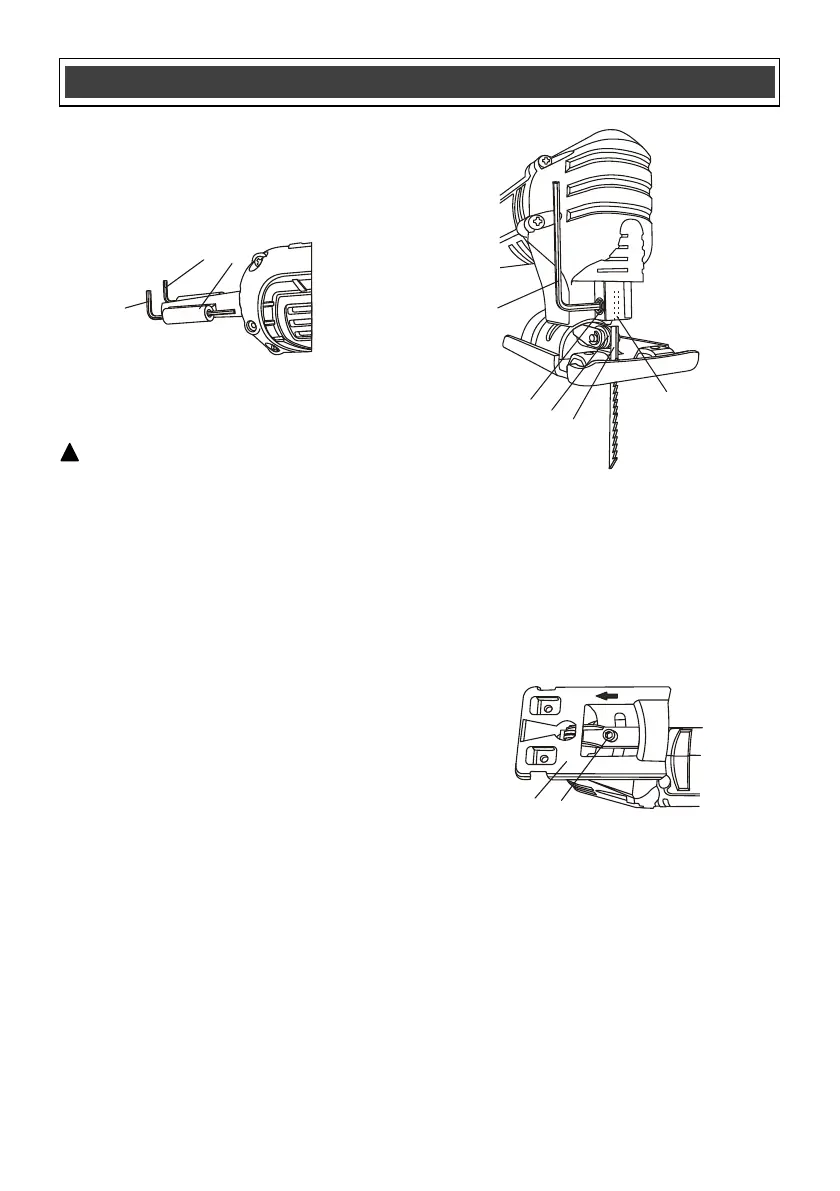
HEX KEY STORAGE
The 2.5mm hex key (1) for tightening the blade
clamp and the 3mm hex key (2) for adjusting the
bevel angle are stored in the cord guard at the
rear of the tool (3) (Fig. 1).
INSTALLING A BLADE
WARNING: Always remove the plug
from the power source before installing or
removing a blade or adjusting the detail saw
in any way.
1. To install a blade in the detail saw, loosen
the blade holder set screw (1) by turning it
counter clockwise approximatey one full
turn (Fig. 2).
NOTE: Use the 2.5mm hex key (2) that is
stored in the cord guard at the rear of the
tool.
2. Insert the appropriate blade (3) into the
blade holder slot (4) as far as it will go.
NOTE: Make sure the rear edge of the
blade is nested in the blade guide roller (5).
3. Firmly tighten the blade holder set screw
until the blade is firmly clamped in the
blade holder.
REMOVING A BLADE
To remove a blade, simply loosen the blade
holder set screw and remove the blade from the
blade holder.
NOTE: Let the blade cool down before
attempting to remove it. The blade will get very
hot during cutting.
SETTING THE BEVEL CUTTING ANGLE
Bevel cutting angles may be adjusted from 0° to
45° either left or right. To adjust the bevel angle:
1. Loosen the base pivot screw (1) until the
base (2) can be slid forward (Fig. 3).
NOTE: Use (3mm) hex key supplied.
2. Bevel angles (3) are marked on a scale
located on the side of the base (Fig. 4).
3. Slide the base toward the front of the detail
saw and align the bevel angle index mark
(4) with the desired bevel angle on the
base.
 Loading...