GENERAL CUTTING – cont’d
NOTE: Higher speeds will generally result
in smoother cuts, but will also generate
more heat and therefore shorten the life of
the blade.
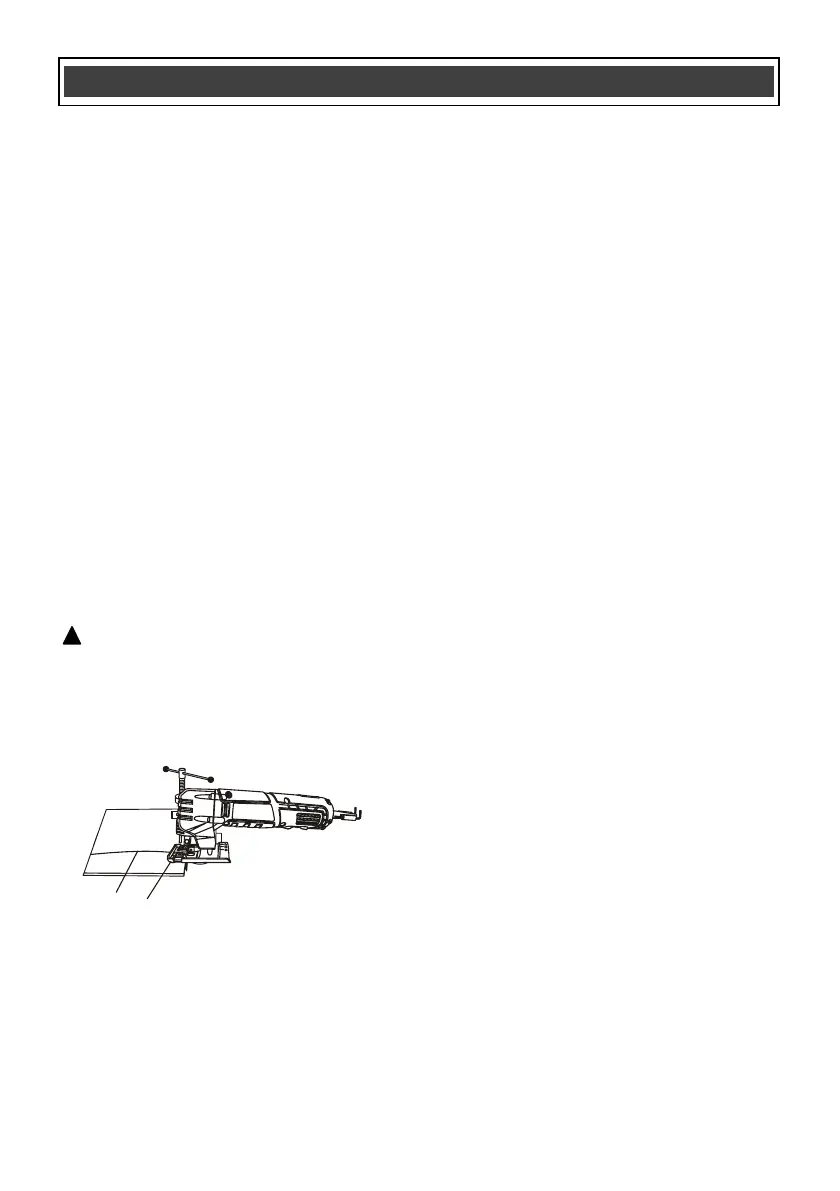
4. Rest the front of the detail saw base plate
(1) on the workpiece and align cutting edge
of the blade with the cutting line (2) on your
workpiece (Fig. 8). Make sure the power
cord is out of your way and not in the path
the blade will follow.
5. While firmly gripping the detail saw, and
with the blade NOT in contact with the
surface to be cut, start the detail saw by
turning the ON/OFF switch ON.
6. Once the detail saw has reached the
desired speed, gradually bring the moving
blade into contact with the workpiece at the
appropriate location.
NOTE: Apply enough downward pressure
to keep the detail saw steady and only
enough forward pressure to keep the blade
cutting freely.
CAUTION: Do not force the detail saw.
Use only enough force to keep the blade
cutting. Do not put sideways pressure on the
blade. Excessive or sideways pressure on
the blade will cause it to bend and twist,
which may result in breaking the blade.
BEVEL CUTTING
Bevel cutting angles may be adjusted from 0° to
45° either left or right. To adjust the bevel angle,
refer to Fig. 3 & 4.
NOTE: Remove the edge guide mounting
screws as shown in Fig. 7 when bevel cutting.
Once the cutting angle has been verified,
proceed with the cutting activity as outlined in
"GENERAL CUTTING" above.
 Loading...