Assembly and adjustments (continued)
Assemble the table accessories
The router table accessories include a moveable fence with a guard, a miter gauge, several table
inserts, and a safety pin.
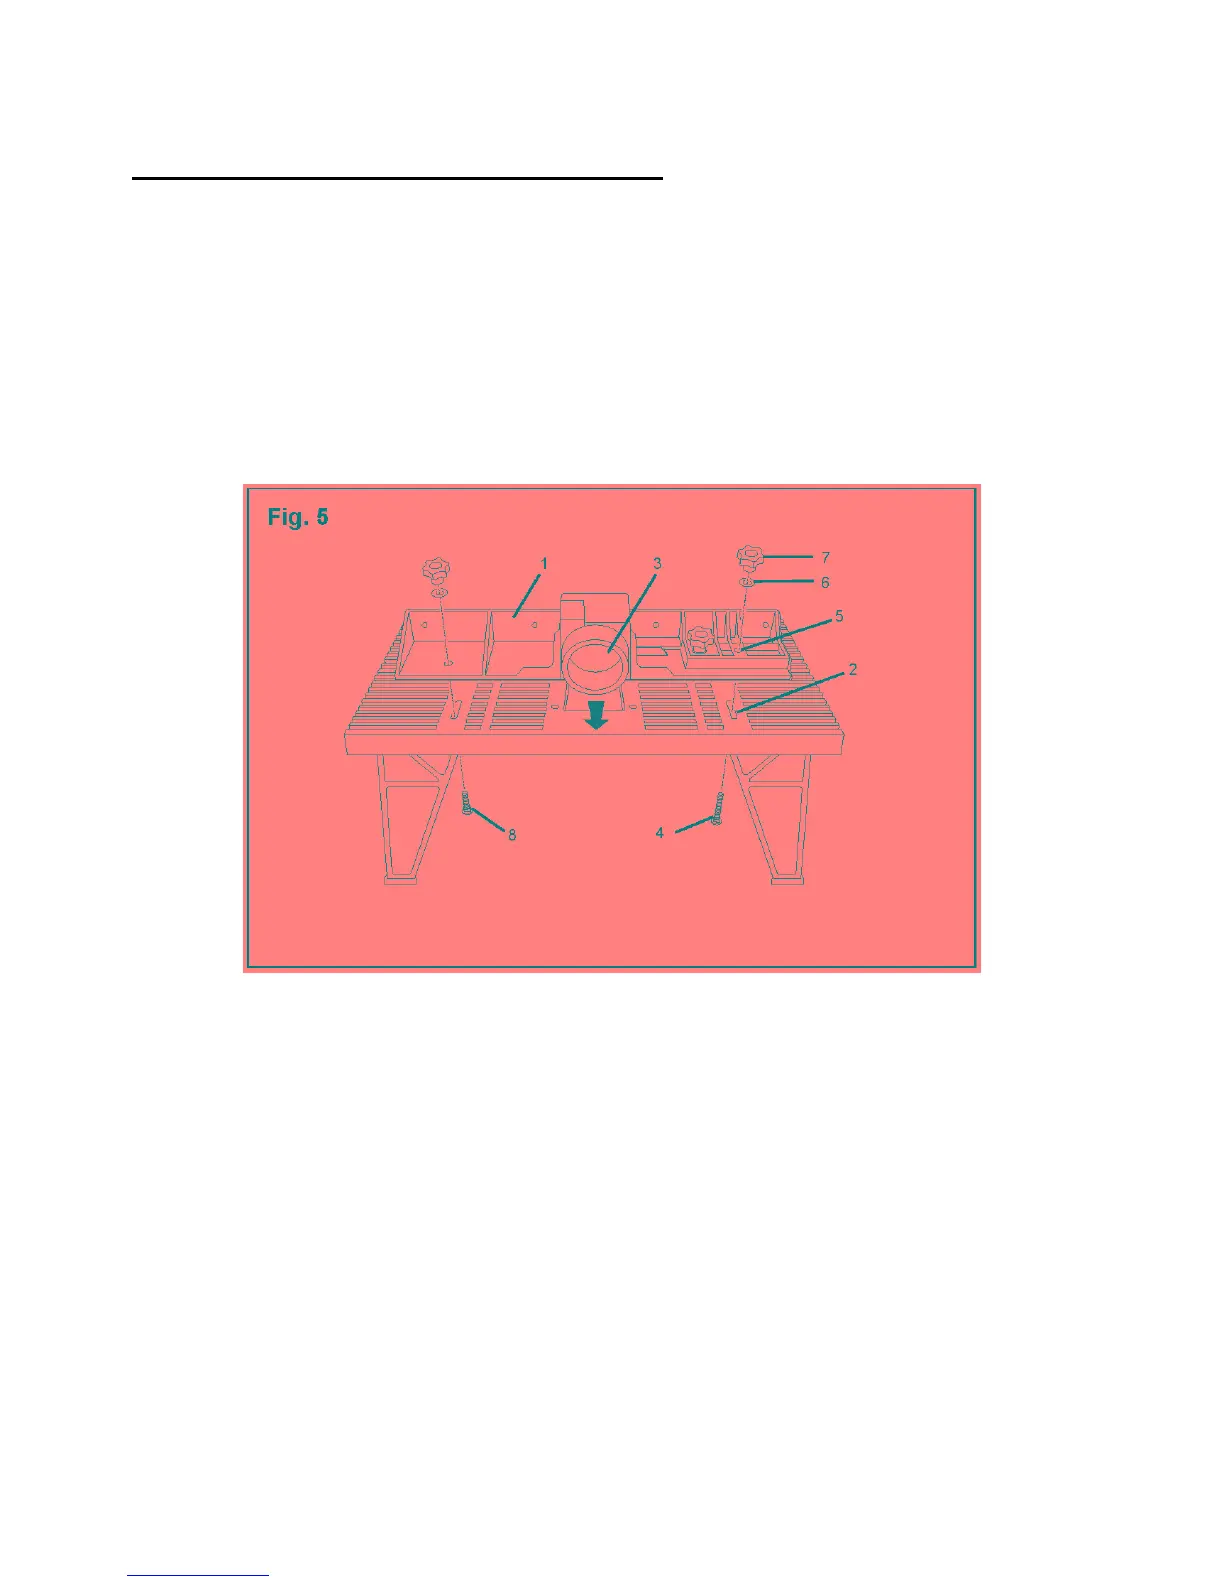
Attach the fence to the table (Fig. 5)
The plastic fence is moveable and attaches to the table through the two channel openings on the
table. Two sliding panels and a guard attach to the fence.
1. Place the router table so that you are facing the rear of the table.
2. Align the fence (1) over the channel openings (2) in the table. The large round opening on the
fence (3) should face the rear of the table.
3. Place the longest carriage bolt (4) through the channel opening (2) on the table and through the
hole (5) on the right side of the fence. Secure the bolt with a flat washer (6) and a large lock
knob (7).
4. Place the shorter carriage bolt (8) through the channel opening on the left side of the table and
through the opening on the left side of the fence. Secure the bolt with a flat washer and a large
lock knob.
13