Assembly and adjustments (continued)
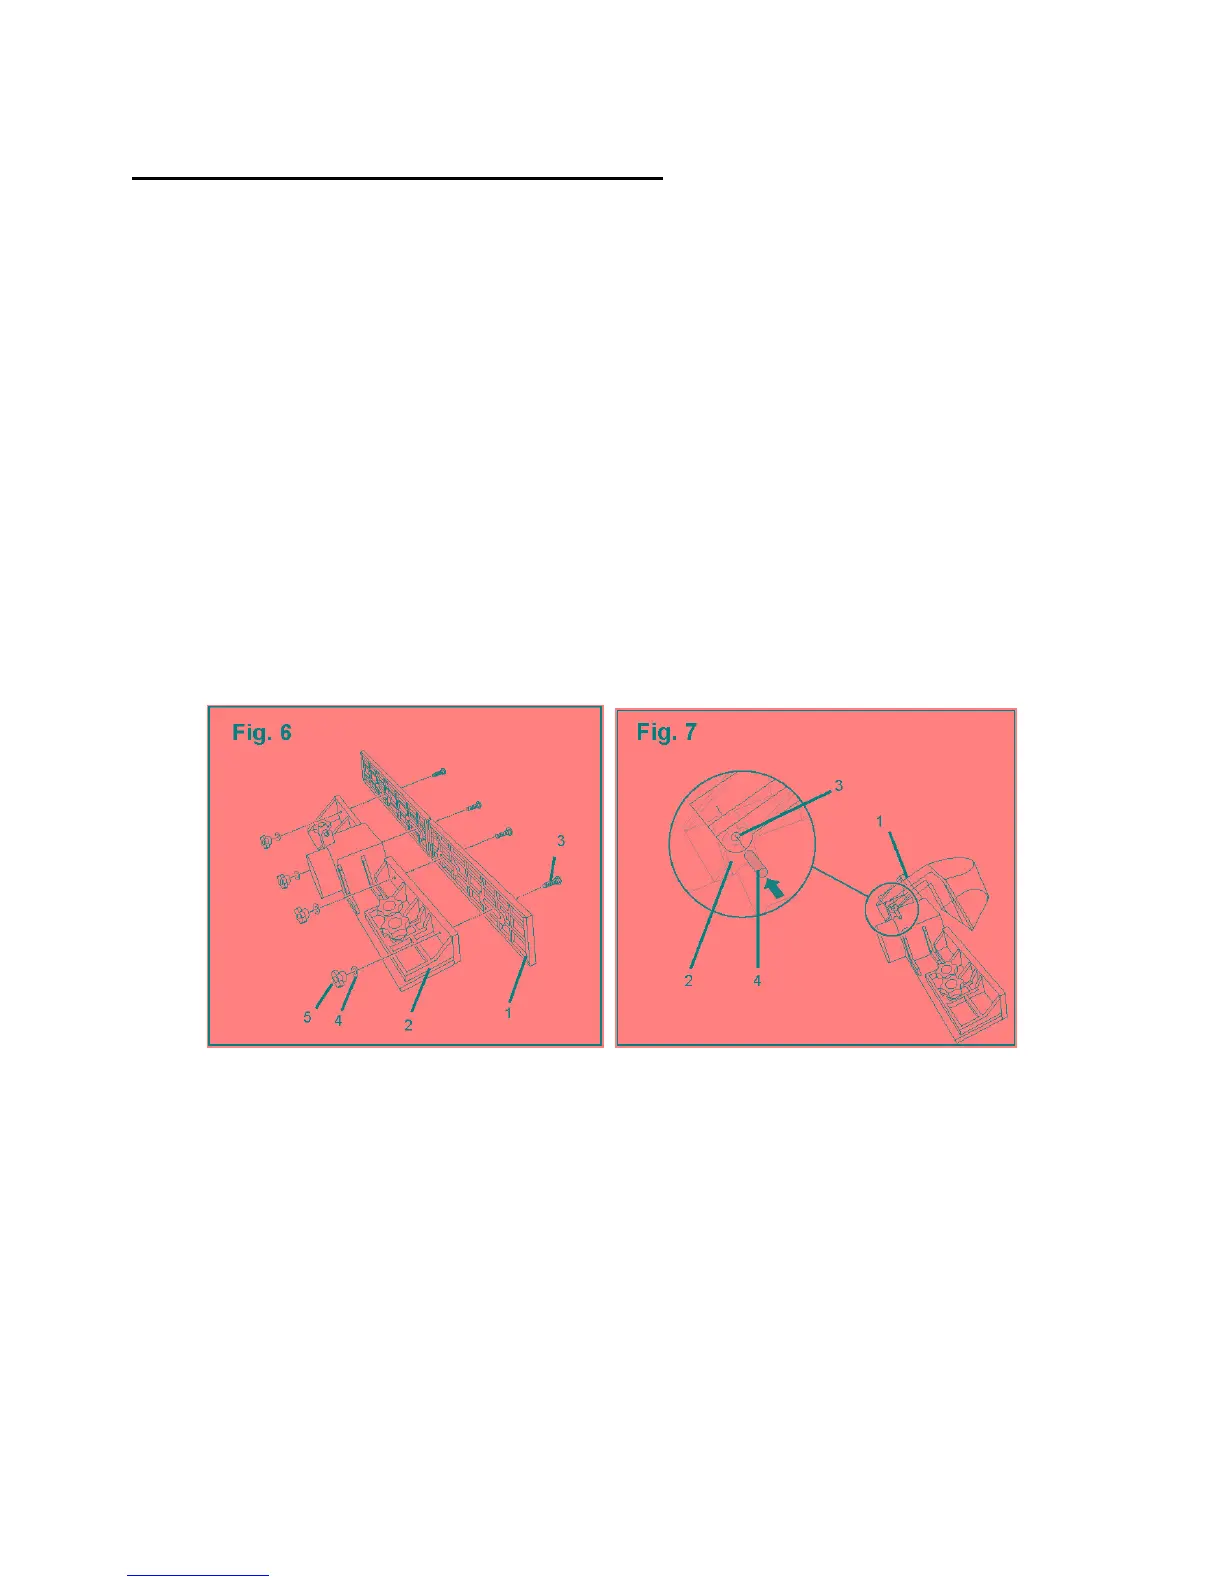
Attach the sliding panels to the fence (Fig. 6)
1. Place one sliding panel (1) along the front side of the fence (2) and align the channel openings
on the panel with the holes along the front of the fence.
2. Place a carriage bolt (3) through each of the two openings on the panel and secure each bolt
with a flat washer (4) and a small lock knob (5).
3. Repeat steps 1 and 2 to secure the second sliding panel to the fence.
Attach the guard to the fence (Fig. 7)
The guard protects the cutting edge of the router bit. A pin secures the guard to a support on the
fence. The guard will move freely when it is attached properly to the fence.
1. Place the arm of the guard (1) over the support base (2) on the fence.
2. Align the openings (3) on each side of the guard arm with the openings on the support base.
3. Slide the pin (4) through both sides of the guard arm and the support base on the fence. Tap
gently on the pin if needed to insert it through the support base.
14