Assembly and adjustments (continued)
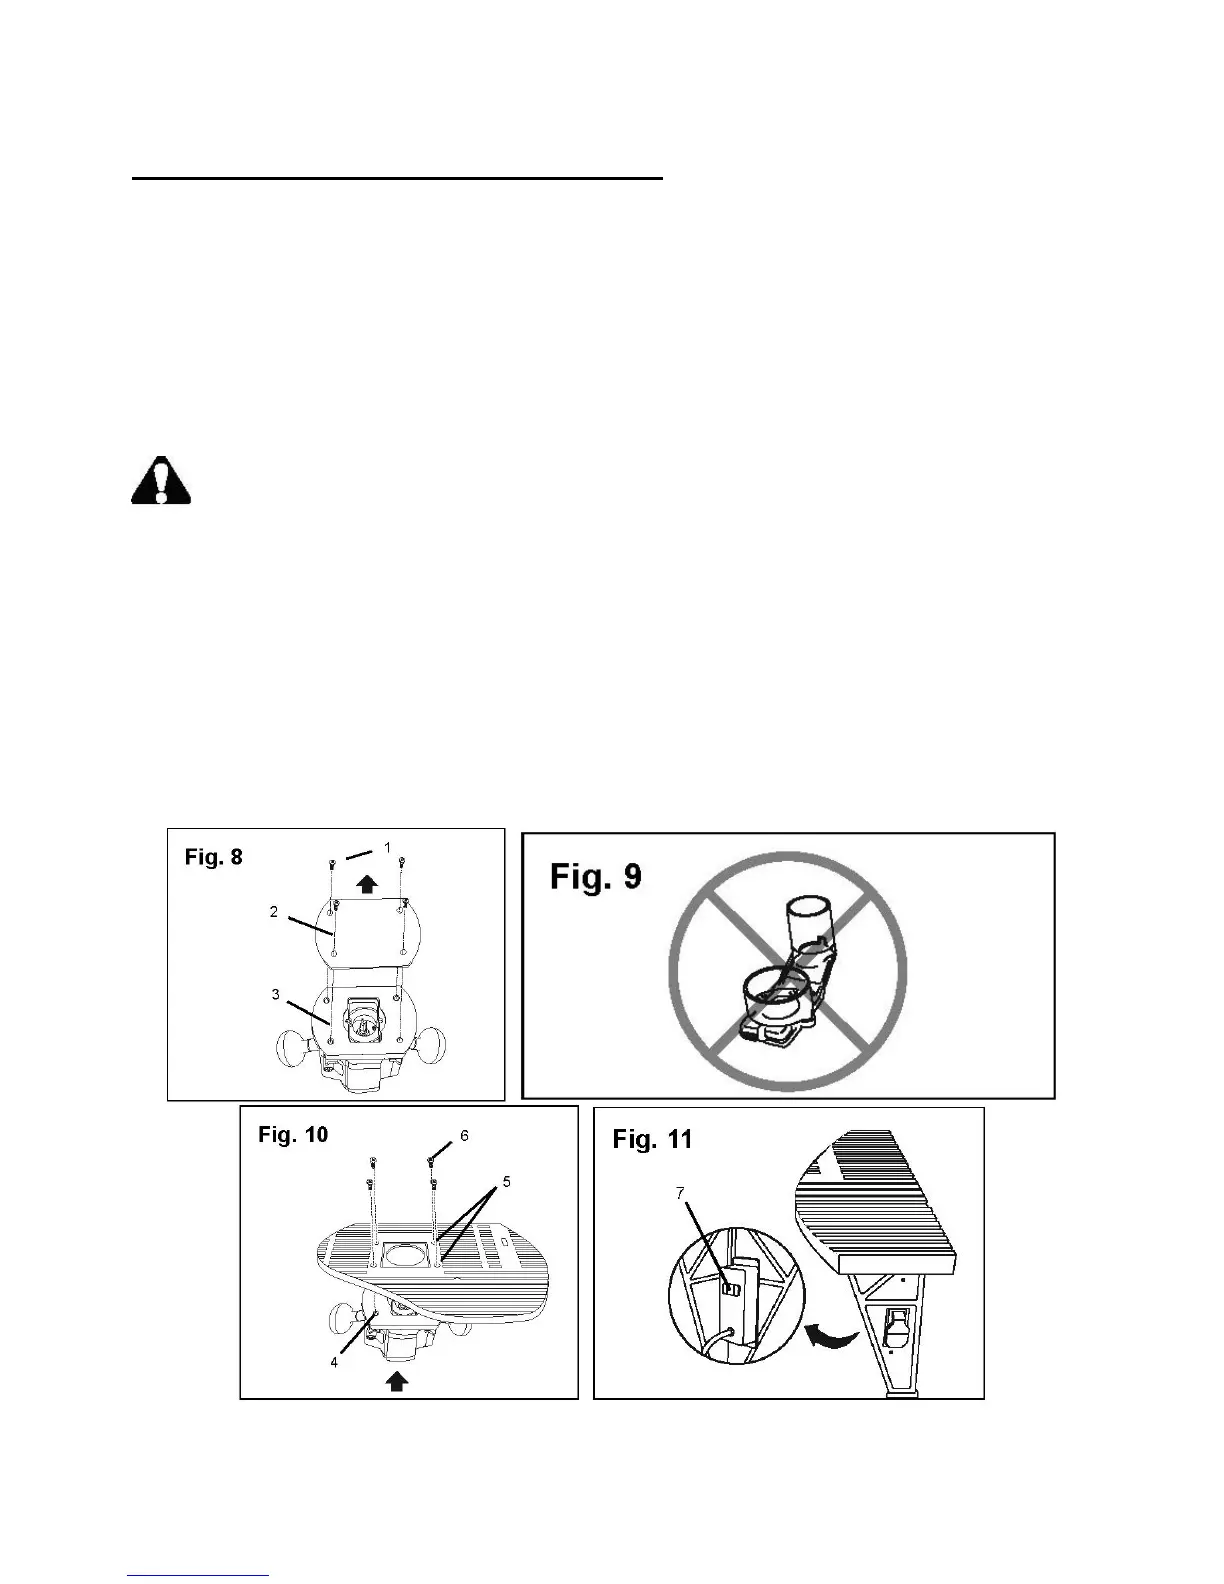
Attach the router to the table (Fig. 8–11)
The plunge router attaches to the underside of the router table and is secured by four bolts. Once
installed, the router power cord plugs into an outlet on the switch box. When properly installed, the
router table switch turns the router on and off.
Note: See the Plunge Router Instruction Manual for additional information on assembling and
using the router.
1. Remove the four screws (1) that hold the plastic protective plate (2) to the router plate (3).
2. Make sure the dust collecting attachment is not installed on the router (Fig. 9).
WARNING: Do not use the router dust collecting attachment when installing the router on
the router table.
3. Place the router under the table and align the four openings (4) on the router plate with the four
openings (5) on the table. Make sure the front of the router faces the front side of the router
table (Fig. 10).
4. Secure the router to the table with four brass flat head Phillips® screws (6). Make sure the
router is securely attached to the table before continuing.
5. Make sure the switch on the front right leg is in the OFF (down) position.
6. Plug the router power cord into the outlet (7) on the rear of the switch box. Secure the router
power cord so that it will not interfere with the operation of the router (Fig. 11).
15