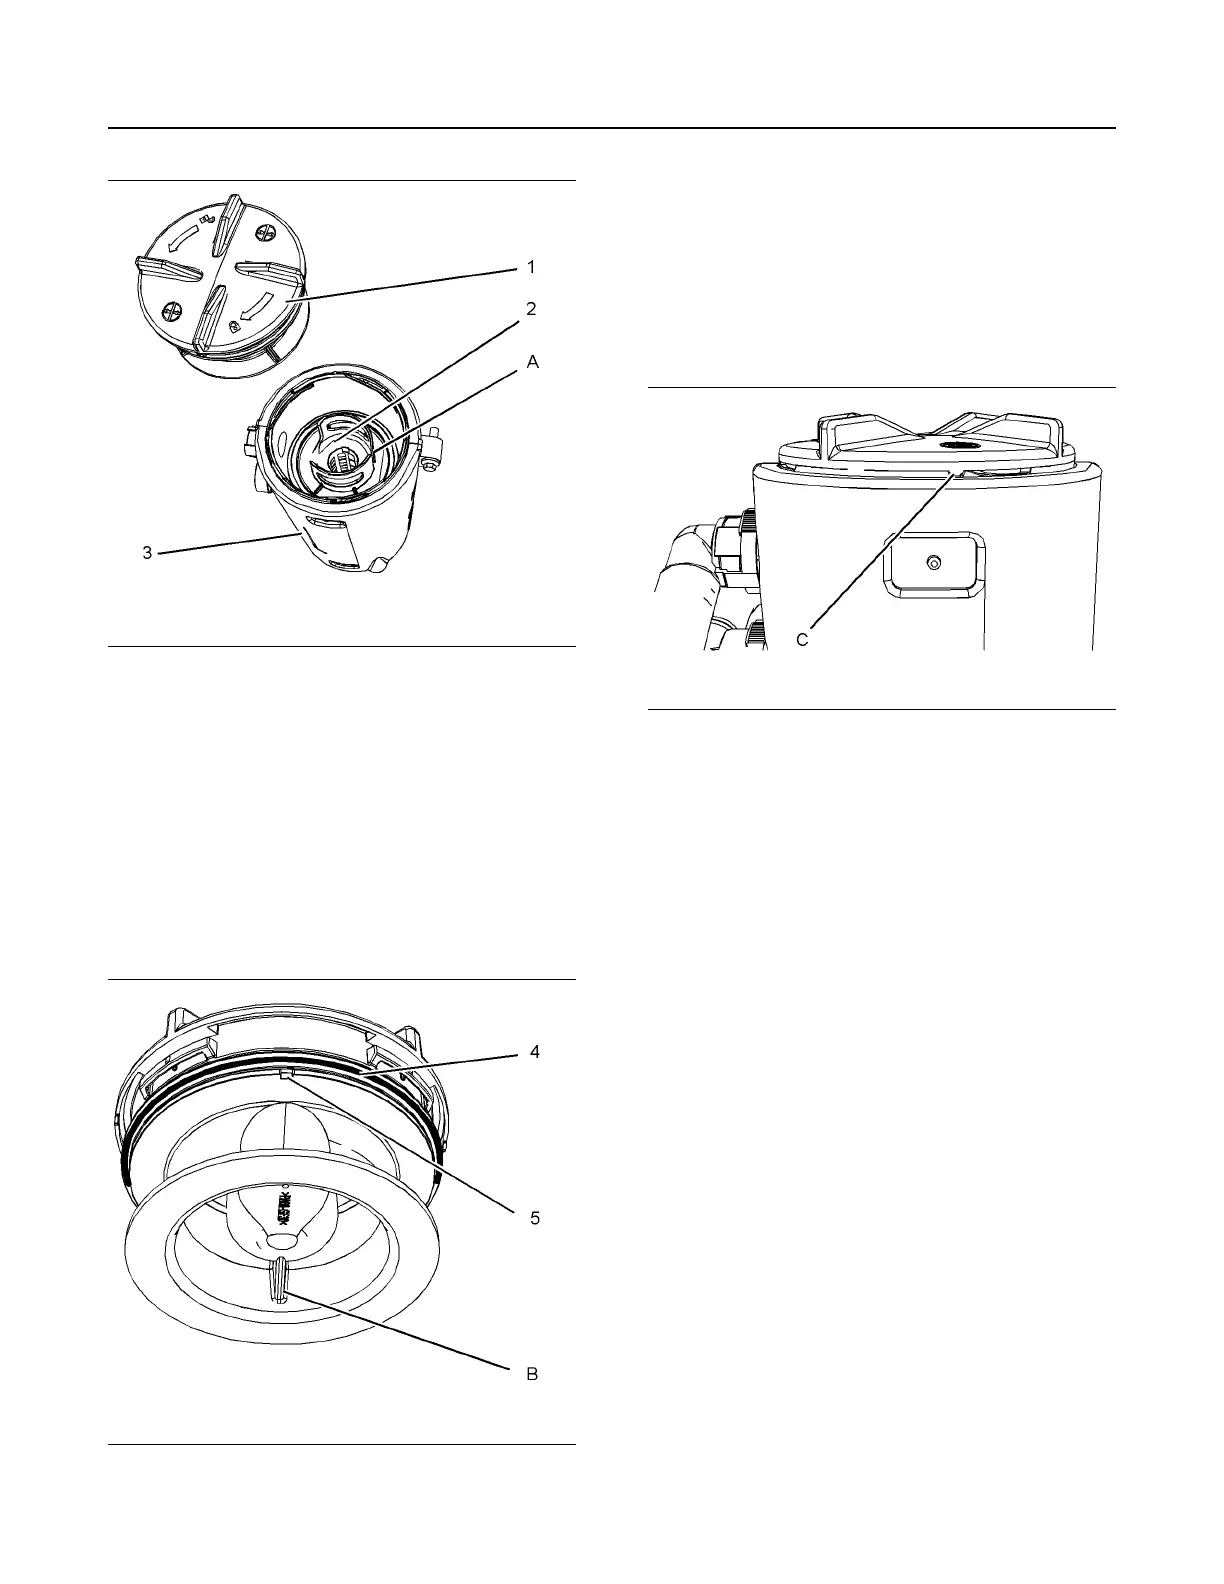
Illustration 68 g02415998
Typical example
1. Ensure that dirt cannot enter the breather
assembly. Ensure that the outside body of the
breather assembly is clean and free from damage.
Place a container under the breather assembly.
2. Rotate the cap (1) counterclockwise into the
unlocked position. Remove the cap from the body
of the breather (3).
3. Note the orientation of the filter element (2).
Remove the filter element .
Illustration 69 g01884135
(B) Alignment position
Note: The cut away from section (5) in the cap allows
access to the seal.
4. Remove the old seal (4) and install a new seal.
5. Install a new filter element into the breather body
(3) and orient the filter element so that position (A)
is aligned. Refer to illustration 68 . Align position
(A) on the filter element to position (B) on the cap.
Illustration 70 g02415999
Typical example
6. Install the cap (1). Rotate the cap by hand
clockwise until the cap locks into the locked
position C on the breather body.
7. Remove the container.
118
SEBU9063-07
Maintenance Section
Engine Crankcase Breather Element - Replace