Chapter 4 TPD1397EID
38
How to check the drive belt
Press down the belt with the thumb at the
centre of the longest free length and check
the deection (A). With moderate thumb
pressure - 45N (10 lbf) 4,5 kgf - the correct
deection of the belt is 10 mm (3/8 in).
How to adjust the belt tension
Caution: The alternator is driven by a
drive belt of a specic design. Use only a
Perkins POWERPART drive belt. If this is
not done, an early failure of the belt may
occur.
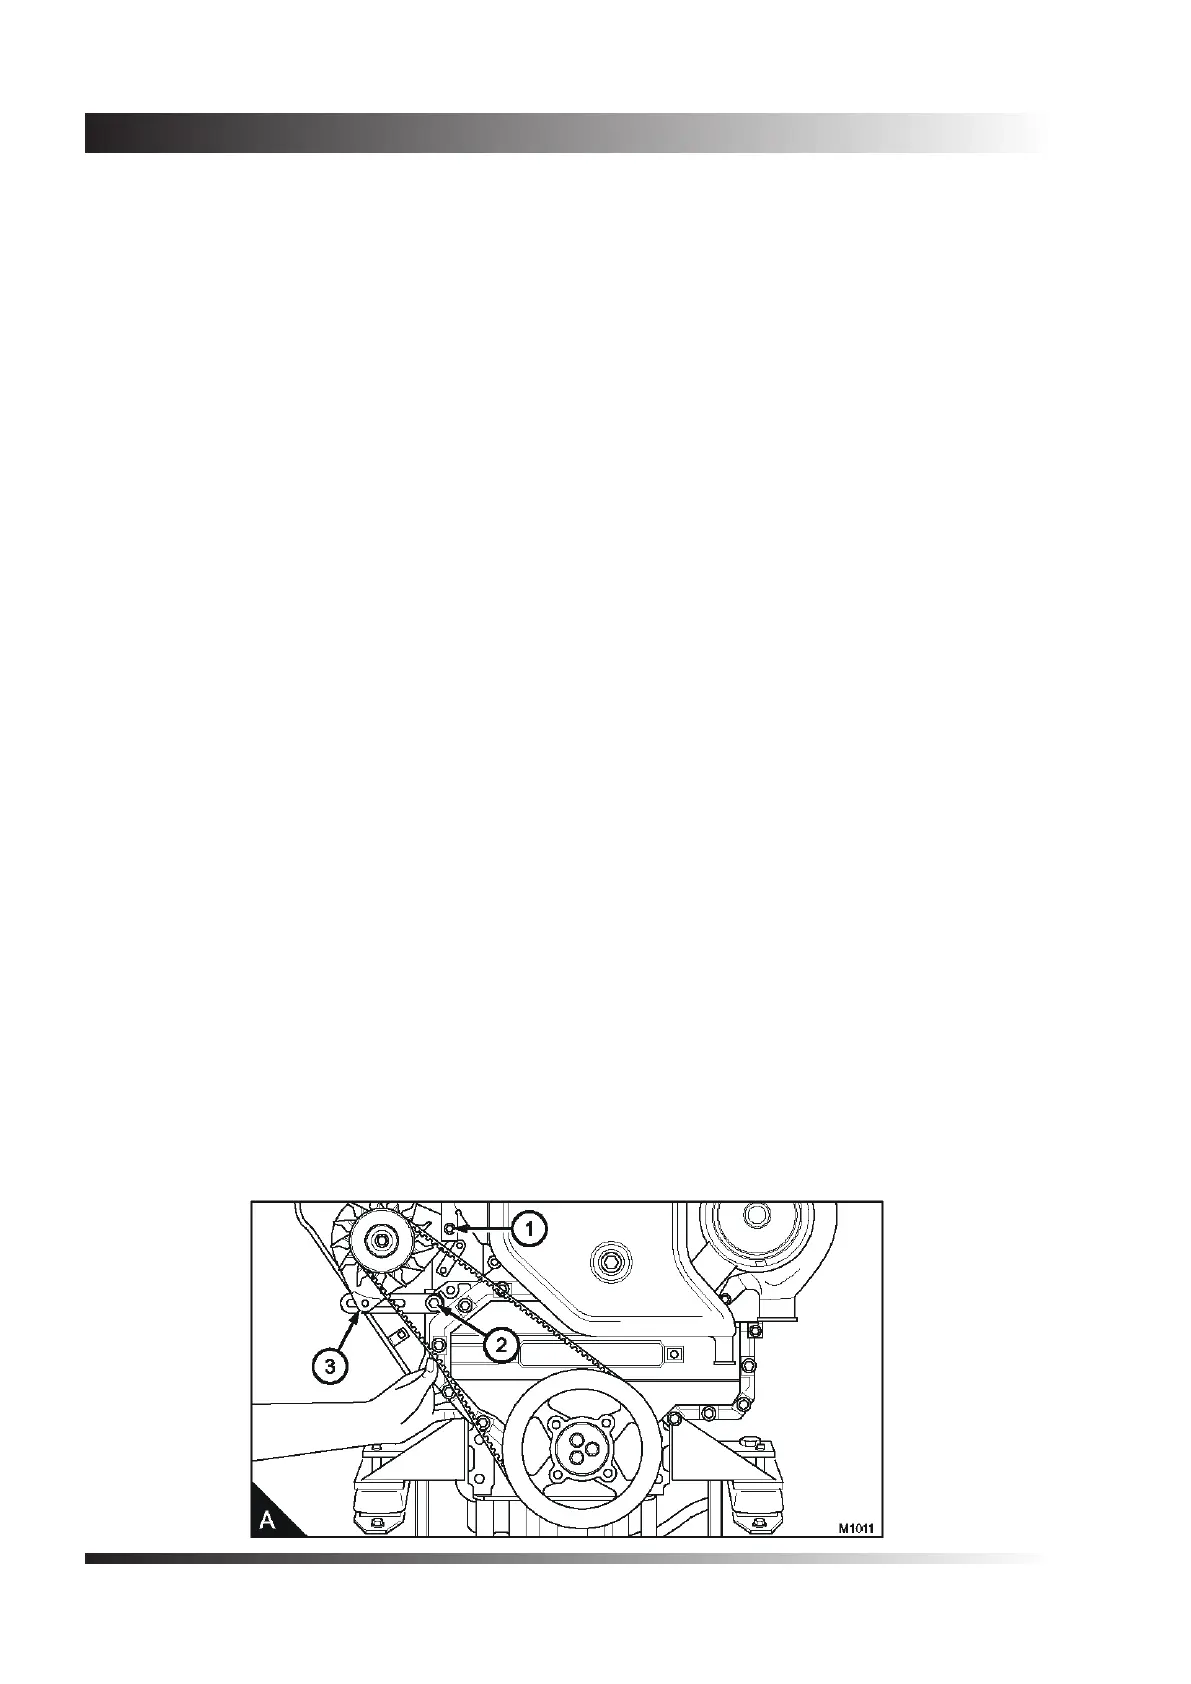
1. Loosen the pivot fastener (A1) of the
alternator and loosen the setscrews (A2)
and (A3) of the adjustment link.
2. Change the position of the alternator
to give the correct tension. Tighten the
pivot fasteners of the alternator and the
setscrew of the adjustment link.
3. Check the belt tension again to ensure
that it is still correct. If a new belt is tted,
the belt tension must be checked again
after the rst 25 hours of operation.
Come controllare la cinghia
trapezoidale
Premere la cinghia con il pollice al
centro del tratto sospeso più lungo e
controllare la essione (A). Esercitando
una pressione media del pollice - 45N, 4,5
kgf - la essione corretta della cinghia è
di 10 mm.
Come regolare la tensione della
cinghia
Attenzione: L’alternatore è azionato da
una cinghia trapezoidale di tipo specico.
Usare solo una cinghia di trasmissione
POWERPART Perkins. In caso contrario,
la cinghia potrebbe danneggiarsi
prematuramente.
1. Allentare il fermo orientabile (A1)
dell’alternatore e le viti di ssaggio (A2) e
(A3) del tirante di regolazione.
2. Modicare la posizione dell’alternatore
per ottenere la tensione corretta. Serrare i
fermi orientabili dell’alternatore e la vite di
ssaggio del tirante di regolazione.
3. Controllare nuovamente la tensione
della cinghia per assicurarsi che sia
ancora corretta Se viene montata una
nuova cinghia, la tensione deve essere
controllata di nuovo dopo le prime 25 ore
di funzionamento.
Controleren van de aandrijfriem
De riem met de duim in het midden van
de langste vrije lengte indrukken en
de doorbuiging (A) controleren. Bij een
gemiddelde duimdruk - 45 N / 4,5 kgf - is
de correcte doorbuiging van de snaar 10
mm.
Afstellen van de aandrijfriem
Voorzichtig: De wisselstroomdynamo
wordt aangedreven door een speciaal
type aandrijfriem. Gebruik uitsluitend een
Perkins POWERPART aandrijfriem. Indien
dit niet gebeurt, kan de aandrijfriem eerder
defect raken.
1. Maak de scharnierbevestigingen
(A1) van de wisselstroomdynamo en
de klembouten (A2) en (A3) van de
verstelbare steun los.
2. Zet de wisselstroomdynamo zo dat
de juiste spanning wordt verkregen.
Haal de scharnierbevestigingen van de
wisselstroomdynamo en de verstelbare
steun aan.
3. Controleer opnieuw of de riemspanning
nog steeds correct is. Wanneer een
nieuwe riem wordt aangebracht, moet de
riemspanning na de eerste 25 werkuren
opnieuw worden gecontroleerd.