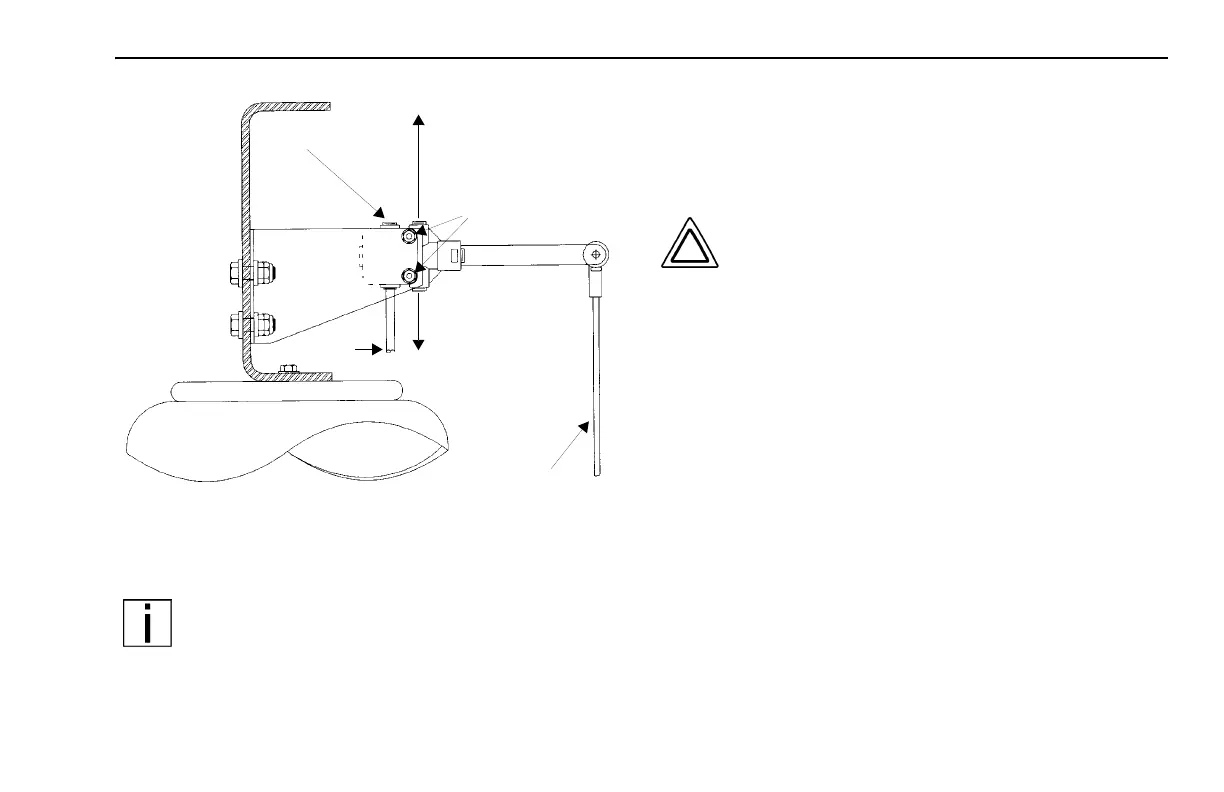
SUPPLY FROM FORWARD
AIR TANK
DELIVERY TO RH AIR BAG(S)
DELIVERY TO LH AIR BAG(S)
MOUNTING NUTS
AIR BAG
LINK ROD
EXHAUST
02941B
PART 7: STARTING & OPERATING THE VEHICLE SETTING RIDE HEIGHT
(R10/06) Y53-6007 – 111 –
Typical Height Control Valve (Rear View Looking Forward)
NOTES:
• At least one of the mounting holes in the height
control valve bracket will be slotted to permit
rotating the valve.
• On dual-valve systems, begin with the LH
valve on the next step.
2. Loosen the fasteners mounting a height control valve
to its bracket.
CAUTION:
• The rear of a vehicle will drop about 3 1/2
inches (88 mm) when the air springs are
deflated. Ensure that no persons or objects
that could be injured or damaged are under
the vehicle before deflating the air springs.
• To minimize risk of damage or injury, do not
use a dump valve to deflate the air springs.
Rotate the height control valve(s) manually
to ensure positive control of air spring
deflation.
• To minimize risk of injury, keep away from
air springs as they are being inflated.
3. Rotate the valve either clockwise or counterclockwise
until air pressure in the air springs provides the ride
height specified for that suspension. Measure the ride
height from the bottom of the frame rail to the approx
-
imate centerline of the rearmost drive axle hub: