PART 8: MAINTENANCE AND SERVICE ELECTRICAL
(R10/06) Y53-6007 – 181 –
1. Ensure that the hood is properly adjusted.
2. Ensure that the hood is closed and completely
latched.
3. Ensure that the tires are inflated to an on-highway set-
ting.
4. Ensure that the headlamp surfaces are clean and dry.
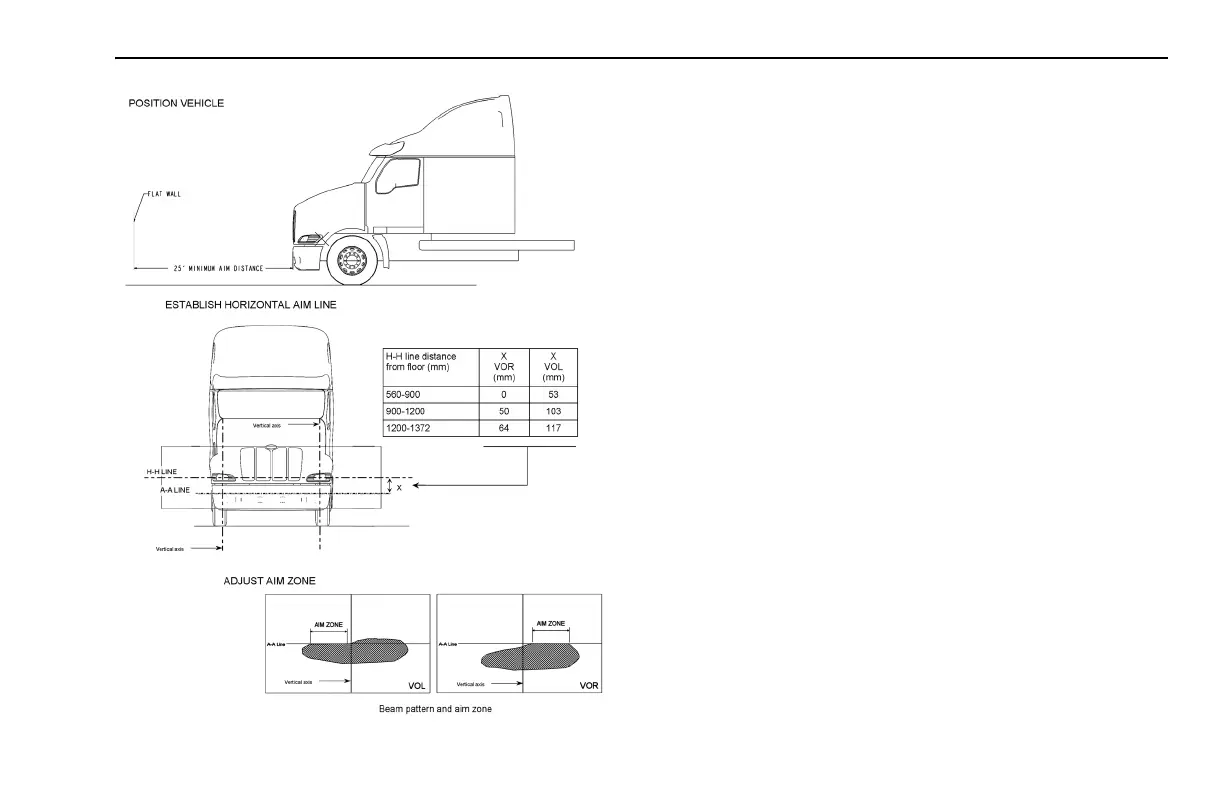
5. Establish a horizontal line, no more than 1 in. (2.5 cm)
wide, on a suitable aiming surface at the same height
above a level surface as the optical center of the
headlamp.. The optical center is identified on the
cover lens by a small dot. If a dot is not present, the
optical center is the center of the beam that is being
aimed.
6. .Determine the headlamp identifier from the cover
lens of the headlamp. Look for either the letters ‘VOL’
or ‘VOR’.
7. Establish a second horizonal line, no more than 1 in.
(2.5 cm) wide, below the H-H line. This is the A-A line.
8. .Turn the headlamp’s adjuster until the aim zone visi-
ble in the beam pattern is level with the A-A line on the
aiming surface; the lamp is now properly adjusted.