READ ALL INSTRUCTIONS BEFORE OPERATINGTHE
PRODUCT.
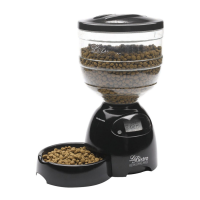
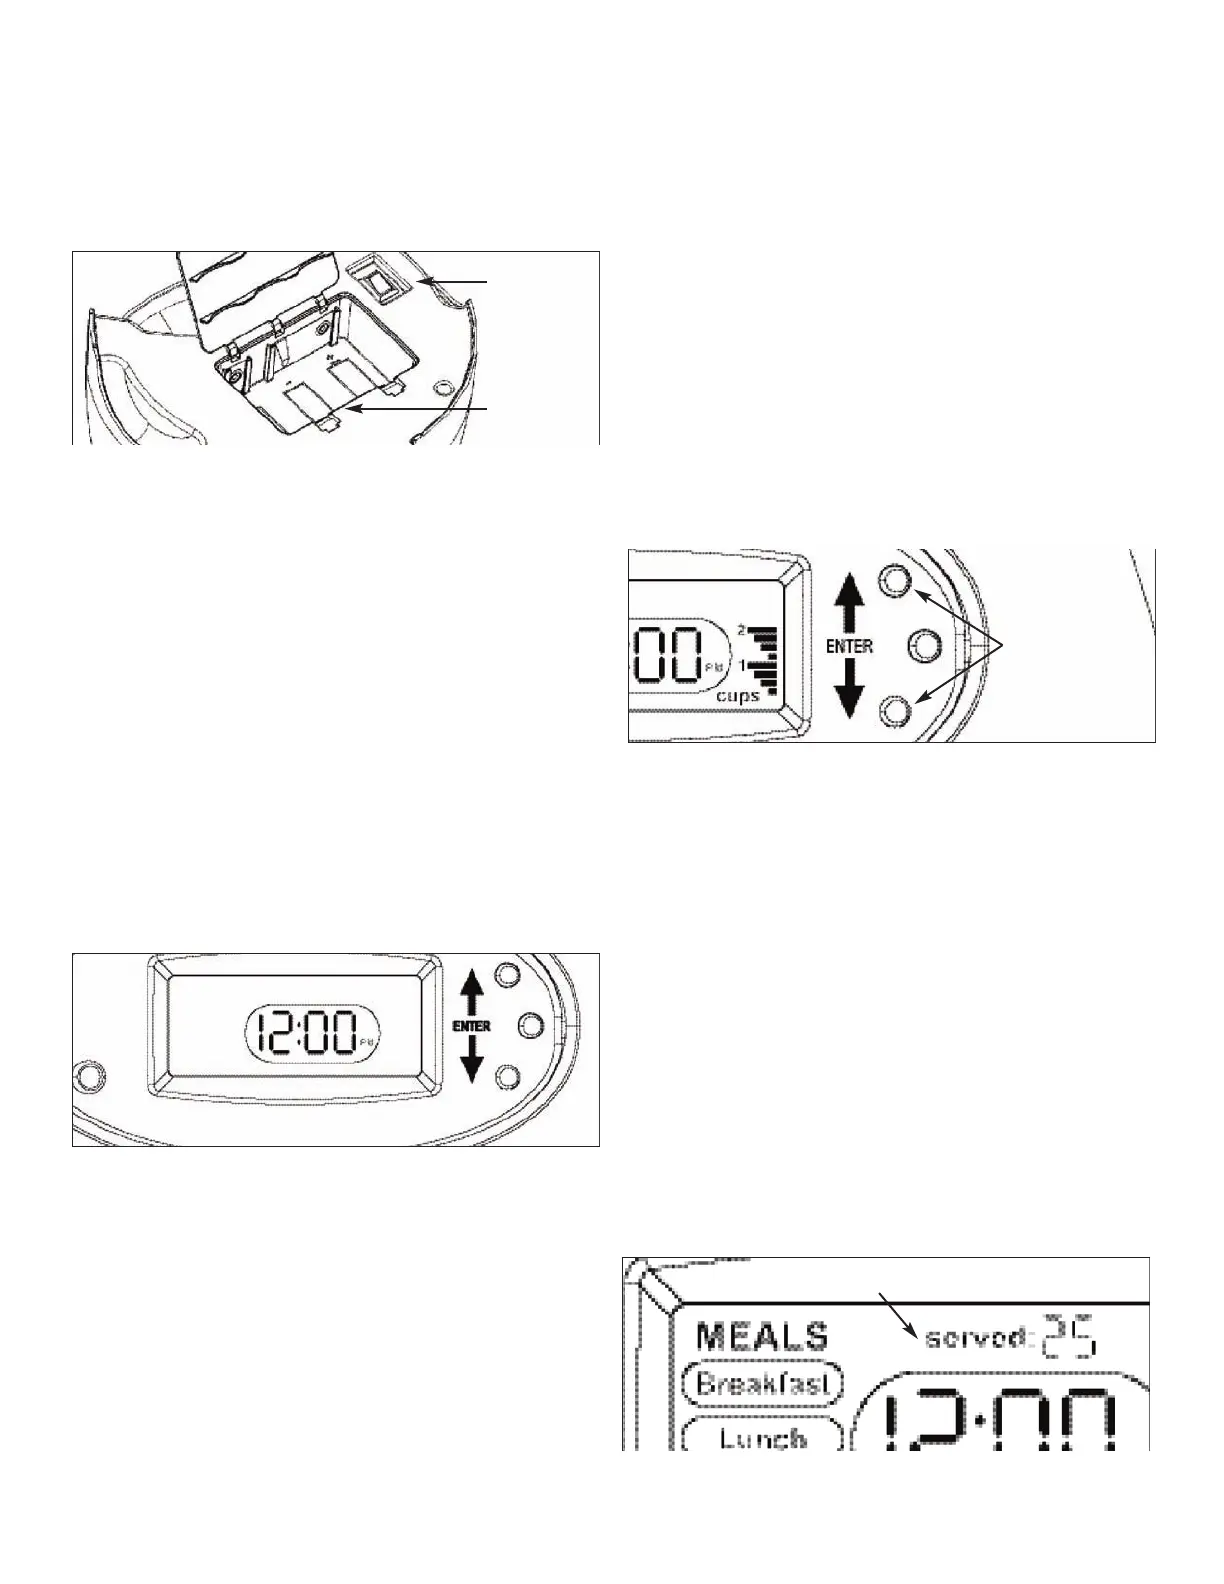
To Install Batteries:
1)Turn the base upside down and remove battery cover.
2) Install 3 new "D" cell, alkaline batteries.
(
Be sure to match positive and negative markings).
3) Replace battery cover. Be sure to "snap" in place.
ToTurn Unit ON:
1) Press the (-) side of the On/Off switch DOWN. (located on the bottom of the
base)
2) Set unit right side up. (LCD screen should be facing you)
NOTE: Clock will flash "12:00 A.M." automatically.
3) Press ENTER button to set current time. First the HOUR will be flashing.
4) Use UP or DOWN arrow buttons to set current HOUR. (until it is correct)
NOTE: the clock will automatically change to A.M. or P.M. as you scroll
through the hours.
5) Press ENTER button again and the MINUTES will start flashing.
6) Use UP or DOWN arrow buttons to set current MINUTES.
7) Press ENTER upon completion.
NOTE: Clock will be set after setting minutes and the unit is now in
AUTOMATIC MODE.
While setting current time, if the programming is not completed the Portion
Control LeBistro
®
waits until the current time is set and will not go into
AUTOMATIC MODE.
SETTING ANY MEAL, MEALTIME and MEAL SIZE:
To Set Meal Selection:
1) Press and Hold the ENTER button for 2 seconds. "MEALS" will flash.
2) Use UP or DOWN arrow buttons to select the desired Meal to be
programmed. (Breakfast, Lunch or Dinner will flash as UP and DOWN arrows
buttons are pressed)
3) Press the ENTER button after you select the Meal.
a) “Yes” will Flash. Press the ENTER if you want to set the meal time.
b) If you do not wish to set that meal time, press the DOWN arrow to select
“No” and press ENTER.
Note: (if “No” is selected, press ENTER and the software takes you back to
“MEALS”. Use UP or DOWN arrows buttons to select the desired Meal to
be programmed)
To Set MealTime:
After selecting the MEAL to be programmed and selecting "Yes", the HOUR
will flash.
1) Use UP or DOWN arrow buttons to set Meal HOUR. (until it is correct)
NOTE: that clock will automatically change to A.M. or P.M. as you scroll
through the Hours.
2) Press ENTER button again and the MINUTES will start flashing.
3) Use UP or DOWN arrow buttons to set Meal MINUTES.
4) Press Enter button when minutes are set.
The Menu will automatically take you to the "Meal Size"
programming.
To Set Meal Size:
After setting MealTime, the "Meal Size" Menu will flash. (right side of
display)
1) Use UP or DOWN arrow buttons to increase or decrease amount of food
to be dispensed. For example; to feed 1 cup meal size, press the UP arrow
button until 4 bars are displayed.
2) Press Enter upon completion. NOTE: Each bar equals approximately
1/4 cup.The maximum meal size you may select is 3 cups.
To Set Other Meals:
After any Meal has been programmed (inclusive of time and size) "MEALS"
will flash and Meals programmed will show on screen.
1) Clock will display current time.
2) REPEAT "Meal Selection" programming directions.
NOTE: if you only wish to set 1 Meal, press ENTER while “MEALS” is
flashing and unit will go into AUTOMATIC MODE.
PROGRAMMING COMPLETE
After all meals are set:
1) Press ENTER
NOTE: After programming of all meals in completed, press ENTER while
“MEALS” is flashing and unit will go into Automatic Mode.
Meals Served
"SERVED" will show on screen at all times.This indicates number of Meals
served. 1 digit equals 1 meal.
Meals served will go up to 99 and then reset at 00.
To re-set the "SERVED" counter; press UP and DOWN Arrow buttons
simultaneously and it will re-set to 00.
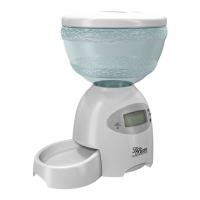
Battery Casing
O
n/Off Switch
Press Up or Down
Arrows to Program
Meal Size
Meal Served counts up to 99, then resets
Time must be set before set-up can continue
PROGRAMMING
 Loading...