22
1. When setting up a pantograph, you will use the
same steps as setting your quilt block (see above),
except you will repeat the pattern the desired times to
fi ll your pattern box (see page 34 under repeat).
2. After you have repeated the desired amount of
times, notice a few things:
a. Each pattern you have repeated has a green
circle at the beginning of the pattern and a red (X) at
the end of the pattern. You don’t want any circles or
(X)’s in the center of your repeats because this means
you will have jump stitches.
b. The machine will always move left to right,
if your circles are on the right and the (X) is on the
left, you will need to choose reverse path from the
edit menu. NOTE: It is important reverse the pattern
before you repeat it, or you will run into issues.
3. You are now ready to run (See pg 37 under “When
running a pattern”).
4. NOTE: Even though you are able to set up sev-
eral pattern boxes at one time, the system will only
run the pattern box you have showing on the screen.
Once that box is fi nished you will need to move to the
new screen to run the other pattern boxes you have
setup.
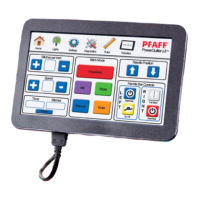
Setting up a Pantograph style pattern:
Circle for start, “X” for fi nish
 Loading...