Mechanical Instructions
EN 15L11M1.1L LA 4.
2011-Jun-24
back to
div. table
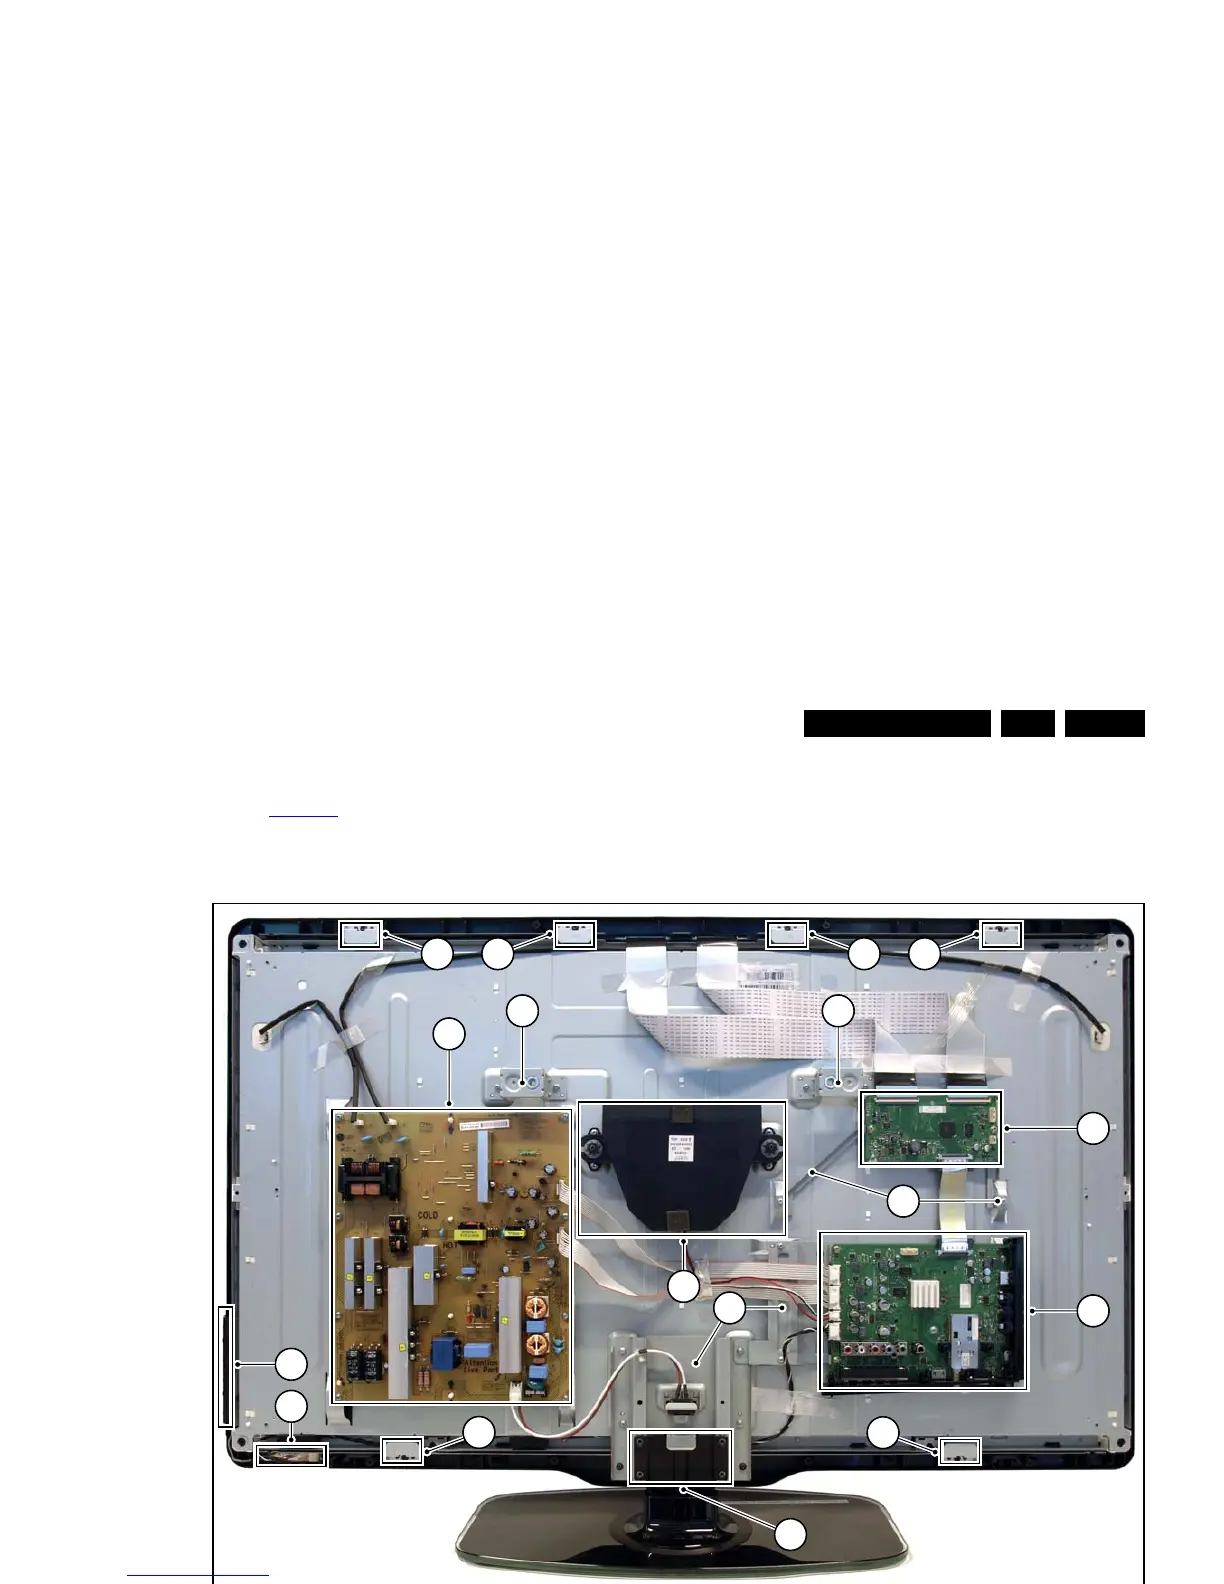
4.3.2 LCD Panel
Refer to Figure 4-6
for details.
1. Remove the Stand [A].
2. Remove the Speakers/Subwoofer [B].
3. Remove the PSU [C], SSB [D] and TCON (E).
4. Remove the IR/LED board [F].
5. Remove the Local Control board [G].
6. Remove the clamps [1].
7. Remove all metal subframes [2] that do not belong to the
LCD display.
Figure 4-6 LCD Panel removal (based on 40" model)
4.4 Assy/Panel Removal (Berlinale styling;
xxPFL5x06D/xx)
Instructions below apply to the 40PFL5606H/12 (European
model), but will be similar for other models.
4.4.1 Rear Cover
Refer to Figure 4-7
to Figure 4-9 for details.
Warning: Disconnect the mains power cord before removing
the rear cover.
1. Remove screw caps [1] that cover VESA screw holes.
2. Remove all fixation screws [2], [3] that secure the rear
cover.
3. Release the bottom catches [4], [5].
4. At the indicated areas [6] the cover is secured by clips. Be
very careful with releasing those.
5. Lift the rear cover from the TV starting from the bottom [7]
and tilt it vertically [8]. Make sure that wires and flat foils are
not damaged while lifting the rear cover from the set.
 Loading...