English
15
STANDBY
B
....................switches to Standby/On
SCAN ................................plays the first 10 seconds of each
track
SHUFFLE............................plays CD(RW) or program in
random order
REPEAT..............................repeat play
Number/alphabet keys 0 - 9
......................................- selects a track by number
- selects character for text input
TRACK INCR(ement) ........increases track numbers during
recording
SPACE................................inserts a space character during
text input
SCROLL..............................activates scrolling of text over the
display
CDR ....................................selects CD recorder deck
CD ......................................selects CD player deck
2 ......................................starts CD(RW) play
O ......................................- previous track (Play and Program
mode)
- cursor control in Menu/Prog.
review mode
P ......................................- next track (Play and Program
mode)
- cursor control in Menu/Prog.
review mode
9 ......................................stops CD(RW) and clears a
program
Q....................................searches backward
R....................................searches forward
; ......................................interrupts CD(RW) play/recording
MENU/STORE ..................- enters Menu mode
- stores Menu settings
PROG.(ram) ........................opens/closes program memory
ENTER................................- selects settings in Menu mode
- programs track numbers
- starts playback of selected track
CANCEL ............................- deletes tracks from a program
- deletes text in Menu mode
- returns to a higher level in the
menu
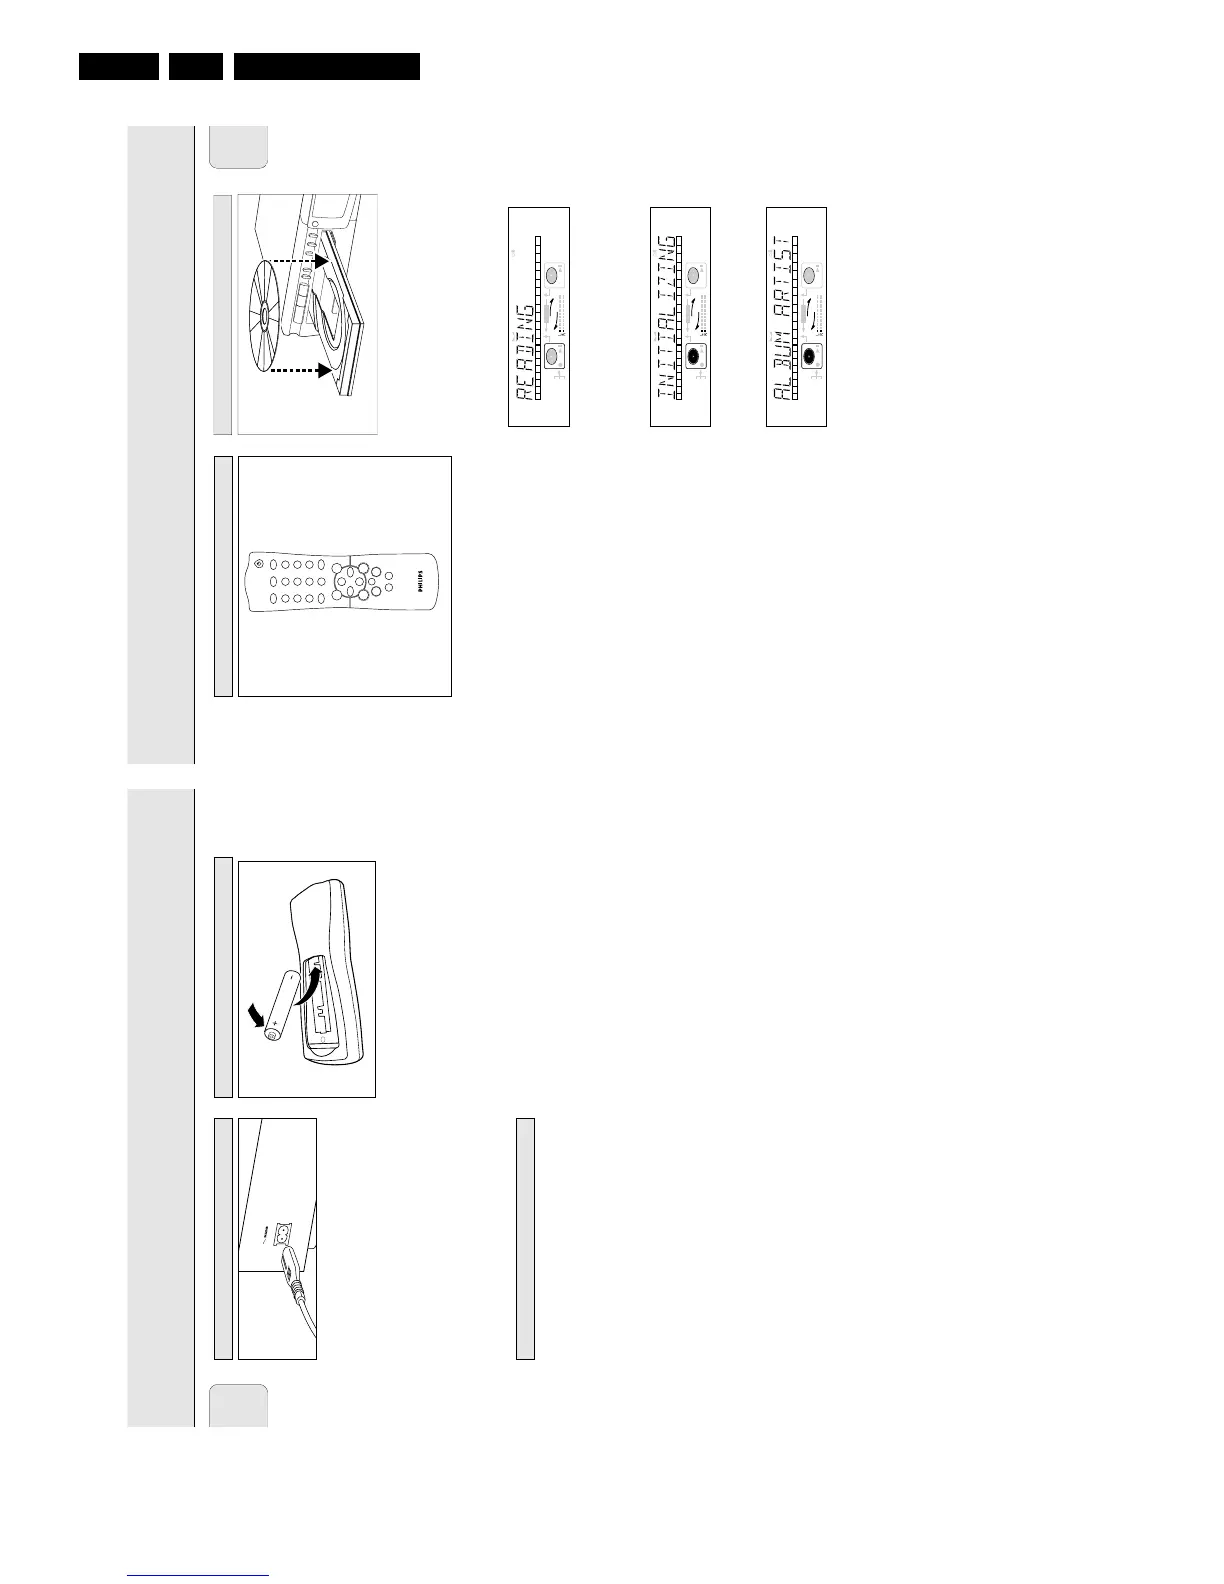
1 Press OPEN/CLOSE to open the disc tray.
➜ OPEN lights up.
2 Insert a CD, CDR or CDRW in the appropriate recess in the
tray, label side up.
3 Press OPEN/CLOSE to close the tray (see also Playing a CD).
➜ CLOSE lights up, followed by READING and the
display will show the type of disc you inserted.
•If you insert a blank or partly-recorded CDR or unfinalized
CDRW, the CD recorder will calibrate the disc for optimum
recording. During this process the display will first show
INITIALIZING and then the number of audio tracks.
Calibration can take up to 25 seconds.
• If a CDR(W) is finalized it will show
CD
on the display.
• If CD-text is available the TITLE/ARTIST will scroll by.
Note:
- Only Audio CDs will be accepted. If a non-audio disc is
inserted, the display shows
WRONG DISC/
USE AUDIO CD
.
- Reading an unfinalized disc in the CD recorder deck could
take approximately 1 minute.
- For recording it is important that the blank disc is completely
free from dust particles or scratches. (see maintenance).
English
14
1 Plug the power cord supplied into the MAINS connector on
the CD recorder, then into a mains socket.
2 Press ON/OFF.
➜ The CD recorder will switch on.
3 The recorder switches automatically to active mode.
Note: When the CD recorder is in the ‘OFF’ position, it is still
consuming some power. If you wish to disconnect your
player completely from the mains, withdraw the plug
from the AC outlet.
- Place the CD recorder on a solid, vibration free surface.
- Do not place the CD recorder near a source of heat or in
direct sunlight.
- Do not use the CD recorder under extremely damp
conditions.
- If the CD recorder is placed in a cabinet, make sure that a
2.5 cm space remains free on all sides of the CD recorder
for proper ventilation.
Important:
- Do not put the CD recorder on top of other equipment that
heats up the CD recorder (e.g. receiver or amplifier).
1 Open the battery compartment cover.
2 Insert 2 batteries (“AA”, LR-6 or UM-3; as supplied) as
shown.
3 Replace the cover.
Note: We recommend you use 2 batteries of the same type
and condition.
Batteries contain chemical substances, so they should
be disposed of properly.
Inserting batteries in the remote control
Setup recommendations
Power supply
INSTALLATION