Do you have a question about the Philips VR620CAT and is the answer not in the manual?
Registering product for maximum protection under warranty terms.
Card serves as proof of ownership for theft or loss.
Guarantees information and special offers for your model.
Explains hazard symbols like "bolt of lightning" and "exclamation point".
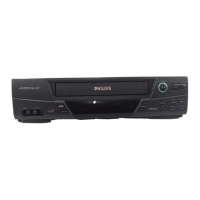
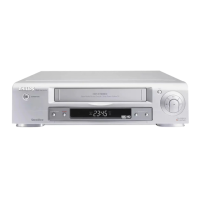
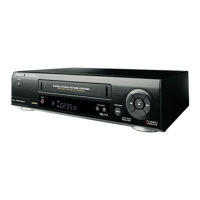
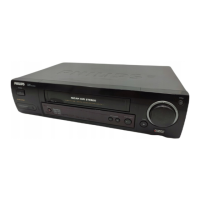
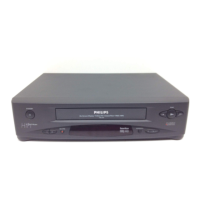
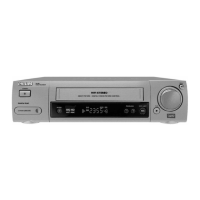
Introduces the VCR and manual structure, listing capabilities.
Warns against fire/shock hazards and FCC modifications.
Declaration of Conformity and recycling advice.
Instructions for inserting AA batteries into the remote control.
How to point and use the remote for VCR, TV, or Cable Box.
Methods to prevent recording over tapes using tabs.
Advice on tape usage and head cleaning.
Initial disconnection of existing antenna/cable from the TV.
Connecting the antenna or cable to the VCR's ANT(enna) IN jack.
Linking the VCR's RF OUT to the TV's ANTENNA IN jack.
Plugging in power for both VCR and TV.
Configuring the VCR's output channel switch for TV tuning.
Details on connecting the cable signal, VCR, and TV for this setup.
Steps to synchronize TV and VCR channels for optimal viewing and recording.
Instructions for performing simultaneous recording and viewing with a cable box.
Connecting the signal source to the VCR's antenna/cable input.
Linking VCR video and stereo audio outputs to the TV's inputs.
Setting the TV to accept signals from external sources.
Initial steps to turn on both the television and the VCR.
Synchronizing the TV channel and selecting the on-screen display language.
Starting the VCR's automated process to scan and store available channels.
Navigating through the VCR's menu system to access setup options.
Starting the automatic channel scanning and memorization process.
The VCR's process of scanning and storing available channels.
Instructions for adding new channels or removing unwanted ones from the VCR's memory.
Checking the list of channels that have been stored in the VCR's memory.
Navigating the VCR's menu to find the clock adjustment option.
Inputting the hour, minute, and AM/PM for accurate timekeeping.
Inputting the month, day, and year for the VCR's calendar.
Setting the VCR to automatically adjust the clock for Daylight Savings Time.
Navigating to the VCR's language selection feature.
Setting the VCR's on-screen displays and menus to English or Spanish.
Locating the correct two-digit code for your TV brand from the provided list.
Inputting the code via the remote to enable TV operation.
Locating the correct two-digit code for your Cable Box or DBS brand.
Inputting the code via the remote to enable Cable Box/DBS operation.
Describes essential buttons for device operation and menu access.
Details buttons for channel selection, memory functions, and starting recordings.
Explains buttons for playing, muting, VCR/TV modes, and speed selection.
Describes buttons for slow motion, volume adjustment, and pausing.
Buttons for clearing input, managing status displays, and rewinding tape.
Buttons for stopping playback, changing channels, and switching between VCR and TV modes.
Buttons for confirming selections, controlling the TV, and searching by time.
Buttons for operating cable boxes, fast forwarding, and switching to the previous channel.
How to select and customize the VCR's on-screen status display settings.
Explains the meaning of lights like PWR, VCR, Cassette-Inside, REC, and Timer.
Details on how the current time is shown on the VCR's display.
Describes essential buttons like POWER, EJECT, PLAY, STOP, RECORD, MENU.
Explains the purpose of the VIDEO IN and AUDIO IN jacks.
Details the VCR/TV button and CHANNEL buttons.
Describes ANT(enna) IN, AUDIO IN, AUDIO OUT, and RF OUT jacks.
Explains VIDEO OUT, VIDEO IN jacks, and the AC Power Cord connection.
Details the CH3/CH4 Switch and OUT jack.
Steps to insert a tape and initiate playback.
How to stop playback, rewind, and remove the tape.
Functionality for playing S-VHS format tapes.
Steps required before starting a recording, including tape and VCR setup.
Procedures for initiating, temporarily stopping, and ending a recording.
Steps to record a program while watching a different one.
Procedures for starting an instant timed recording of 30 minutes to 8 hours.
Essential steps before programming timer recordings, like channel setup and clock setting.
Choosing between ONCE, DAILY, or WEEKLY recording types.
Allocating a recording slot and specifying the channel for the timer recording.
Defining the exact start and end times for the timer recording.
Choosing the tape speed (SP/SLP) and the program's date.
Completing the programming process and preparing the VCR.
Chart detailing tape speeds (SP, LP, SLP) and their recording/playback times.
Accessing and viewing the list of programmed timer recordings.
Steps to remove a specific timer recording from the VCR's memory.
Wiring diagram illustrating how to connect two VCRs for duplication.
Steps for inserting tapes and configuring VCR modes for copying.
Procedures to initiate and terminate the tape copying operation.
Setting the VCR to automatically replay a tape from the beginning after it finishes.
Using the VCR's memory function to mark a point on the tape.
Using the memory function to quickly find a previously marked spot on the tape.
Specifying the amount of time to search forward or backward on the tape.
Starting the VCR's function to find a specific point based on elapsed time.
Using the remote's buttons for various tape search speeds.
Techniques for freezing frames and playing the tape in slow motion.
VCR behavior for automatic playback, rewind, and tape ejection.
Details on automatic and manual tracking for optimal picture quality.
Interpreting on-screen displays for stereo and second audio signals.
Visual guides for connecting the VCR to audio systems.
Configuring the VCR to receive and record specific audio types.
Setting the VCR to output Hi-Fi stereo sound during playback.
Setting the VCR to display a blue screen and mute audio for poor signal reception.
Solutions for common problems like no power or recording failures.
Troubleshooting advice for playback picture issues and remote control malfunctions.
Solutions for problems with channel selection and normal TV viewing.
Advice for tape insertion/removal problems and poor signal reception.
Information on Hi-Fi audio playback and cleaning video heads.
Details on what the warranty covers and what it does not.
General explanation of how to exchange the product under warranty.
Step-by-step guide for returning a product for exchange.
Procedures for receiving a replacement unit directly from Philips.
Definitions of technical terms and abbreviations used in the manual.
Key technical data including dimensions, power, and performance standards.
Lists items provided with the VCR, such as the remote control and RF coaxial cable.
Lists optional items available for purchase to enhance VCR functionality.