7
www.UsePhoenix.com • sales@UsePhoenix.comToll-Free 1-800-533-7533
5. Correct the system fault that caused the burn out.
Consult the factory for advice.
6. Install the replacement compressor with a new capacitor
and an oversized liquid line lter.
In a running burn out, install an oversized suction line
lter/drier between the accumulator and compressor.
Thoroughly ush the accumulator with refrigerant to
remove all trapped sludge and to prevent the oil hole
from becoming plugged. A standing burn out does not
require a suction line lter/drier.
7. Evacuate the system with a good vacuum pump and
accurate vacuum gauge. Leave the pump on the system
for at least an hour.
8. Operate the system for a short period of time, monitoring
the suction pressure to determine that the suction lter
is not becoming plugged. Replace the suction lter/drier
if pressure drop occurs. If a severe running burn out has
occurred, several lter/driers may have to be replaced to
remove all of the acid and moisture.
NOTE: NEVER use the compressor to evacuate the system
or any part of it.
4.6C Replacing a Compressor- Non-Burn Out
Remove the refrigerant from the system. Replace the
compressor and liquid line lter/drier. Charge the system to
50 PSIG and check for leaks. Remove the charge and weigh
in the refrigerant quantity listed on the nameplate. Operate
the system to verify performance.
4.7 Defrost Thermostat and Timer
The defrost thermostat is attached to the refrigerant suction
tube between the accumulator and compressor. If the low
side refrigerant temperature drops due to excessive frost
formation on the evaporator coil, the thermostat opens. The
compressor is then cycled off and on by the defrost timer.
The blower will continue to run, causing air to ow through
the evaporator coil and melt the ice when the compressor is
off. When the air temperature and/or humidity increase, the
evaporator temperature will rise and the thermostat will close
to end the defrost cycle.
4.8 Condensate Pump
Condensate is automatically pumped when the water level in
the pump’s reservoir rises to close the oat switch or if the
pump purge switch is held in.
To replace the condensate pump:
1. Remove the metal strap holding the pump by loosening
the 2 screws holding it in place.
2. Disconnect the leads.
3. Installation is the reverse of above, but check that the
plastic inlet and outlet hoses do not rub against copper
refrigerant tubes.
4.9 Gravity Drain Option
If the condensate pump fails and cannot be replaced
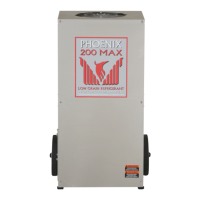
immediately, the Phoenix 200 MAX can be used by draining
by gravity.
1. Unplug the unit and remove the front cover.
2. Push the plastic plug on the right side (see Fig. 4) out
from inside the unit.
3. Locate the heavy vinyl hose that connects the drain pan
to the condensate pump. Pull the end out of the pump.
4. Push that end of the vinyl hose through the hole in the
right side.
5. Connect a garden hose and run it to a drain. Keep the
hose as at to the oor as possible to avoid air pockets
that would hinder draining. Placing the unit on something
above the oor will also improve draining.
4.10 Relay
The contacts of the single pole, single throw relay complete
the power circuit to the compressor. The contacts are closed
when power is provided to the relay coil via the control circuit.
The control circuit includes the power switch, low pressure
control, defrost thermostat and timer.