P
P
H
H
O
O
E
E
N
N
I
I
X
X
U
U
N
N
L
L
I
I
M
M
I
I
T
T
E
E
D
D
L
L
L
L
C
C
-
-
-
-
-
-
-
-
-
-
-
-
-
-
-
-
-
-
-
-
-
-
-
-
-
-
-
-
-
-
-
-
-
-
-
-
-
-
-
-
-
-
-
-
P
P
H
H
X
X
-
-
2
2
0
0
0
0
-
-
-
-
-
-
-
-
-
-
-
-
-
-
-
-
-
-
-
-
-
-
-
-
-
-
-
-
-
-
-
-
-
-
-
-
-
-
-
-
-
-
-
-
-
-
-
-
-
-
-
-
-
-
-
-
-
-
-
-
-
-
U
U
S
S
E
E
R
R
S
S
G
G
U
U
I
I
D
D
E
E
P
P
G
G
.
.11
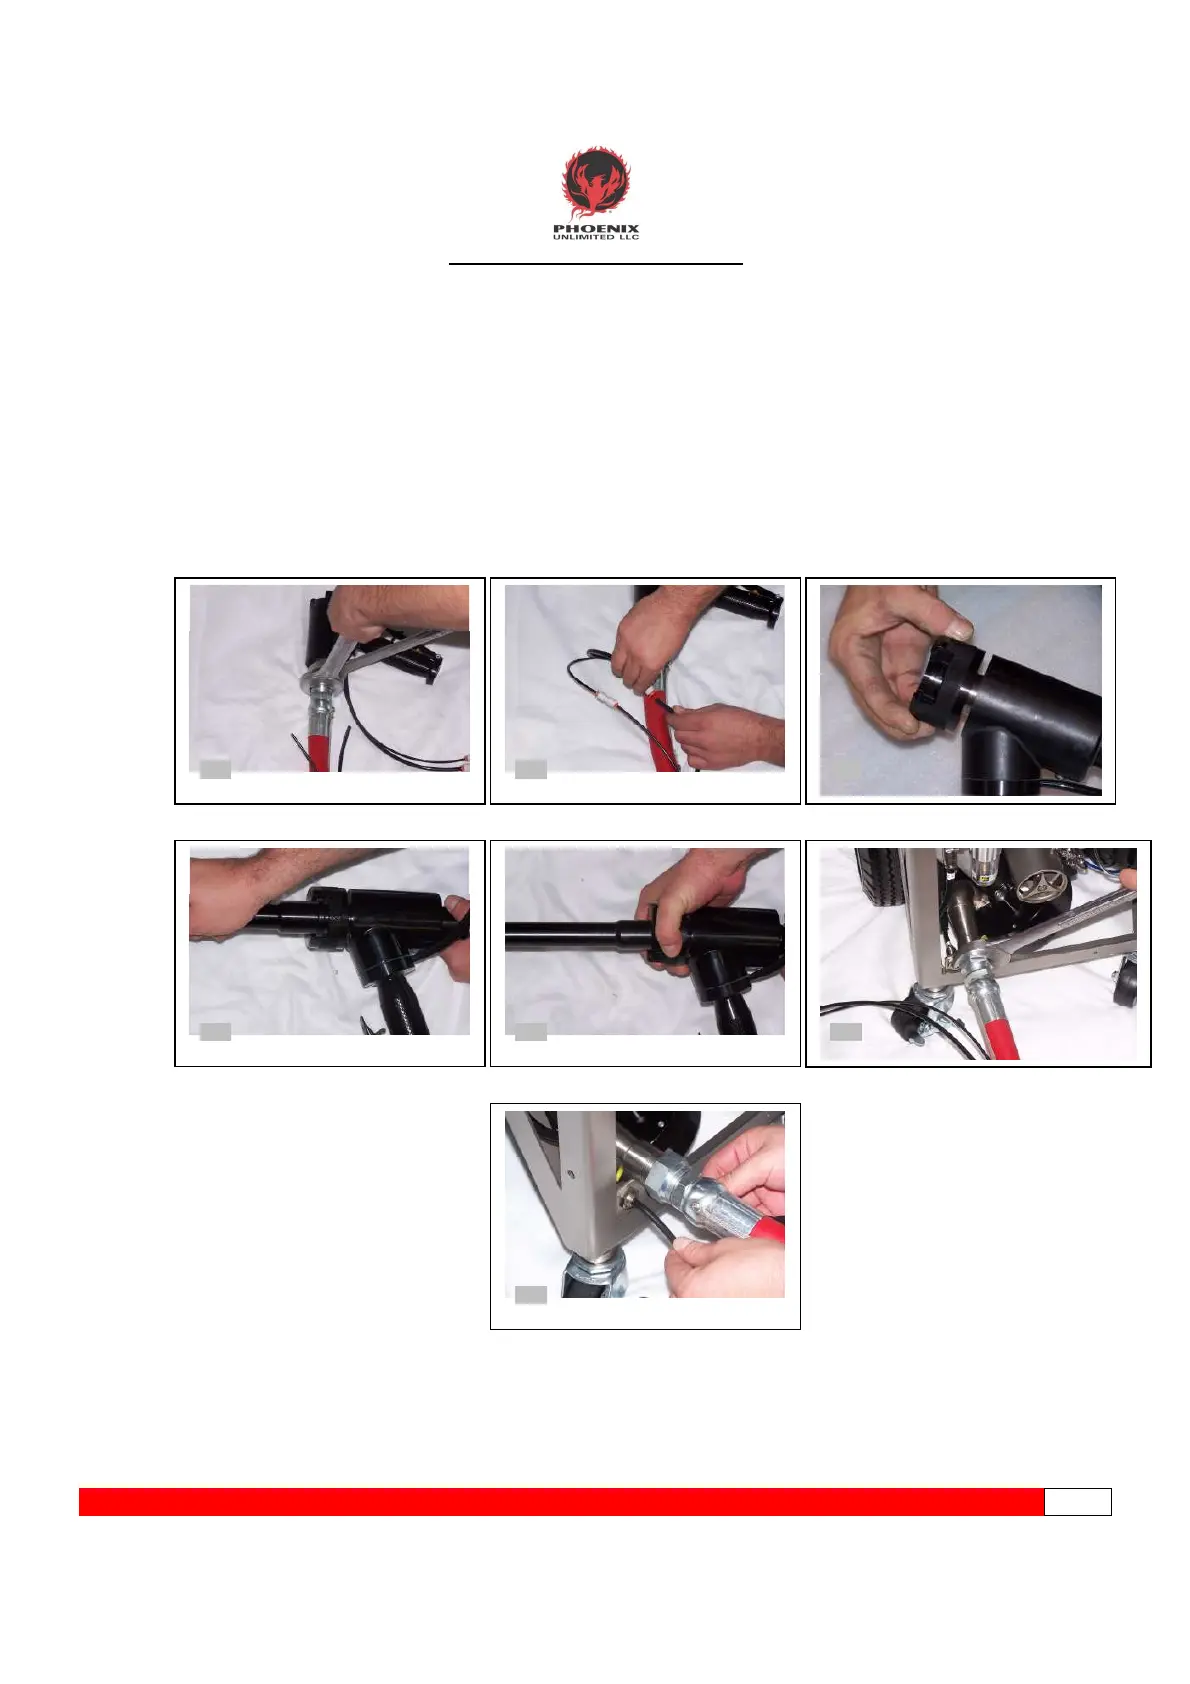
CONNECTING THE BLAST GUN
1. Use 1¼” and 1½” wrenches to connect the gun to the end of the blast hose with the shorter
length trigger lines. Do not over-tighten. (pic 1)
2. Connect the respective trigger lines (different sizes) to the gun, pushing firmly into the quick-
connect fittings. (pic 2)
3. Install the nozzle by a) twisting threaded retainer to completely ‘open’ position; b) place
nozzle into end of blast gun; c) tighten retainer to secure the nozzle. Improper seating of the
nozzle in the gun may result in air leakage. (pics 3, 4, 5)
4. Using the 1½” wrench, connect the remaining end of the blast hose to the front of the PHX-
200. (pic 6)
5. Connect the two trigger lines to the unit, pushing firmly until seated. Failure to attach trigger
lines will result in the non-functioning of the unit. (pic 7)
6. If necessary, ground the item you are blasting.
Pic 1 Pic 2 Pic 3
Pic 4 Pic 5 Pic 6
Pic 7