Page 17 of 28
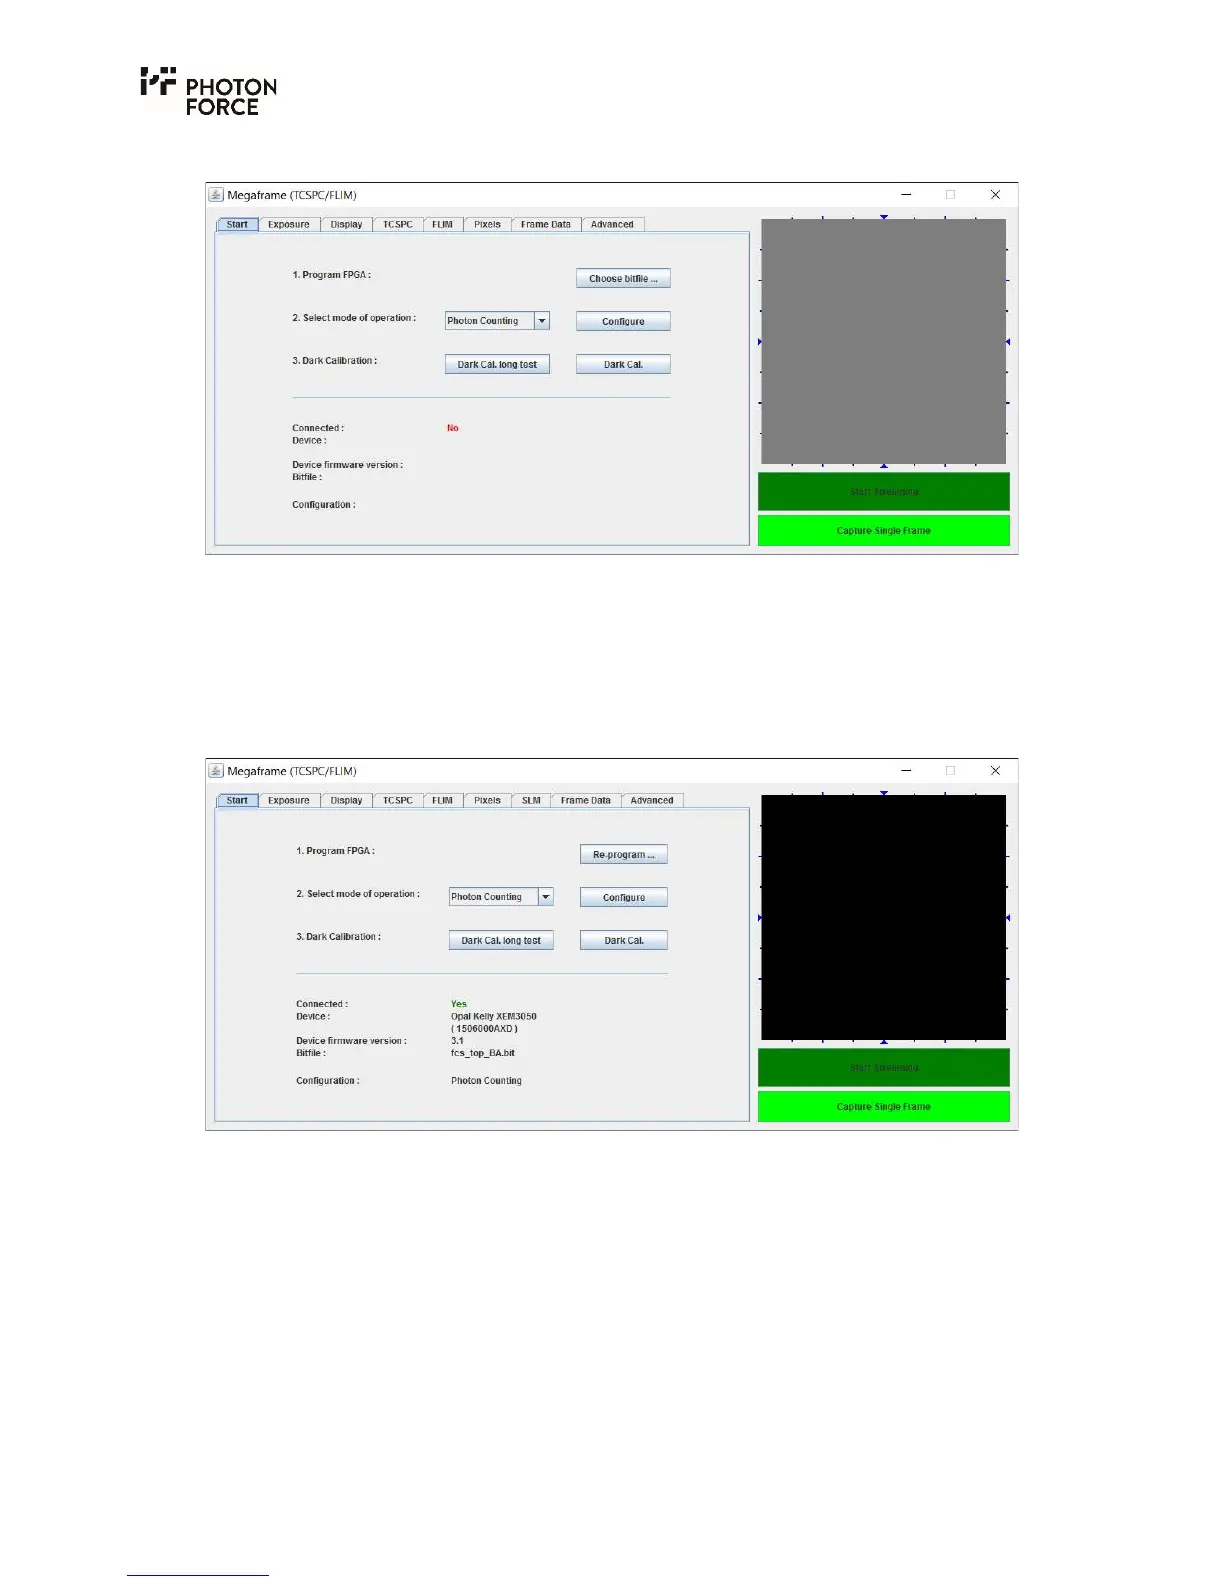
5. Once the application starts, the following window appears.
6. Ensure the PF32 system is connected and powered on.
7. Click “Choose bitfile” and select the “PF32_USB3.bit” file provided, which contains the
camera firmware. Note that other controls in the application are unresponsive until the
camera firmware has been programmed, and the connection status will display “NO”. If
programming is successful, the connection status will change to “YES” and the FPGA type,
serial number and system operating mode will be displayed.
By default, the system is configured in a photon counting mode, which does not provide timing
information. Settings may be changed by selecting the desired mode of operation from the drop-
down menu and pressing configure, or by changing the appropriate settings in the control tabs.
At this point, in order to see an image within the software, you should attach a lens to the PF32.
The PF32 has a CS-mount on the front. Should you wish you to use a C-mount lens, an appropriate
spacer should be used. To use any other lens, adapters must be purchased separately.