Do you have a question about the Phrozen SONIC MINI 8K and is the answer not in the manual?
Remove the resin vat and any objects from the machine's platform before starting calibration.
Attach the building plate knob to the printer and tighten securely, ensuring no shifting.
Use an Allen wrench to loosen all four screws on the building plate in a counterclockwise direction.
Place a piece of A4 paper (0.07-0.10 mm thick) flat on the LCD screen for leveling.
On the touch panel, click TOOLS, then Z CALIB, and NEXT to begin the automated process.
Once the plate touches down, apply firm pressure on its sides to ensure tight contact with the paper.
Tighten all four screws clockwise in a cross pattern while pressing down on the plate.
Tug on paper corners to check pressure; re-calibrate if the plate feels loose or paper moves.
Click DONE on the touch panel and wait for the build plate to retract.
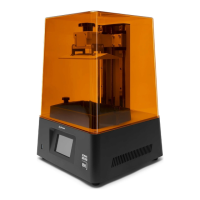
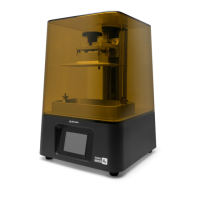
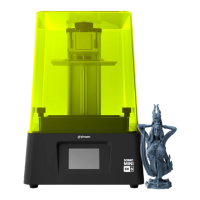
The Phrozen Sonic Mini 8K is a high-resolution 3D printer designed for precision and ease of use, making it suitable for both hobbyists and professionals seeking detailed prints. Its core function revolves around stereolithography (SLA) 3D printing, specifically using an LCD screen to cure liquid resin layer by layer, thereby building a three-dimensional object. The device is engineered to produce models with exceptional detail, leveraging its 8K resolution capabilities to achieve smooth surfaces and intricate geometries that are often challenging for lower-resolution printers.
A critical aspect of operating the Sonic Mini 8K, and indeed any resin 3D printer, is the Z-axis calibration. This process ensures that the building plate is perfectly level with the LCD screen, a fundamental requirement for successful print adhesion and consistent print quality. Without proper calibration, prints may fail to stick to the build plate, warp, or exhibit inconsistencies in their initial layers, leading to wasted resin and time. The manual emphasizes this by stating that Z-axis calibration is "essential for every 3D printer" and directly impacts whether "models and prints will adhere to the building plate."
The calibration process itself is designed to be straightforward, guiding the user through a series of steps that ensure optimal alignment. It begins with the preparation of the printer, specifically the removal of the resin vat to clear the machine's platform. This step highlights the importance of a clean and unobstructed workspace before initiating any calibration or printing task. Following this, the building plate is installed, with a specific instruction to "align it with the pins" and "screw and tighten the building plate," while also cautioning to "ensure that the building plate does not shift during tightening." This attention to detail in the installation phase is crucial for maintaining the integrity of the print setup.
A key maintenance feature integrated into the calibration process involves loosening the screws that secure the building plate. The manual instructs the user to "loosen all 4 screws on the sides of the building plate in a counterclockwise direction" using an Allen wrench. This step is vital because it allows the building plate to move freely and self-level against the LCD screen during the subsequent calibration steps. The instruction to "double-check to see if the plate is loose and movable" underscores the importance of ensuring the plate has enough play to achieve proper alignment.
The calibration continues with the placement of an A4 paper, approximately 0.07-0.10 mm thick, directly onto the LCD screen. This paper serves as a crucial spacer and reference point, allowing the user to gauge the precise distance between the building plate and the screen. This method is a common and effective technique in resin 3D printing for achieving accurate Z-axis homing.
User interaction with the device is facilitated through a touch panel, where the calibration process is initiated. The manual directs the user to "click TOOLS, then click Z CALIB," followed by "NEXT." This sequence triggers the building plate to extend downwards towards the LCD screen, a process that takes "1-2 minutes." This automated movement ensures that the plate descends to a predetermined position, ready for manual adjustment.
Once the building plate has descended, a critical usage feature comes into play: applying pressure to the building plate. The user is instructed to "apply pressure and press down firmly on the sides of the building plate" while simultaneously pulling on the A4 paper. The goal here is to ensure that the "building plate is laying tight against it," meaning the plate is firmly seated against the paper, which in turn is against the LCD screen. This manual pressure helps to achieve a snug fit, eliminating any gaps that could lead to calibration inaccuracies.
Following the manual pressure application, the screws on the building plate are tightened. The manual specifies a "cross pattern order" for tightening, such as "top-right, lower-left, top-left, and lower-right." This method is a standard engineering practice to ensure even pressure distribution and prevent warping or misalignment of the plate as the screws are secured. The instruction to tighten the screws "in a clockwise direction while pressing down on the building plate with the other hand" reinforces the need to maintain constant pressure during this critical step.
A final double-check is integrated into the calibration process to ensure accuracy. The user is advised to "tug on all four corners of the A4 paper to check for pressure intensity." If the paper feels "tight," it indicates a successful calibration. If not, the manual instructs the user to "perform the Z-axis calibration test again," highlighting the iterative nature of achieving precise settings and the importance of verification.
The calibration concludes by clicking "DONE" on the touch panel, which prompts the building plate to retract. Once retracted, the A4 paper is removed, signifying that the printer is now calibrated and ready for use. The manual concludes with an encouraging note: "You are now ready to begin your 3D printing journey!" This comprehensive, step-by-step guide to Z-axis calibration not only serves as a maintenance instruction but also as a fundamental usage feature, ensuring that users can consistently achieve high-quality prints with their Phrozen Sonic Mini 8K. The emphasis on precision, careful handling, and verification throughout the process reflects the printer's design philosophy of delivering detailed and reliable 3D printing experiences.
| Build Volume | 165 x 72 x 180 mm |
|---|---|
| XY Resolution | 22 µm |
| Layer Thickness | 0.01 - 0.30 mm |
| Connectivity | USB |
| Z Resolution | 10 µm |
| Print Speed | Up to 80 mm/hr |
| Wavelength | 405 nm |
| Power Input | 100-240 V, 50/60 Hz |
| Power Consumption | 60 W |
| Operating System Compatibility | Windows, Mac OS |
| Slicer Software | CHITUBOX |
| Technology | Resin 3D Printing |
| LCD Resolution | 7680 x 4320 |
| Light Source | UV LED |
| LCD Screen | 7.1" Mono LCD |