Do you have a question about the Phrozen SONIC MIGHTY 4K and is the answer not in the manual?
Remove the resin vat and clear the machine's platform of any objects before proceeding with calibration.
Attach the building plate to the printer and screw it tightly into place to prepare for calibration.
Use an Allen wrench to loosen the four screws on the building plate sides counterclockwise.
Lay a piece of A4 paper (0.07-0.10 mm) flat on the LCD screen to aid in leveling the building plate.
Navigate to TOOLS > Z CALIB on the touch panel and click NEXT to begin the calibration sequence.
Apply firm downward pressure on the sides of the building plate once it has touched down on the paper.
Loosely tighten the four screws on the building plate in a cross pattern while maintaining downward pressure.
Securely fasten all four building plate screws in a cross pattern, maintaining downward pressure for a tight fit.
Tug on the paper corners to check pressure intensity. Re-calibrate if the paper is not tight against the plate.
Click DONE on the touch panel, wait for the plate to retract, and then remove the A4 paper.
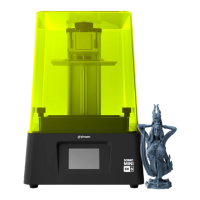
This manual outlines the Z-axis calibration process for a Phrozen Sonic Mighty 4K 3D printer, a crucial step to ensure successful and high-quality prints. The primary function of Z-axis calibration is to level the building plate with the LCD screen, which is essential for proper adhesion of models to the building plate during the printing process. Without proper calibration, prints may fail to adhere, leading to wasted material and time.
The calibration process is designed to be user-friendly, guiding the operator through a series of steps that involve both manual adjustments and interactions with the printer's touch panel. The usage features emphasize precision and careful handling, ensuring that the building plate is correctly positioned and secured.
The process begins with preparation, requiring the user to remove the resin vat and any other objects from the machine's platform. This ensures a clear workspace and prevents interference during calibration. Next, the building plate is installed onto the printer and securely fastened with screws. This initial attachment is a foundational step, setting the stage for the subsequent leveling adjustments.
A key usage feature involves loosening the screws on the sides of the building plate. The manual specifies using an Allen wrench and turning the screws in a counterclockwise direction. It's crucial to loosen all four screws sufficiently so that the plate becomes loose and movable, allowing for adjustment. A critical note is provided here: the screws should not be removed entirely, only loosened. This prevents accidental dislodging of the plate and simplifies the re-tightening process.
Another important usage feature is the introduction of an A4 piece of paper, approximately 0.07-0.10 mm thick, which is placed flat on the LCD screen. This paper acts as a gauge, providing a precise measurement for the gap between the building plate and the LCD screen. This simple yet effective tool allows the user to feel the pressure and ensure the correct distance, which is vital for proper print adhesion.
The manual then guides the user through the printer's touch panel interface. The user is instructed to navigate to the "TOOLS" menu and select "Z CALIB" to initiate the calibration process. This digital interaction is a core usage feature, allowing the printer's motor to automatically lower the building plate. The manual specifies clicking "NEXT" and waiting for 1-2 minutes as the building plate extends to the LCD screen, demonstrating an automated aspect of the calibration.
Once the building plate has descended and made contact with the A4 paper, the user is instructed to apply pressure on the sides of the building plate. This manual pressure, combined with pulling on the paper, helps to ensure that the building plate is lying tightly against the paper, indicating a correct level. A beeping sound from the device is a confirmation feature, signaling that this step has been successfully completed and the user can proceed.
The subsequent steps focus on securing the building plate in its newly calibrated position. This involves tightening the four screws on the sides of the building plate. A specific usage feature is the instruction to tighten the screws in a cross-pattern order (e.g., top-right, lower-left, top-left, lower-right) while simultaneously pressing down on the building plate with the other hand. This technique ensures even pressure distribution and prevents the plate from shifting during tightening. Initially, the screws should not be tightened completely, allowing for a final check.
A maintenance feature, or rather a quality assurance step, is the "Double-Check Z-axis Calibration." After the initial tightening, the user is instructed to tug on all four corners of the A4 paper to verify the pressure intensity. If the paper feels tight, it indicates successful calibration. If not, the user is advised to perform the Z-axis calibration test again, highlighting the importance of accuracy and providing a troubleshooting loop.
Finally, the manual instructs the user to fully tighten all four screws in the same cross-pattern order, ensuring the building plate is securely fastened. This final tightening step locks the calibrated position in place, preparing the printer for operation.
The conclusion of the process involves interacting with the touch panel again, clicking "DONE" to signal the completion of calibration. The building plate then retracts, and the A4 paper can be removed. The manual concludes by stating that the user is now ready to begin their 3D printing journey, emphasizing the readiness of the device for its primary function.
Throughout the manual, the language is clear and concise, providing step-by-step instructions that are easy to follow. The inclusion of images for each step further enhances the user experience, providing visual cues that complement the written instructions. The emphasis on careful handling, precise adjustments, and verification steps ensures that users can confidently calibrate their 3D printer for optimal performance. The process is designed to be repeatable, allowing users to recalibrate as needed to maintain print quality.
| Build Volume | 200 x 125 x 220 mm |
|---|---|
| LCD Resolution | 3840 x 2400 pixels |
| Connectivity | USB |
| Power Consumption | 120W |
| Operating System | Phrozen OS |
| Layer Thickness | 10 - 300 μm |
| Technology | Resin (MSLA / LCD) |
| Z Resolution | 10 μm |
| Control Panel | Touchscreen |
| Material Compatibility | 405nm UV Resin |
| Light Source | ParaLED Module |