Do you have a question about the Phrozen Sonic Mini Series and is the answer not in the manual?
Remove the resin vat and ensure the machine's platform is clear of any objects before proceeding.
Prepare a piece of A4 paper to be placed on the LCD screen for leveling the building plate.
Attach the building plate knob to the printer, align it with the pins, and screw/tighten the plate.
Use a wrench to loosen all four screws on the sides of the building plate, ensuring it's loose and movable.
Place a piece of A4 paper (0.07-0.10 mm thick) flat on the LCD screen for leveling.
On the touch panel, click TOOLS, then Z CALIB to begin the calibration process.
Once the plate touches down, press down tightly on its sides to ensure it's tight against the paper.
Tighten all four screws on the sides while keeping pressure on the building plate.
Click DONE on the touch screen and wait for the build plate to retract.
Once the plate has retracted, remove the A4 paper to complete the Z-axis calibration.
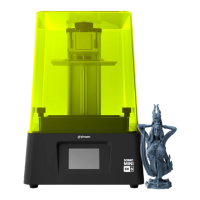
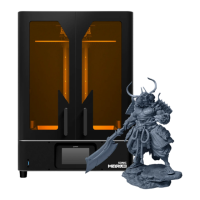
This document outlines the Z-axis calibration process for Phrozen 3D printers, specifically for the Sonic Mini, Sonic, and Shuffle series. The primary function of this calibration is to ensure that the building plate is perfectly leveled to the LCD screen, which is crucial for successful 3D printing as it guarantees proper adhesion of models to the building plate.
The calibration process involves a series of steps designed to accurately position and secure the building plate. Users begin by preparing the printer for calibration. This involves removing the resin vat from the machine's platform to ensure there are no obstructions. Following this, a standard A4 piece of paper, which typically has a thickness of approximately 0.07-0.10 mm, is placed flat on the LCD screen. This paper serves as a crucial tool for leveling, acting as a spacer to achieve the correct gap between the building plate and the LCD.
Next, the building plate is installed. This involves attaching the building plate knob to the printer and aligning it with the designated pins. Once aligned, the building plate is screwed and tightened into place, but not fully secured at this stage. The subsequent step requires the user to loosen all four screws located on the sides of the building plate using a wrench. It is important to double-check after loosening to confirm that the plate is indeed loose and movable, allowing for adjustment during the calibration.
With the A4 paper still on the LCD screen and the building plate loosely attached, the user proceeds to the printer's touch panel. The calibration sequence is initiated by navigating to the "TOOLS" menu and then selecting "Z CALIB." The system will then prompt the user to click "NEXT." After this, there is a waiting period of approximately 1-2 minutes during which the building plate automatically extends downwards until it makes contact with the LCD screen, pressing against the A4 paper.
Once the building plate has descended and is resting on the A4 paper, the user must apply firm, even pressure on the sides of the building plate. This manual pressure is essential to ensure that the plate is lying tightly and evenly against the sheet of paper, establishing the correct level. While maintaining this pressure, all four screws on the sides of the building plate are then tightened. This step is critical for securing the plate in its newly calibrated position.
After the screws are tightened and the building plate is firmly secured, the user clicks "DONE" on the touch screen. The building plate will then retract, moving upwards from the LCD screen. The final step involves removing the A4 paper from the LCD. At this point, the Z-axis calibration is complete, and the 3D printer is ready for printing.
The maintenance aspect of this process is integrated into the calibration itself, as it ensures the proper functioning of the printer's Z-axis. Regular calibration, as outlined, helps prevent common printing issues such as poor first-layer adhesion, warped prints, or models detaching from the building plate during printing. By following these steps, users can maintain the precision and reliability of their Phrozen 3D printer, ensuring consistent print quality and extending the lifespan of the machine's components by preventing undue stress from misaligned parts. The use of a standard A4 paper simplifies the process, making it accessible for users without requiring specialized tools beyond the wrench provided with the printer.
| Connectivity | USB |
|---|---|
| Material | Resin |
| Power Input | 100-240V, 50/60Hz |
| Operating System Compatibility | Windows, Mac |
| Layer Thickness | 10 - 300 µm |
| Z Resolution | 10 µm |