PN 350-025004-09
Page | 5
Accessory Adjustment
The MIRacle accessory may not require any alignment when installed. However, should you choose to
fine-tune the accessory, refer to this figure and follow these steps:
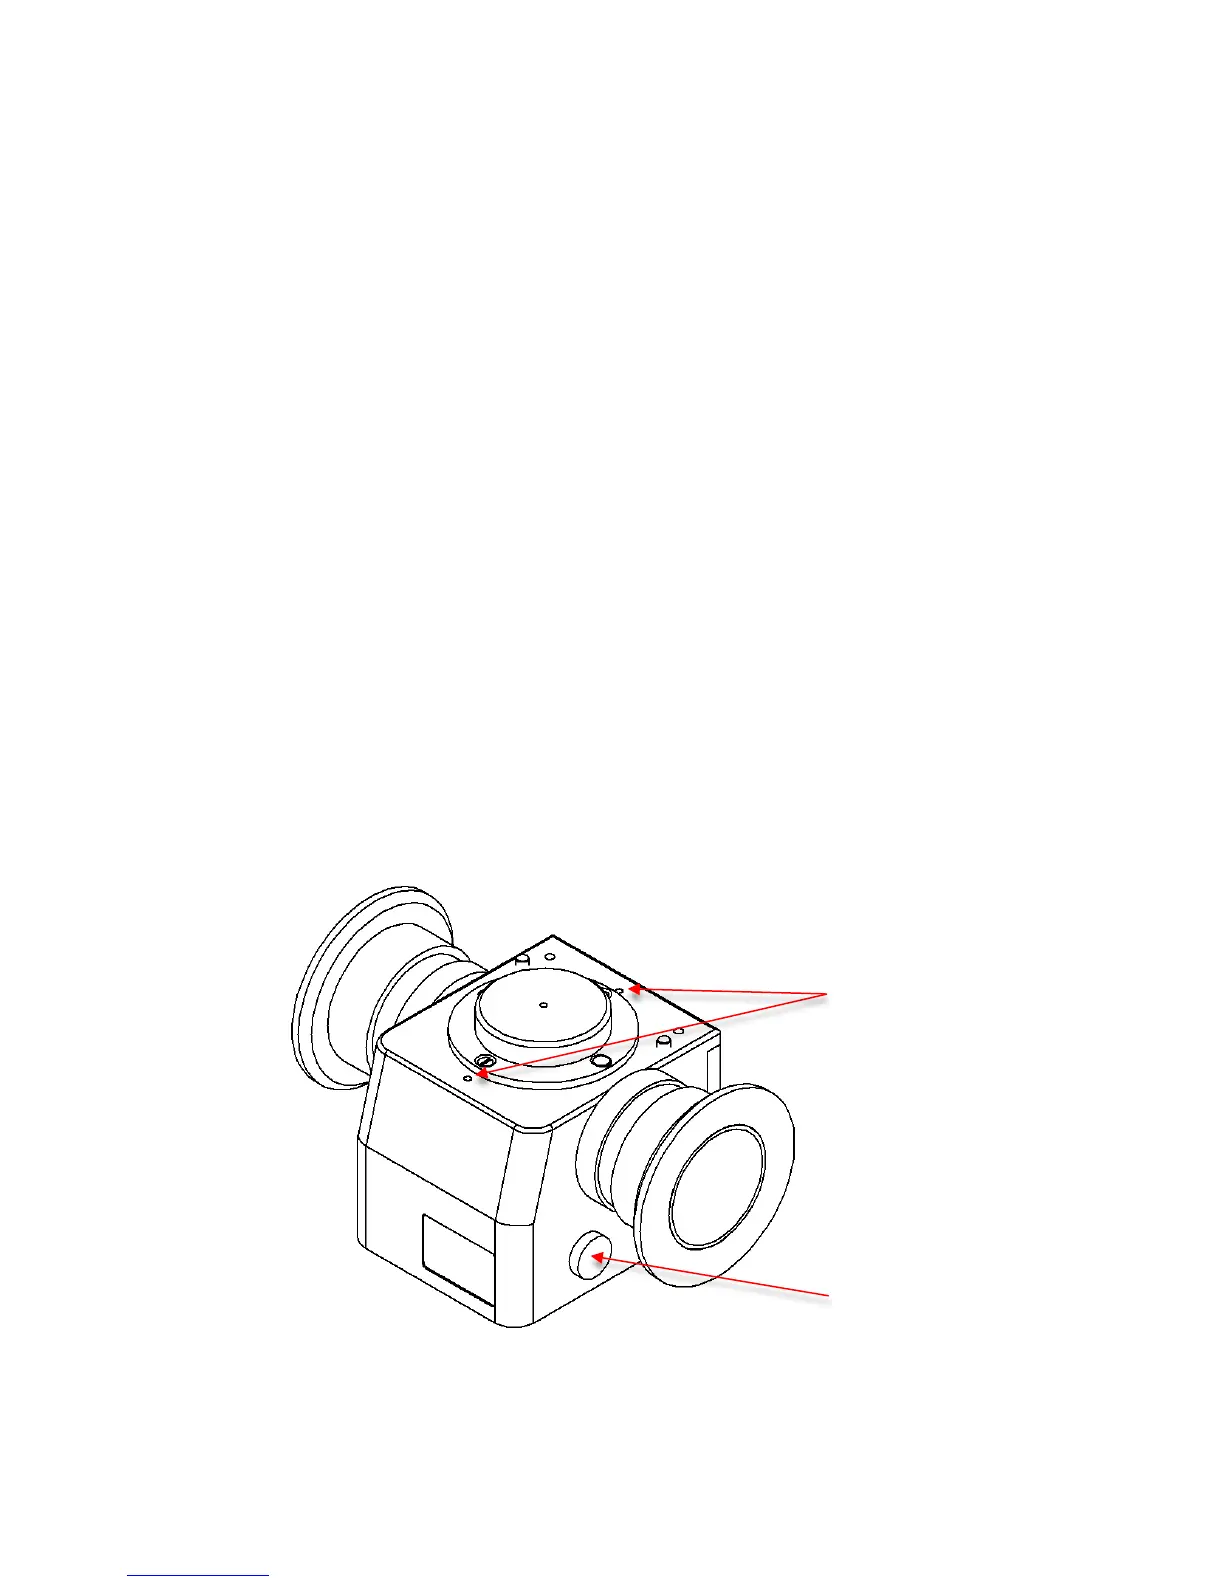
1. Display the live interferogram on the spectrometer monitor and using the thumbscrews on the left
and right side of the accessory (angle adjustment), adjust the mirrors until the highest throughput is
achieved. To do this, turn the screws one at a time slightly and check the signal. If it increases,
reverse turn until the maximum signal is obtained.
2. Insert the enclosed hex wrench in the two height adjustment screws on the top of the accessory.
Adjust the screws one at a time until the highest throughput is obtained.
3. Repeat the entire procedure two or three times to fine-tune the accessory.
NOTE:
For some side focus FTIR models, both thumbscrews are located on the right side of the MIRacle
base optics assembly.
This is a one-time alignment procedure that optimizes the MIRacle to work with an individual optical
bench. Once completed, the alignment does not have to be repeated unless the accessory adjustments
have been moved or it has been placed in a different FTIR instrument. You are now ready to verify the
MIRacle optical throughput performance.
Figure 4. Fine-tuning the MIRacle accessory

 Loading...