Do you have a question about the Pioneer A-66X and is the answer not in the manual?
Lists different model designations and their corresponding line voltage specifications.
Locates the line voltage selector switch on the rear panel of multi-voltage models.
Provides step-by-step instructions for adjusting the line voltage selector switch using a screwdriver.
Instructs users to locate the serial number on the rear panel for warranty card completion.
Emphasizes reading and retaining instructions, heeding warnings, and following operating procedures.
Details restrictions on using the appliance near water, its placement, ventilation needs, and heat sources.
Advises on routing power cords safely and explains the safety feature of polarized plugs.
Provides guidance on cleaning the unit and when professional servicing is required.
Explains the importance and methods for grounding an antenna system for surge protection.
Explains the meaning of the lightning flash and exclamation point warning symbols.
Details wire color coding for UK power plugs and states UK models lack a supplied plug.
Instructs on connecting AC mains and signal terminals, and disconnecting the plug when not in use.
Illustrates connections for turntables, CD players, tuners, and tape decks to the amplifier's input/output terminals.
Provides a step-by-step guide on stripping and connecting speaker wires to the terminals.
Explains how to properly connect RCA cables to input/output terminals, noting plug colors.
Identifies and explains the function of terminals and outlets on the rear panel.
Describes the switched and unswitched AC outlets, their power limits, and usage notes.
Instructs on connecting the power cord to a wall outlet or audio timer.
Provides recommended speaker impedance ranges for connecting to A, B, or A+B terminals.
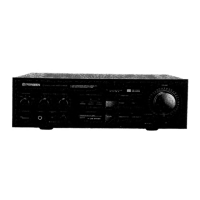
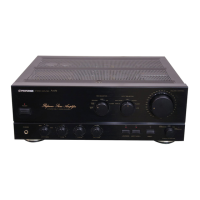
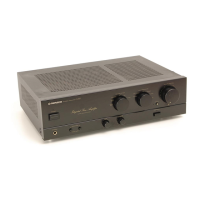
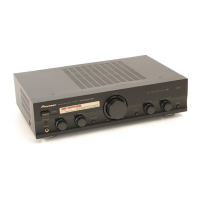
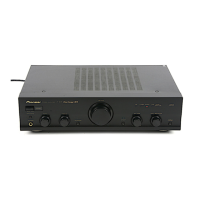
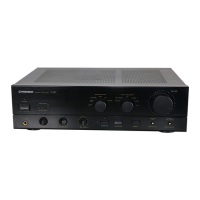
Introduces the front panel layout and its main controls and indicators.
Explains how to operate the power switch and its indicator light.
Describes how to select speaker systems (OFF, A, B, A+B) for playback.
Explains the function and operation of the Bass and Treble tone controls for adjusting sound frequencies.
Details how to use tape monitor switches for listening to tape playback or monitoring recording.
Explains how to set the phono selector switch based on the turntable's cartridge type.
Explains how to select audio input sources like CD, Tuner, Phono, Video/AUX.
Describes the volume control operation and the function of the headphones jack.
Explains the function of the subsonic filter switch for reducing low-frequency noise during record playback.
Details the balance control for sound distribution and the line straight switch for bypassing tone circuits.
Explains the loudness switch function for boosting bass and treble at low listening volumes.
Outlines initial setup steps, including setting speaker selector, tape monitor, balance, and subsonic filter.
Guides on how to listen to FM/AM radio broadcasts by setting the tuner and volume.
Instructions for playing records, including setting the phono selector and volume.
Explains how to listen to tape playback from connected tape decks using the tape monitor switch.
Describes how to record audio from various sources onto tape decks.
Guides on selecting and listening to audio from CD players, video components, and AUX inputs.
Explains how to monitor the recorded sound using the tape monitor switch during the recording process.
Details the procedure for copying tapes between two tape decks.
Lists probable causes and remedies for the unit not receiving power.
Covers troubleshooting steps for no sound from the unit or one speaker.
Addresses issues related to recording tapes and performing tape copying.
Lists detailed technical specifications for the amplifier's power output, distortion, and frequency response.
Provides specifications for power requirements, consumption, dimensions, and weight.
Details input sensitivity, impedance, overload levels, and output specifications.
Lists specifications for tone controls, subsonic filter, and loudness contour.
| continuous_average_power_output_per_channel | 80 watts |
|---|---|
| power_requirements_HE_model | a.c. 220 V ~, 50/60 Hz |
| power_requirements_YP_models | a.c. 240 V ~, 50/60 Hz |
| power_consumption_HE_HB_YP_models | 600 W |
| continuous_power_output_both_channels_driven | 90W +90W |
| DIN_continuous_power_output_both_channels_driven | 95W+95W |
| total_harmonic_distortion | 0.007% |
|---|---|
| output_bandwidth_IHF | 5 Hz to 45 kHz |
| damping_factor | 60 |
| phono_MM_sensitivity_impedance | 2.5 mV/50 kQ |
|---|---|
| phono_MC_sensitivity_impedance | 0.2 mV/100 Q2 |
| tuner_CD_tape_play_video_aux_sensitivity_impedance | 150 mV/50 kQ2 |
| phono_MM_frequency_response | 20 Hz to 20 kHz, +0.3 dB, -0.3 dB |
|---|---|
| phono_MC_frequency_response | 20 Hz to 20 kHz, +0.5 dB, -0.5 dB |
| tuner_CD_video_aux_frequency_response | 5 Hz to 100 kHz, +0 dB, -3 dB |
| dimensions_mm | 420 (W) x 416 (D) x 134 (H) mm |
|---|---|
| dimensions_in | 16-9/16(W) x 16-3/8(D) x 5-1/4(H) in |
| weight_without_package | 10.9 kg/23 Ib 15 oz |