3
<DRB1214>
En/Fr
Operating Instructions
Mode d’emploi
Bedienungsanleitung
Istruzioni per l’uso
Gebruiksaanwijzing
Manual de instrucciones
English
Français
Deutsch
Italiano
Español
Nederlands
Set the line voltage selector switch to the
position of your area before connecting
the power cord. (Refer to page 2.)
Stellen Sie den Netzspannungs-Wahlschalter
vor dem Anschließen des Netzkabels auf die
örtliche Netzspannung ein. (Siehe Seite 30.)
Zet de spanningskeuzeschakelaar in de juiste
stand overeenkomstig de plaatselijke netspanning
alvorens het netsnoer aan te sluiten of de stekker
in het stopcontact te steken. (Zie blz. 58)
Ponga el selector de tensión en la posición
correspondiente a la tensión utilizada en
su zona antes de conectar el cable de
alimentación. (Consulte la página 58.)
Avant de raccorder le cordon d’alimentation,
régler le sélecteur de tension de ligne sur la
position correspondant au secteur local.
(Voir page 2)
Regolare il selettore di tensione sulla
posizione corrispondente alla tensione del
paese di utilizzazione. Vedere in proposito
a pag. 30.
R
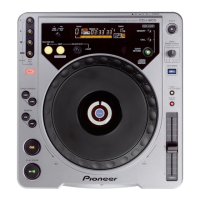
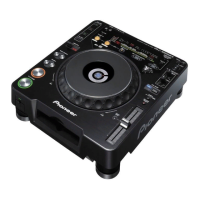
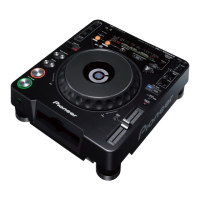
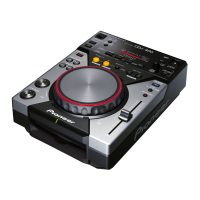
CDJ-500S
'
RISK OF ELECTRIC SHOCK
DO NOT OPEN
CAUTION
IMPORTANT 1
CAUTION:
TO PREVENT THE RISK OF ELECTRIC SHOCK, DO
NOT REMOVE COVER (OR BACK). NO USER-
SERVICEABLE PARTS INSIDE. REFER SERVICING TO
QUALIFIED SERVICE PERSONNEL.
The exclamation point within an equilateral triangle is
intended to alert the user to the presence of important
operating and maintenance (servicing) instructions in
the literature accompanying the appliance.
The lightning flash with arrowhead symbol, within an
equilateral triangle, is intended to alert the user to the
presence of uninsulated "dangerous voltage" within the
product's enclosure that may be of sufficient magnitude
to constitute a risk of electric shock to persons.
0
D
EJECT
TEMPO
+
FWD
–
REV
TRACK SEARCH
TIME
MODE
AUTO
CUE
TEMPO
±10/±16
MASTER
TEMPO
IN/REAL TIME CUE OUT/EXIT
RELOOP
SEARCH
4
¢
1
¡
CUE
6
PLAY/PAUSE
–
0
+
OUT ADJUST
LOOP
'
COMPACT DISC PLAYER
CDJ-500S
PROFESSIONAL
COMPACT DISC PLAYER
LECTEUR DE COMPACT DISC
COMPACT-DISC-SPIELER
LETTORE PER COMPACT DISC
COMPACT DISC-SPELER
REPRODUCTOR DE DISCOS COMPACTOS