Do you have a question about the Pioneer PD-M435 and is the answer not in the manual?
Instructions for setting the voltage selector switch for proper operation.
Warnings about moisture, opening covers, and proper voltage usage.
Cautions for European/UK laser and US model radiation exposure.
Instructions for connecting the player to an amplifier and AC outlet.
Step-by-step instructions for loading discs into the magazine.
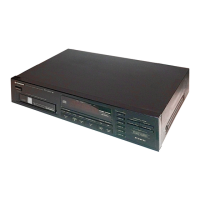
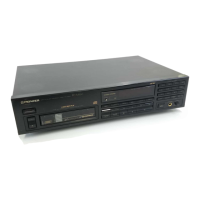
Detailed list and description of buttons and features on the player's front panel.
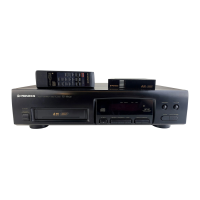
Explanation of buttons and operations for the PD-M435 remote control.
Instructions for starting, pausing, and stopping CD playback.
Methods for searching specific discs, tracks, or passages.
Step-by-step guide to creating a custom playback program.
Procedure for selecting and deleting specific tracks or discs from playback.
Solutions for magazine not ejecting or playback stopping unexpectedly.
Fixes for no sound, distorted audio, and non-functional remote control.
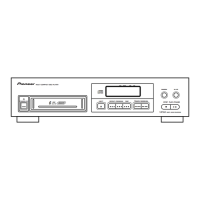
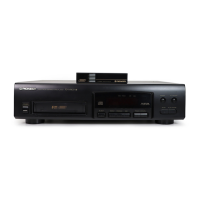
This document describes the operation and maintenance of the Pioneer Multi-Play Compact Disc Player models PD-M435, PD-M431, and PD-M430. The instructions are primarily based on the PD-M435 model but are largely applicable to the other two.
The Pioneer Multi-Play Compact Disc Player is designed to play compact discs. It features a magazine system that can hold up to six 12 cm discs, allowing for continuous playback and easy disc management. For 8 cm CDs, a special Multi-Play Magazine (JD-M108) is required, which is sold separately. The player supports various playback modes including normal playback, repeat playback (single track or all tracks/discs), random playback (all tracks in random order, or only non-deleted tracks in random order), and programmed playback (playing desired tracks/discs in a specified order).
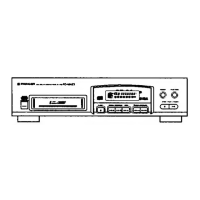
The PD-M435 model includes a remote control unit for convenient operation from a distance, as well as a headphone jack with volume control. The PD-M431 and PD-M430 models do not include a remote control unit, but the PD-M430 (U.K. and European models) does feature a headphone jack. All models (PD-M430/PD-M431 and U.S./Canadian PD-M435) can be integrated into a Pioneer stereo system with a system remote control feature, allowing control of basic playback functions (Play, Stop, Pause, Track/Disc Search, Disc Change) via the amplifier's remote control unit.
The player also offers several advanced functions for recording purposes, such as Compu Program Editing and Time Fade Editing. Compu Program Editing allows tracks to be selected for both sides of a tape within a specified playing time, automatically programming tracks, a pause, and then tracks for the second side. Time Fade Editing selects tracks for one side of a tape, with playback stopping with a fade-out. A One-touch Fade function enables starting playback with a fade-in and stopping with a fade-out at desired points.
To play a compact disc, turn on the power, insert a magazine (it will click into place, and if the power is off, it will automatically turn on), and then press the PLAY button. Playback will start from the first disc. To pause playback, press PAUSE; pressing it again or PLAY will resume playback. To stop playback, press STOP/CLEAR once to return to the beginning of the current disc's first track, or twice to return to the first track of the first disc and enter stop mode. To eject the magazine, press EJECT, remove the magazine, and then press POWER to turn off the unit.
Discs are inserted into the magazine with the label side downward. The magazine has six trays, numbered 1 to 6 from top to bottom. Only one disc tray should be pulled out at a time. Labels can be affixed to designated locations on the magazine for titles, disc names, and classification.
During playback, the TIME button cycles through different time displays: elapsed playback time of the current track, remaining playback time of the current track, remaining playback time from the current point to the end of the disc, and total playback time of the disc.
Press REPEAT once to repeatedly play the current track (1► REP indicator lights). Press REPEAT twice to repeatedly play all tracks on all discs in normal playback mode, or all tracks in a programmed/random/delete playback mode (REP indicator lights). Press REPEAT again to exit repeat mode.
Press RANDOM PLAY to play all tracks on all discs in a random order (RANDOM indicator lights). If a Delete Program has been set, pressing RANDOM PLAY will play only the non-deleted tracks in random order.
In stop mode, press PROGRAM, then select the desired disc and track numbers using the DISC NUMBER and TRACK search buttons, pressing PROGRAM after each selection. Up to 32 steps can be programmed. Press PLAY to start programmed playback. To stop, press STOP/CLEAR. A pause can also be programmed by pressing PAUSE instead of a track number.
In stop mode, press DELETE, then select the disc and track numbers to be deleted using the DISC NUMBER and TRACK search buttons, pressing DELETE after each selection. Press PLAY to play all tracks other than the deleted ones. To clear all delete program contents, press STOP/CLEAR in stop mode, or eject the magazine. On PD-M435 models, pressing CLEAR on the remote control unit in delete program playback mode will revert to normal playback mode.
Using a commercially available audio timer, the player can be set to automatically start playback at a preset time. Insert a magazine, set the timer, and the player will turn on and begin playback from the first track of the first disc.
For multi-voltage models (not U.S., Canadian, European, U.K., or Australian), a line voltage selector switch is located on the rear panel. Before plugging in, ensure the switch is set to the correct voltage for your area using a flat-blade screwdriver.
Use only optical audio digital discs. When handling, hold discs by the edges or by one edge and the center hole to avoid touching the signal surfaces. Do not affix gummed labels or tape, and avoid scratching or damaging the label. Do not use damaged (cracked or warped) discs, as they rotate at high speed inside the player.
Wipe discs gently with a soft, dry cloth from the inner edge toward the outer periphery to remove fingerprints or smudges. For very dirty discs, dampen a soft cloth with water, wring it out well, wipe the dirt, and then dry with another soft cloth. Never use record cleaning sprays, anti-static agents, benzene, thinner, or other volatile solvents, as these can damage the disc surface.
Store discs vertically in their cases to prevent warping. Avoid locations with high heat, humidity, or extremely low temperatures, and never leave discs in cars where direct sunlight can cause extreme heat. Always adhere to precautionary notes on disc labels.
To clean the player and the magazine, wipe with a soft, dry cloth. For stubborn dirt, use a soft cloth dampened with a mild detergent solution, wring it well, wipe off the dirt, and then dry the surface with a dry cloth. Do not use volatile liquids such as benzene and thinner, as they are harmful to the unit.
If the unit is moved from a cold to a warm environment, or if the room temperature rises sharply, condensation may form inside, affecting performance. Allow the unit to stand for about an hour or gradually raise the room temperature to resolve this.
Open the battery compartment on the rear of the remote control unit and insert two AAA/R03 dry cell batteries, ensuring correct polarity. Remove batteries if the remote control unit will not be used for an extended period (one month or more) to prevent leakage. If leakage occurs, carefully wipe away the fluid and replace with new batteries. Do not mix new and used batteries or different brands of batteries.
The manual includes a troubleshooting guide to help diagnose and resolve common issues such as discs not ejecting, playback stopping, no sound, distorted sound, or remote control malfunction. It advises checking power connections, disc orientation and cleanliness, amplifier settings, and remote control battery status. If issues persist, users are advised to contact a Pioneer authorized service center.
| Type | CD Player |
|---|---|
| Disc Capacity | 6 |
| Disc format | CD, CD-R, CD-RW |
| Channels | 2 |
| Frequency Response | 2 Hz - 20 kHz |
| Digital Output | Coaxial |
| Dimensions | 430 x 110 x 300 mm |
| Weight | 3.5 kg |
| Output Level | 2 V (fixed) |