Do you have a question about the Pioneer PD-M450 and is the answer not in the manual?
Addresses power cord protection, polarization, and antenna grounding.
Details how to connect the CD player to an amplifier and power outlet.
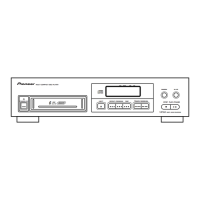
Identifies and explains the buttons and slots on the player's front panel.
Step-by-step guide to inserting discs and starting playback.
Instructions on how to stop playback and remove the disc magazine.
Details methods for locating specific discs and tracks.
How to create custom playback sequences of tracks or discs.
Adding pauses, clearing, checking, and modifying programmed sequences.
Steps to remove specific tracks or entire discs from playback.
Solutions for playback stopping immediately or pausing unexpectedly.
Troubleshooting steps for lack of sound or audio distortion/noise.
Solutions for issues with specific discs causing noise or playback stops.
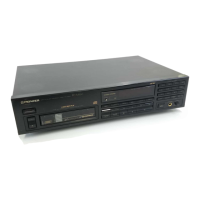
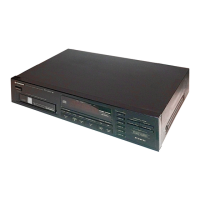
This document describes the Pioneer Multi-Play Compact Disc Player models PD-M550, PD-M455, PD-M453, and PD-M450. These devices are designed for playing compact discs and offer various features for enhanced listening and recording experiences.
The Pioneer Multi-Play Compact Disc Player is a digital audio system capable of playing up to six compact discs loaded into a single magazine. The player supports basic playback functions such as play, pause, and stop, and offers advanced features for disc and track management.
Basic Playback: To start playing a compact disc, first turn on the player's power. Then, insert a loaded 6-disc magazine into the magazine slot, pushing it until a click sound is heard. Press the Play button to begin playback. If the power is off when a magazine is inserted, the player will automatically turn on (Automatic Power On function). The player memorizes the last played disc when powered off with a magazine inside, resuming from the first track of that disc upon the next power-on.
Pause and Stop: To temporarily pause playback, press the Pause button. The indicator will light up, and playback will halt at that point. Pressing Pause again or Play resumes playback. To stop playback, press the Stop button once to return to the beginning of the current track, or twice to return to the beginning of the first track on the first disc and enter stop mode. To remove the magazine, press the Eject button, then remove the magazine, and finally press Power to turn off the unit. The magazine can also be ejected while the power is off (Power Down Eject).
Time Display: During playback, the TIME button cycles through different time displays: elapsed playback time of the current track, remaining playback time of the current track, remaining playback time from the current point to the end of the disc, and total playback time of the disc. During program playback, the number of program steps can also be displayed with the Total setting. Note that remaining time cannot be displayed for tracks with numbers 24 or higher, or during program, delete program, random, or delete random playback.
Timer Playback: The player can be set up for automatic playback at a preset time using a commercially available audio timer. After inserting a magazine and setting the timer, the player will turn on and begin playback from the first track of the first disc at the specified time. It's crucial not to unplug the power cord or turn off the power with an audio timer during playback, as this could damage the disc. In case of a power failure while in standby mode, the player will automatically turn on with the timer playback function when power is restored, so disconnect the AC power cord if the player will be unused for a long time.
Disc and Track Search:
Repeat Playback: Pressing REPEAT once plays the current track repeatedly, indicated by the REPEAT indicator. Pressing REPEAT twice plays all tracks on all discs repeatedly in normal, program, delete program, or random playback modes. Pressing REPEAT again turns off the indicator and exits repeat mode.
Random Playback: Pressing RANDOM PLAY lights the RANDOM indicator and plays all tracks on all discs in a random order. To play tracks other than deleted tracks in a random order, press RANDOM PLAY after performing the Delete Program procedure.
Magazine Hi-Lite Scan: In stop mode, pressing HI-LITE SCAN once starts playback from 1 minute into the first track of each disc for about 10 seconds, with the DISC SCAN indicator blinking. After scanning all first tracks, the player returns to stop mode. Pressing HI-LITE SCAN twice plays from 1 minute into each track for about 10 seconds, with the SCAN indicator blinking. To exit, press Stop, a Disc number button, or a Track number button. Hi-Lite Scan can be initiated from a desired elapsed time during playback, and the player will memorize this point for Track Scan playback. Programming desired tracks is possible during Track Scan playback. Repeat playback can be applied to Hi-Lite Scan.
Adjusting Sound Volume (PD-M550/PD-M455/PD-M453 only): The OUTPUT LEVEL buttons (+/-) adjust the output level between 0 dB and -25 dB in 1 dB steps, simultaneously affecting the OUTPUT and PHONES jacks.
ADLC (Automatic Digital Level Controller): For PD-M550/PD-M455/PD-M453 models, ADLC automatically adjusts the output level to a proper level, especially useful for discs with noticeable recording level differences during program or random playback. The ADLC indicator lights when active. Pressing ADLC again turns it off. Note that OUTPUT LEVEL settings are canceled when ADLC is on, and OUTPUT LEVEL buttons cannot be operated.
Program Playback: To play tracks/discs in a desired order:
Programming a Pause: During program mode, a pause can be inserted by pressing the Pause button instead of a track number. "PA" appears on the display. This is useful for recording on cassette tapes, allowing time to switch tape sides. Pauses can only be programmed in stop mode, not at the beginning of a program, and not consecutively.
Clearing Program Contents: To clear all program contents, press Stop, then Eject. The contents will be cleared when the magazine is ejected. Alternatively, press CLEAR on the remote control unit during program mode to erase the last program step.
Modifying Program Contents (PD-M550/PD-M455/PD-M453 only):
Delete Program Playback: To delete undesired tracks/discs:
Compu Program Editing: This feature selects tracks for both sides of a tape.
Time Fade Editing: This feature selects tracks within a specified time, and playback pauses with a fade-out.
One-Touch Fade: This function allows playback to start with a fade-in and stop with a fade-out from a desired point. It can be used in Normal, Program, Delete Program, Random, or Magazine Hi-Lite Scan playback.
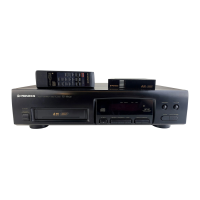
System Remote Control (PD-M550/PD-M455/PD-M453 only): When connected to a Pioneer stereo amplifier with the mark via the CONTROL IN/OUT jacks, the CD player can be controlled using the amplifier's remote control unit. The CD player's remote control unit can also be used directly by pointing it at the remote sensor on the front panel, within 7 meters and 30 degrees. Strong light like sunlight or fluorescent light may interfere with remote control operation. The PD-M450 uses the remote control unit accompanying the amplifier.
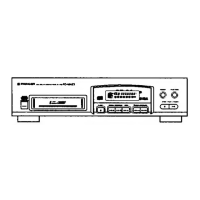
CD-Deck Synchro Function: If you have a Pioneer cassette deck with CD-Deck synchro, connecting the CD-DECK SYNCHRO jacks on both devices enables synchronized recording between the player and deck.
Magazine Handling: The player uses a 6-disc magazine. Discs should be inserted label side downward into the trays, pulling out only one tray at a time. Do not insert objects other than discs. For 8-cm CDs, a special Multi-Play Magazine (JD-M108, JD-M308) is required; do not use 8-cm discs or adaptors in standard 12-cm magazines. Affix provided labels to designated locations on the magazine for titles, disc names, or classification. Store magazines in their cases, away from high heat, humidity, or extreme temperatures.
AC Power Cord Connection: Some functions depend on how the AC power cord is connected. If connected to an unswitched outlet, Timer playback, Program memory, Delete program memory, and Output level memory are not available. These functions are enabled when connected to a switched outlet or an audio timer.
Cleaning Discs: Fingerprints or smudges on discs can degrade sound quality. Always keep discs clean by gently wiping them with a soft cloth from the inner edge toward the outer periphery. For very dirty discs, dampen a soft cloth with water, wring it out, wipe gently, then dry with another soft cloth. Never use record cleaning sprays, anti-static agents, benzene, thinner, or other volatile solvents, as these can damage the disc surface.
Storing Discs: Store discs vertically in their cases to prevent warping. Avoid locations with high heat, humidity, or extremely low temperatures, and never leave discs in cars. Always follow precautionary notes on disc labels.
CD Lens Cleaner: The player's pickup lens should not get dirty during normal use. If malfunction occurs due to soiling, contact a Pioneer authorized service center. If using a commercial CD lens cleaner, exercise caution as some may cause damage.
Cleaning the Player and Magazine: Wipe the player and magazine with a soft, dry cloth. For stubborn dirt, use a soft cloth dampened with a mild detergent solution, wring it out well, then wipe dry. Do not use volatile liquids like benzene or thinner.
Troubleshooting: The manual provides a troubleshooting guide for common issues like the magazine not ejecting, playback stopping, no sound, distorted sound, or remote control malfunction. It suggests checking power connections, disc loading, disc cleanliness, cable connections, amplifier settings, and remote control battery/angle. If issues persist after these checks, contact a Pioneer authorized service center.
| Type | CD Player |
|---|---|
| Number of Discs | 6 |
| Channels | 2 |
| Frequency Response | 2 Hz - 20 kHz |
| Dynamic Range | 96 dB |
| Signal-to-Noise Ratio | 100 dB |
| Disc format | CD |
| Output Level/Voltage | 2V |
| Digital outputs | Optical |