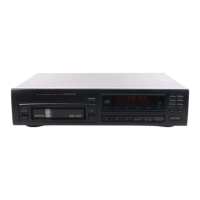
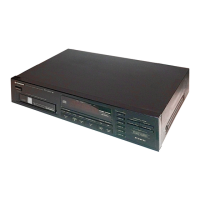
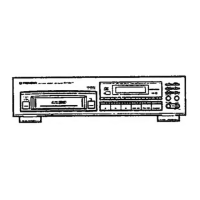
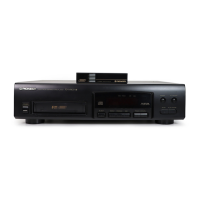
This document outlines the operation and maintenance of the Pioneer Multi-Play Compact Disc Player models PD-M502, PD-M552, PD-M602, and PD-M702. It covers essential setup, basic playback functions, advanced programming, and troubleshooting to ensure optimal performance and longevity of the device.
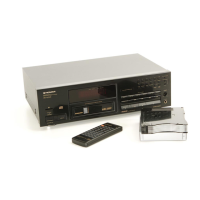
The CD player is designed for multi-disc playback, utilizing a 6-disc magazine. This allows users to load up to six 12 cm (5-inch) discs for continuous listening without manual disc changes. The magazine features a window to check which disc is currently loaded, even during playback. For 8-cm (3-inch) CDs, a special Multi-Play Magazine (JD-M108, JD-M308), sold separately, is required. It is crucial not to load 8-cm discs or their adaptors into the standard 12-cm magazine, as this can cause serious damage to the player. When inserting discs into the magazine, always ensure the label side is facing downward for proper playback. Objects other than discs, such as song cards or explanations, should never be inserted into the disc trays. Users should also avoid touching the playing surface of discs with their hands or fingers.
Setup and Connections:
Before operating the player, it's important to confirm the supplied accessories, which typically include a 6-compact disc magazine, an output cord, and a control cord (for specific models). For models other than PD-M502, two AAA/R03 dry cell batteries are provided for the remote control unit.
Connecting the player involves several steps:
- Audio Output: Connect the OUTPUT jacks of the CD player to the input jacks (CD or AUX) of a stereo amplifier. Ensure white plugs connect to left (L) jacks and red plugs to right (R) jacks. It is critical not to connect the unit to the amplifier's PHONO jacks, as this will result in distorted sound.
- Power Supply: Connect the power cord to a household AC wall outlet or an AC outlet on the amplifier. Always ensure plugs are fully inserted.
- System Remote Control (for compatible Pioneer amplifiers): If using a Pioneer stereo amplifier with the "R" mark, connect the CONTROL IN jack on the CD player's rear panel to the CONTROL OUT jack of the amplifier. This enables control of the CD player using the amplifier's remote control unit. The control cord is supplied with the CD player.
- CD-Deck Synchro Function: For Pioneer cassette decks with CD-Deck synchro, connect the CD-DECK SYNCHRO jacks of both devices. This allows for synchronized recording between the player and deck. The CD-DECK SYNCHRO cord is not supplied with the CD player.
Remote Control Operation (Except for PD-M502):
The remote control unit operates by pointing its infrared signal transmitter at the player's remote control receiver (REMOTE SENSOR) on the front panel. It has an effective range of about 7 meters (23 feet) and an operational angle of up to 30 degrees from the remote sensor. If the sensor window receives strong light (e.g., sunlight or fluorescent light), control may be impaired. For the PD-M502, the remote control unit accompanying the amplifier should be used.
Basic Playback:
- Power On: Turn on the power to the player.
- Insert Magazine: Insert a loaded magazine into the slot until a click is heard. If the power is off (standby mode), inserting a magazine automatically turns on the power (Automatic Power On function).
- Start Playback: Press the PLAY (►) button to begin playback.
- Pause: Press the PAUSE (II) button to temporarily stop playback. Pressing it again or the PLAY (►) button resumes playback.
- Stop: Press the STOP (■) button. The player returns to the beginning of the first track on the disc. Pressing it twice returns the player to the beginning of the first disc and enters stop mode.
Time Display:
During playback, pressing the TIME button cycles through different time displays:
- Time: Elapsed playback time of the current track.
- Remain: Remaining playback time of the current track.
- AL Remain: Remaining playback time from the current point to the end of the disc.
- Total: Total playback time of the disc.
Note that "Remain" time cannot be displayed for tracks with No. 24 or more, or during certain programmed playback modes.
Various Operations:
- Disc Search: In playback or stop mode, press the DISC NUMBER buttons (1-6) to search for a specific disc. If "no DISC" appears, the selected tray is empty. Disc Search cannot be performed during program playback.
- Track Search: In playback, pause, or stop mode, use the TRACK SEARCH (◄◄ / ►►) buttons to navigate between tracks. Pressing the buttons advances or reverses playback to the beginning of subsequent or previous tracks. For tracks 11 and above, use the digit buttons (1-10, >10, +10, ≥20) on the remote control.
- Manual Search: During playback or pause mode, hold down the MANUAL SEARCH (◄◄◄ / ►►►) buttons to rapidly advance or reverse through a disc. Release the button to resume playback or pause.
- Repeat Playback: Press the REPEAT button once to repeat the current track (REPEAT-1 indicator lights). Press it twice to repeat all tracks on all discs in normal or specified playback modes (REPEAT indicator lights). Pressing it again turns off repeat mode.
- Random Playback: Press the RANDOM play button to play all tracks on all discs in random order. The RANDOM indicator lights.
- Magazine Hi-Lite Scan: In stop mode, press the HI-LITE scan button once to play the first minute of the first track of each disc for about 10 seconds (DISC SCAN indicator blinks). Press it twice to play 10 seconds of each track (SCAN indicator blinks). To exit, press the PLAY (►) button or a disc number/digit button.
- Adjusting Sound Volume (Except for PD-M502): Use the OUTPUT LEVEL (+/-) buttons to adjust the output level between 0 dB and -25 dB in 1 dB steps. This adjusts both the OUTPUT jacks and PHONES jack simultaneously (for PD-M602/PD-M702).
- ADLC (Automatic Digital Level Controller): Press the ADLC button to automatically adjust volume levels between discs, especially during program or random playback, to compensate for recording level differences. The ADLC indicator lights when active. If sound becomes unnatural, turn ADLC off. Note that when ADLC is on, OUTPUT LEVEL buttons cannot be operated.
- Music Type Memory: A music type can be memorized for each 6-disc magazine. From stop mode, press the MUSIC TYPE button to cycle through options like POP, ROCK, JAZZ, DANCE, CLASS, OTHER, or DISPLAY OFF. When a type is selected for one second, the M.TYPE indicator lights, and the type is memorized for that magazine. This allows the player to display the recorded music type name whenever the specific magazine is loaded.
Programming Playback (Program Playback):
- Enter Program Mode: In stop mode, press the PROGRAM button. "PROGRAM" indicator lights, and "DISC?" appears.
- Select Disc: Press the disc number button for the desired disc. "AL" appears, then "TRACK?".
- Select Track: Use the TRACK SEARCH (◄◄ / ►►) buttons to select the desired track, then press PROGRAM. For PD-M602 (U.K. model)/PD-M702, use digit buttons.
- Repeat: Repeat steps 2 and 3 to program other tracks. Up to 32 steps can be created.
- Start Playback: Press the PLAY (►) button. Tracks play in programmed order.
- Pause Programming: Press the PAUSE (II) button instead of a track number to insert a pause. "PA" appears on the display. This is useful for recording, allowing time to switch tape sides. Pauses can only be programmed in stop mode and not at the beginning or consecutively.
- Clear Program: In program mode, press the CLEAR button on the remote control unit to erase the last program step. To clear all contents, press the STOP (■) button in stop mode, or eject the magazine.
- Modify Program: In program mode, set to stop mode, press CHECK on the remote, then enter new disc/track numbers and press PROGRAM.
Delete Program Playback:
- Enter Delete Mode: In stop mode, press the DELETE button. "DELETE" indicator lights, and "DISC?" appears.
- Select Disc: Press the disc number button for the disc containing tracks to be deleted. "AL?" appears, then "TRACK?".
- Select Track: Use the TRACK SEARCH (◄◄ / ►►) buttons to select the track to be deleted, then press DELETE. For PD-M602 (U.K. model)/PD-M702, use digit buttons.
- Repeat: Repeat steps 2 and 3 to delete other tracks.
- Start Playback: Press the PLAY (►) button. All tracks other than deleted tracks/discs play in order.
- Clear Delete Program: In stop mode, press the STOP (■) button, or eject the magazine. Press the CLEAR button on the remote in stop or play mode to enter normal playback mode.
Compu Program Editing (Computer Allocated Program Editing):
This feature selects tracks for both sides of a tape.
- Enter Compu Program Mode: In stop mode, press the COMPU/TIME FADE button once. "COMPU" indicator lights, and "DISC?" appears.
- Select Disc: Select the disc number. "TIME?" appears.
- Select Playing Time: Use the TRACK SEARCH (◄◄ / ►►) buttons to select the desired playing time (e.g., 46, 54, 60, 74, 90 minutes), then press COMPU/TIME FADE. For PD-M602 (U.K. model)/PD-M702, use digit buttons to enter minutes. The player then programs tracks for both sides of the tape within half the selected time, including a pause.
Time Fade Editing:
This feature selects tracks within a specified time and pauses playback with a fade-out.
- Enter Time Fade Mode: In stop mode, press the COMPU/TIME FADE button twice. "FADE" indicator lights, and "DISC?" appears.
- Select Disc: Select the disc number. "TIME?" appears.
- Select Playing Time: Use the TRACK SEARCH (◄◄ / ►►) buttons to select the desired playing time (e.g., 23, 27, 30, 37, 45 minutes), then press COMPU/TIME FADE. For PD-M602 (U.K. model)/PD-M702, use digit buttons to enter minutes. The player then programs tracks within the selected time.
Maintenance:
- Location: Install the player in a well-ventilated area, away from direct sunlight, high temperatures (radiators, stoves, amplifiers), humidity, or dust. Avoid placing it on unstable surfaces.
- Cleaning: Clean the player and magazine with a soft, dry cloth. For stubborn dirt, use a soft cloth dampened with a mild detergent solution (1 part detergent to 5-6 parts water), then wipe dry. Never use furniture wax, benzine, thinner, or other volatile liquids, as they can corrode the cabinet.
- Disc Handling: Always keep discs clean by wiping gently from the inner edge to the outer periphery with a soft cloth. For very dirty discs, use a water-dampened cloth, then dry. Never use record cleaning sprays, anti-static agents, benzene, thinner, or other volatile solvents. Hold discs by the edges or one edge and the center hole; avoid touching the signal surfaces. Do not affix gummed labels or tape. Do not use damaged (cracked or warped) discs.
- Storing Discs: Store discs vertically in their cases, away from high heat, humidity, or extremely low temperatures to prevent warping.
- CD Lens Cleaner: The pickup lens should not normally get dirty, but if malfunction occurs due to soiling, consult a PIONEER authorized service center. Commercial CD lens cleaners are available, but use with care to avoid damage.
- Condensation: If the unit is moved from a cold to a warm room, or if room temperature rises sharply, condensation may form inside, affecting performance. Allow the unit to stand for about an hour or raise the room temperature gradually.
- Power Cord: Handle the power cord by the plug. Do not pull the cord, touch it with wet hands, place objects on it, or pinch it. Check the cord periodically for damage.
- Remote Control Batteries: Remove batteries if the remote control unit will not be used for an extended period (one month or more) to prevent leakage. If leakage occurs, clean the compartment and replace batteries. Ensure correct polarity when inserting batteries. Never mix new and used batteries or different brands.
Troubleshooting:
The manual provides a troubleshooting guide for common issues:
- Magazine not expelled: Power plug disconnected, or EJECT button not pressed.
- Playback stops immediately/pauses: Disc loaded upside down, smudges on disc, player in pause mode.
- No sound: Output cords connected incorrectly/loosely, incorrect amplifier operation, dirty pin plugs/amplifier terminals.
- Distorted sound/noise: Dirty pin plugs/amplifier terminals, interference from TV, incorrect connections.
- Loud noise/play stops with certain discs: Badly scratched/warped disc, extremely dirty disc.
- TV picture fluctuation/FM noise: Interference from CD player.
- Remote control not functioning: Dead batteries, too far from player, wrong angle, obstruction.
For abnormal functioning due to lightning, static electricity, or other external interference, turn the power off and on again, or unplug and replug the AC power cord. If issues persist after these checks, contact a PIONEER authorized service center or dealer.