EasyManua.ls Logo

Pioneer PL-560 BK User Manual

Pioneer PL-560 BK
28 pages
To Next Page IconTo Next Page
Page #1 background imageLoading...
Page #1 background image
Service
AL
ETIET
CIRCUIT
&
MECHANISM
DESCRIPTIONS
ORDER
NO
REPAIR
&
ADJUSTMENTS
Caameinmns
ARP-767-0
STEREO
TURNTABLE
L-S6O(CBK)
PL-560
@
PL-560[BK]
is
Black
versions
of
PL-560
®
Models
PL-560
come
in
four
versions
distinguished
as
follows:
Applicable
model
PL-560
PL-560
Power
equivement
Destination
[BK]
O
AC
120V
only
U.S.A.
model
AC
110V
~
120V,
AC
220V
~
240V
(Switchable)
General
export
model
OQ
AC
220V
~
240V
European
continent
model
AC
220V
~
240V
United
Kingdom
model
@
This
service
manual
is
applicable
to
the
PL-560/KU,
R,
WEM,
WB
types.
®
Both
models
PL-560
[BK]
and
PL-560
have
the
same
basic
mechanism
and
performance.
The
only
difference
is
in
appearance.
For
servicing
the
PL-560/R,
WEM,
WB
types.
Please
see
page
25
~
28.
Ce
manuel
d’instruction
se
refére
au
mode
de
réglage,
en
francais.
Este
manual
de
servicio
trata
del
método
de
ajuste
escrito
en
espaiiol.
PIONEER
ELECTRONIC
CORPORATION
4-1,
Meguro
1-Chome,
Meguro-ku,
Tokyo
153,
Japan
PIONEER
ELECTRONICS
[USA]
ING.
P.O.
Box
1760,
Long
Beach,
California
$0801
U.S.A.
TEL:
[B00]
421-1404,
[800)
237-0424
PIONEER
ELECTRONIC
[EUROPE]
N.V.
Keetbergiaan
1,2740
Beveren,
Belgium
TEL:
03/775:28-08
PIONEER
ELECTRONICS
AUSTRALIA
PTY.
LTD.
178-184
Boundary
Road,
Braeside,
Victoria
3195,
Australia
TEL:
(03)
580-9911
FA
©
FEB.
1985
Printed
in
Japan
Question and Answer IconNeed help?

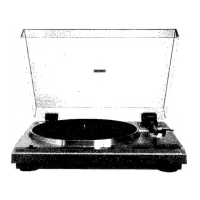
Do you have a question about the Pioneer PL-560 BK and is the answer not in the manual?

Pioneer PL-560 BK Specifications

General IconGeneral
Wow and Flutter0.025% WRMS
Overhang15mm
Speeds33 and 45rpm
Signal to Noise Ratio78dB
Power SupplyAC 120V, 60Hz
PlatterAluminum Die-Cast
TonearmStatic balance type
CartridgePC-135 (Moving Magnet)
Output Level3.5 mV (1 kHz, 5 cm/sec)
Frequency Response20 Hz - 20 kHz

Summary

1. SPECIFICATIONS

2. PANEL FACILITIES

3. PARTS LOCATION

4. DISASSEMBLY

Mechanism Assembly and Motor

Steps for removing the main mechanism and motor components.

Tone Arm

Steps for disassembling the tonearm assembly.

Power Supply Assembly

Steps for disassembling the power supply unit.

5. EXPLODED VIEW

5.1 EXTERIOR

Exploded view detailing the external components of the turntable.

5.2 TONE ARM ASSEMBLY

Detailed exploded view of the tonearm assembly and its parts.

5.3 MECHANISM SECTION (SUB-PANEL ASSEMBLY)

Exploded view of the internal mechanism and sub-panel components.

6. ELECTRICAL PARTS LIST

7. P.C. BOARDS CONNECTION DIAGRAM

8. SCHEMATIC DIAGRAM

9. PACKING

10. ADJUSTMENTS

10.1 AUTO-RETURN ADJUSTMENT

Adjusting the auto-return function for proper operation.

10.2 MECHANISM ADJUSTMENT

Adjusting the tonearm's landing position during playback.

10.3 ARM-ELEVATION ADJUSTMENT

Adjusting the height of the tonearm's elevation.

10.4 MOTOR ADJUSTMENTS

Adjusting motor speed settings for correct playback.

11. PRECAUTIONS FOR REASSEMBLY

Lubrication Points for Reassembly

Details specific points requiring lubrication during reassembly.

Parts Attachment and Reassembly Guidelines

Precautions and steps for correctly attaching parts during reassembly.

12. FOR WEM, WB AND R TYPES

13. SAEFTY INFORMATION

1. SAFETY PRECAUTIONS

General safety rules and checks for continued protection.

2. PRODUCT SAFETY NOTICE

Information on special safety characteristics of parts and using replacements.

Related product manuals