45
Connecting your equipment
03
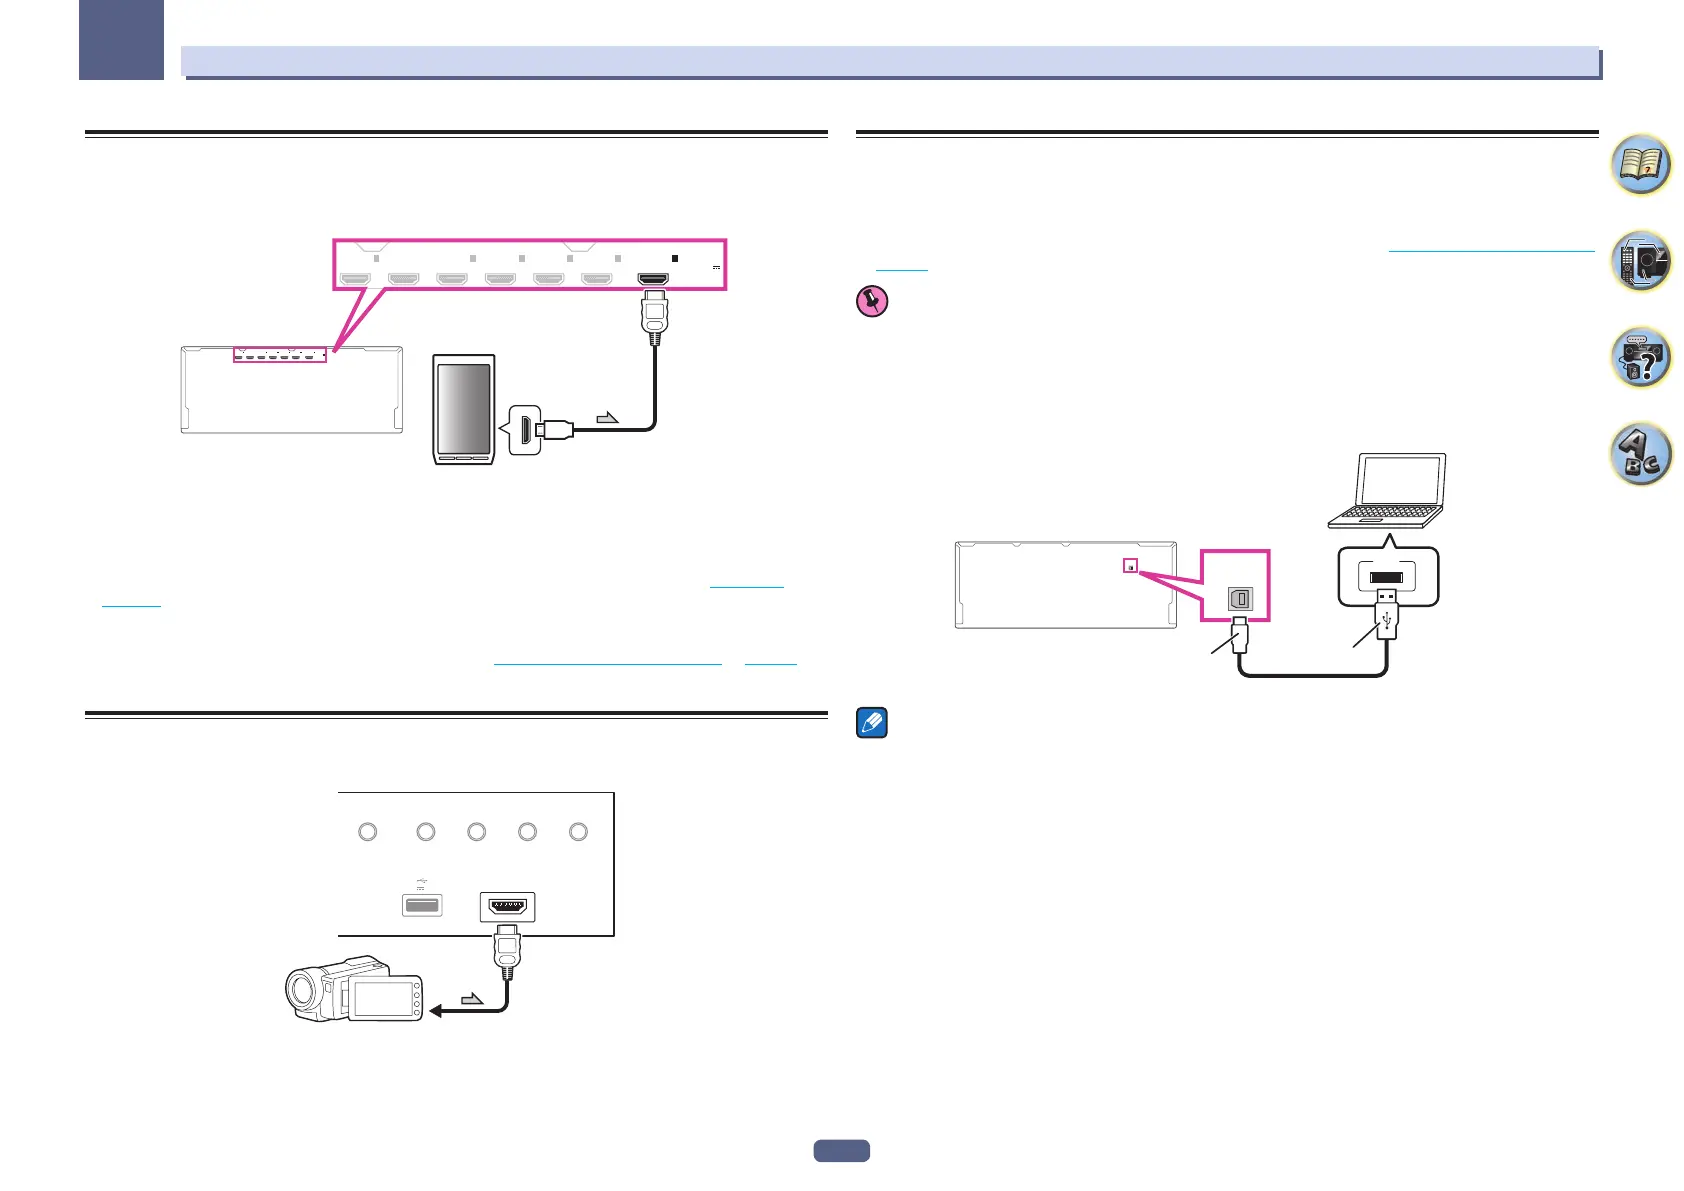
Connecting an MHL-compatible device
An MHL-compatible mobile device can be connected to enjoy 3D/Full-HD videos, high quality multi-channel
audio, and photos etc., with charge the battery on the receiver. Use the MHL cable to connect the device.
(
OUTPUT 5 V
0.9 A MAX
)
IN
1
(
DVD
)
BD IN
IN
2
(
SAT/CBL
)
IN
3
(
DVR/BDR
)
IN
6
IN
4
IN
7
/MHL
(
OUTPUT 5 V
0.9 A MAX
)
IN
1
(
DVD
)
BD IN
IN
2
(
SAT/CBL
)
IN
3
(
DVR/BDR
)
IN
6
IN
4
IN
7
/MHL
MHL enabled
device
MHL cable
% Switch the receiver into standby then use the MHL cable to connect your MHL enabled
device to the MHL terminal on the rear panel of this receiver.
! To automatically switch to the MHL input when an MHL-compatible device is connected, see MHL Setup on
page 107 .
! The MHL-compatible device is recharged whenever it is connected to this unit. (Recharging is enabled only
when the unit’s power is turned on.)
! For instructions on playing the MHL-compatible device, see Playing an MHL-compatible device on page 59 .
! Do not place the MHL device on this unit which has the power turned on.
Connecting an HDMI-equipped component to the front panel
input
HDMI 5 INPUT
AUTO/ALC/
DIRECT STATUS BAND TUNER EDIT
iPod iPhone
DIRECT CONTROL
5V 1
A
Video camera (etc.)
Using a USB cable to connect to a computer
SC-LX88 only
By using a USB cable (sold separately) to connect this unit’s USB-DAC IN terminal to the USB port on a com-
puter, this unit can be used as a D/A converter.
For details regarding the output of signals input to the USB-DAC IN terminal, see Playing music from a computer
on page 59 .
Important
! The exclusive driver must be installed on the computer in order to play high sound quality files of over
48 kHz/24 bits.
The driver software is provided on the included CD-ROM.
! When installing the driver, this receiver and the computer must be connected as shown below. After connect-
ing, turn this receiver’s power on and select the USB-DAC input for the main zone. Note that for Mac OS, there
is no need to install the driver software.
USB-DAC
IN
Computer
A-Type
USB
USB-DAC
IN
B-Type
Note
! This unit cannot be used to play audio files from a computer unless Media Player is installed on the connected
computer.

 Loading...