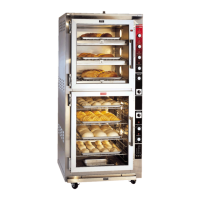
OPERATING INSTRUCTIONS
• Turn the power switch “ON”.
• Set the thermostat to 100°F. Allow approximately 15-30 minutes to reach temperature
• Set the humidity control to 3 to 4.5. At the proper setting your proofer door will have
a light haze on it. This process will take approximately 15-30 minutes. If water beads
up and runs down the door, the setting is too high. You may need to adjust according
to atmospheric conditions.*
• Drain humidity system DAILY. Drain valve is located on lower front corner post.
Ideal proofing conditions consist of a temperature of 100°F and approximately 60-80%
humidity. Proofing times will vary depending on the handling and the type of dough
products. Sugar and yeast must be able to react properly which takes a certain amount of
time. This cannot be altered by adjusting the settings. Correct proofing is very important
for a successful bake.
Make sure dough is completely thawed and at room temperature (if using frozen dough
products) before placing the products in the proofer. If not, it can take two to three times
longer to proof.
HINT: You may want to place the dough (from the retarder) on a room
temperature pan – not the cold pan it was just sitting on. This helps shorten the
proofing time. When putting cold pans in the proofer, you bring the temperature
down, taking longer for it to get back to the desired 100 degree temperature.
6