disarm and home alarm status, use for door only)
Delayed Zone Highlight it press Enter, Default is NO, (if set YES, allows you to come back home and open the
door without triggering the system. System default delay alarm time is 45 seconds. You can change this time by going
to "System Settings" and set the Alarm Delay time).
Siren Enable Highlight it press Enter, Default is YES, (if set NO, siren will disable when this zone triggered, no
siren alarm will sound.)
Note: All zones are instant zones by Default.(“Instant “refers to the system being immediately armed if any zone
is triggered when the system is in armed status.)
Delete select it then press Enter, you can find the target sensor and delete it, you can delete any sensor from
panel.
NOTE: After programming all sensors to your console, please test each sensor before you mount the sensor to
the appropriate location. DO NOT close the door fast then one second during testing, open door and waiting 1-2
seconds when you see sensor light off then close the door, otherwise the console may only receive door open
signal and not detect the door close signal then shows the door is opening on LCD screen.
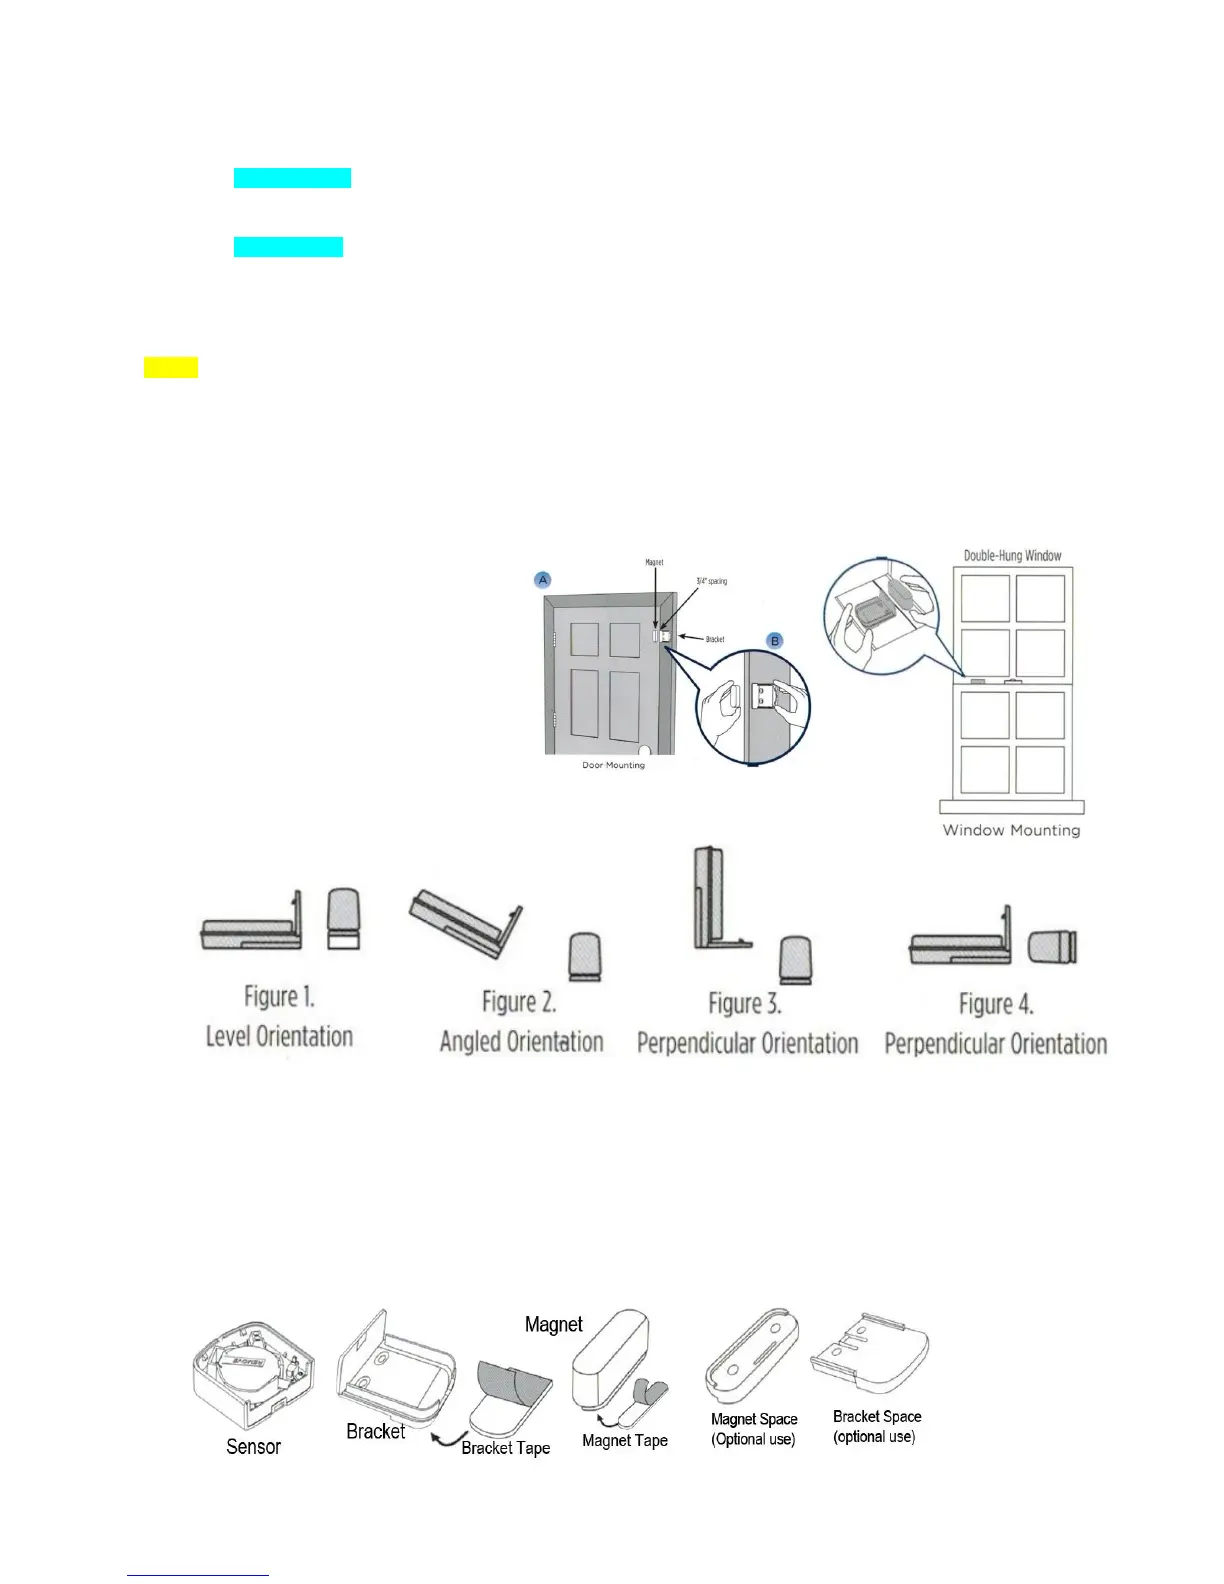
Place each sensor in the appropriate location.
Note: If possible, place the bracket
on the stationary frame of door or
window, and place the magnet on
the door or window itself.
Various orientations between the
Bracket and Magnet may be used as
long as 3/4" distance is not
exceeded. See Example in Figures
1-4
*NOTE: SPACERS IN BOTTOM TRAY MAY BE USED ON THE BRACKET OR MAGNET TO ADJUST
ALIGNMENT
Once you have determined the appropriate location and orientation for the Bracket and Magnet,
attach them with double-sided tape (the Magnet Space and Bracket Space are optional; only apply
when your door/window gap is big or very low)
 Loading...