ENGLISH
7
IMPORTANT: It is advised to read each step entirely before starting assembly on instructions. Do not tighten screws
completely until all screws for that step have been installed. Hardware combination involving a locking washer and
washer should be installed with the locking washer closest to the head of the screw.
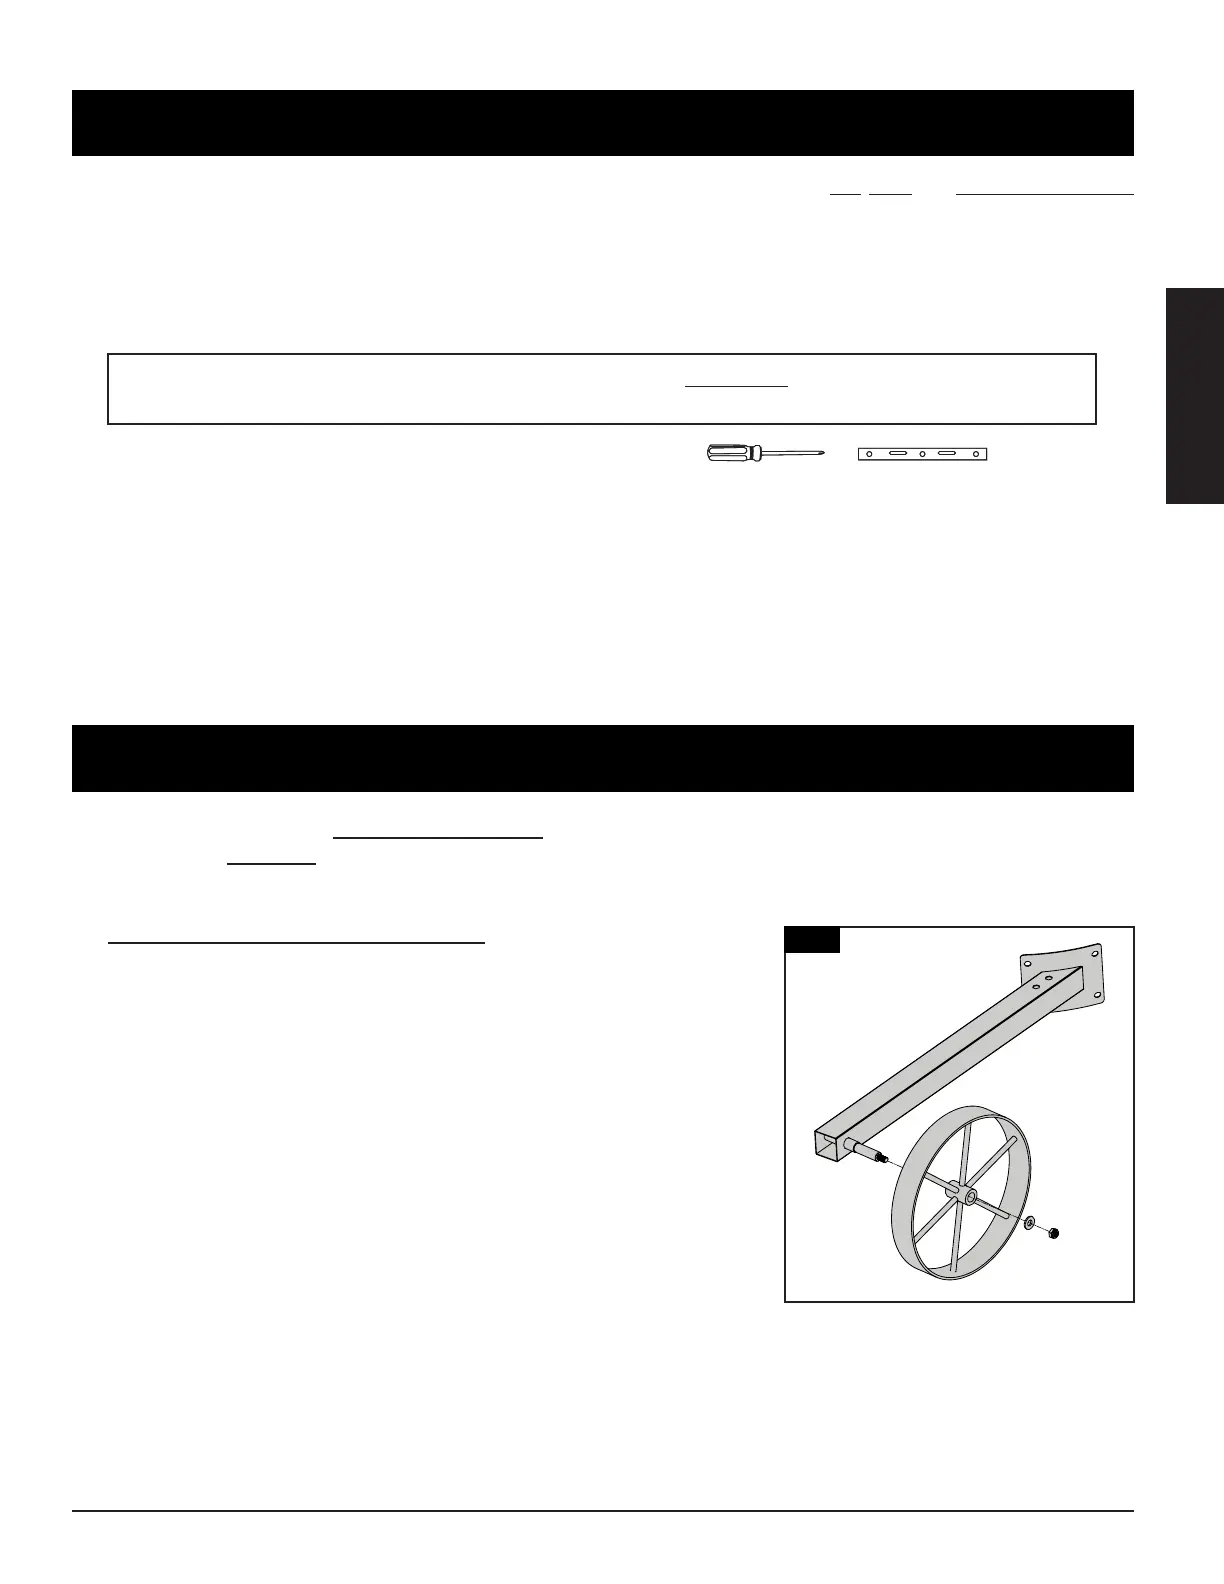
1.
Parts Required:
2 x Leg with Wheel Axle (#16)
2 x Wheel (#19)
2 x Nut (#D)
2 x Washer (#E)
Installation:
• Slide a wheel onto each leg with wheel axle. Secure using a washer and
nut. Spin each wheel to ensure the wheels turn freely.
Prts re locted throuhout the shppn crton, ncludn underneth the rll Inspect the rll, prts, nd hrdwre blster pc
fter removn from the protectve shppn crton Dscrd ll pcn mterls from nsde nd outsde of the rll before
ssembl, then revew nd nspect ll prts b referencn the prts lst If n prt s mssn or dmed, do not ttempt to
ssemble Shppn dme s not covered under wrrnt Contct our deler or Pt Boss® Customer Servce for prts Mond
throuh Sund, 4m - 8pm PST (EN/FR/ES)
service@pitboss-grills.com | Toll-Free: 1-877-303-3134 | Toll-Free Fax: 1-877-303-3135
IMPORTANT: To ease installation, using two people is helpful
(but not necessary) when assembling this unit.
Tools required for assembly: screwdrver nd level
Tools not ncluded
1
16
19




 To Next Page